Swollen laminate flooring is one of the most common moisture-related problems homeowners face — but the good news is, you don’t always need to rip up the entire floor. In this guide, we’ll walk you through exactly how to repair swollen laminate flooring without replacing it, from diagnosing the cause to step-by-step repair methods that actually work.
Whether you’re dealing with a minor bubble from a spill or more widespread swelling from humidity, we’ll cover practical DIY fixes, when to call a professional, and how to prevent it from happening again.
What Causes Laminate Flooring to Swell?
Before you can fix swollen laminate, you need to understand why it happened. Laminate flooring is made from compressed wood fibres (HDF core), which absorb moisture and expand when exposed to water. The most common causes include:
- Water spills left unattended — even small amounts can seep into joints
- High humidity levels — prolonged exposure above 60% relative humidity
- Leaks — from pipes, appliances (dishwashers, washing machines), or radiators
- Improper installation — no expansion gap left around the perimeter
- Subfloor moisture — concrete subfloors without a proper moisture barrier or underlay
- Wet mopping — using excessive water when cleaning (see our guide on how to safely mop laminate)
Signs Your Laminate Flooring Has Water Damage
Catching the problem early makes repair much easier. Look for these telltale signs:
- Bubbling or raised areas — the surface feels uneven underfoot
- Visible swelling at joints — edges of planks are raised or “peaked”
- Discolouration — darkened patches indicating trapped moisture
- Warping or cupping — planks curving upwards at the edges
- Soft or spongy feel — the HDF core has absorbed water
- Mould or musty smell — indicating prolonged moisture exposure beneath the surface
If you notice your floor bulging upwards in multiple areas, this usually indicates a more serious moisture issue that needs addressing at the source.
Can You Actually Fix Swollen Laminate Without Replacing It?
Yes — in many cases, swollen laminate flooring can be repaired without full replacement. The success of the repair depends on:
- How quickly you act — faster intervention = better results
- The extent of the damage — localised swelling is much more repairable than widespread damage
- Whether the HDF core is intact — if the core has fully disintegrated, the plank needs replacing
For minor to moderate swelling where the plank structure is still sound, the methods below will work. For severely waterlogged planks that crumble when touched, individual plank replacement is the only option.
How to Repair Swollen Laminate Flooring: Step-by-Step
Tools and Materials You’ll Need
- Moisture metre
- Dehumidifier or fans
- Pry bar or pull bar (for removing baseboards)
- Clean cloths or towels
- Heavy objects (books, weights, or filled paint tins)
- Laminate roller or flooring jack (for stubborn areas)
- Replacement planks (same product, if individual replacement needed)
- Wood glue (PVA, for edge repairs)
- Utility knife
Step 1: Identify and Fix the Moisture Source
This is the most critical step. If you don’t stop the water source, any repair will fail. Check for:
- Leaking pipes or appliances
- Condensation from poor ventilation
- Rising damp from the subfloor
- Recent spills that weren’t fully dried
Fix the source completely before proceeding. There’s no point repairing flooring that will just swell again.
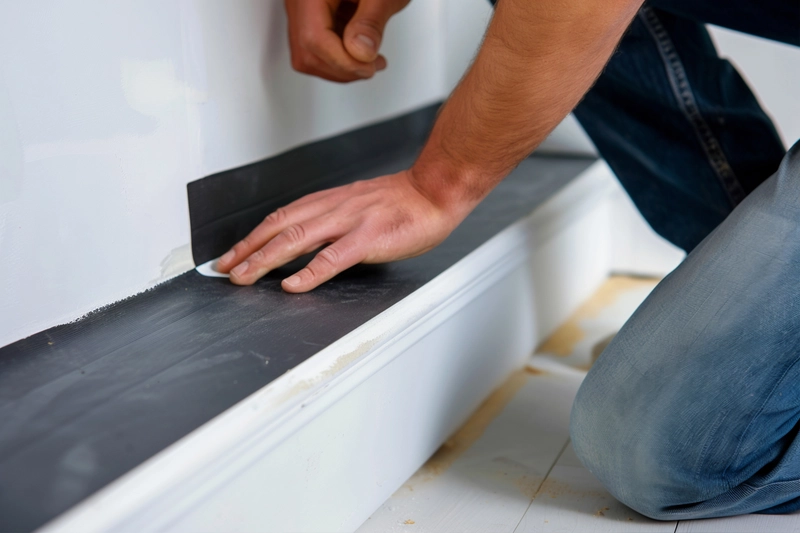
Step 2: Remove Baseboards and Moulding
Carefully remove skirting boards and any transition strips around the affected area. This serves two purposes:
- Gives the laminate room to expand naturally as it dries
- Allows you to check the expansion gap — if there isn’t one, this may be causing the swelling
A proper expansion gap of 8–12mm should exist between the laminate and every wall or fixed object. If missing, you may need to trim the flooring edges with a multi-tool or jigsaw.
Step 3: Dry the Affected Area Thoroughly
Use a moisture metre to check humidity levels in and around the affected planks. Then:
- Place a dehumidifier in the room, set to maximum extraction
- Position fans to circulate air across the floor surface
- If possible, slightly lift affected planks to allow air underneath
- Monitor moisture readings daily — aim for below 12% in the planks
Allow 48–72 hours minimum for drying. Rushing this step is the biggest mistake people make. Some cases may need up to 2 weeks for complete drying.
Step 4: Flatten the Swollen Areas
Once the moisture has been removed, many planks will partially recover on their own. For remaining raised areas:
- Place a clean cloth over the swollen area
- Stack heavy weights evenly across the affected planks
- Leave for 3–7 days, checking progress periodically
- For stubborn areas, use a laminate roller with firm, even pressure
Pro tip: If the swelling is at plank joints only (peaking), the floor may just need an adequate expansion gap rather than weight pressing.
Step 5: Replace Individual Damaged Planks (If Needed)
If some planks remain swollen, soft, or crumbly after drying, they’ll need individual replacement:
- For click-lock laminate: work from the nearest wall, removing planks row by row until you reach the damaged one
- For planks in the middle of the room: use a circular saw set to laminate thickness to cut out the damaged plank, then glue in a replacement with the tongue removed from one side
- Ensure the replacement plank is the same product (or as close a match as possible)
- Leave the expansion gap intact when reinstalling
This is also a good time to check whether your laminate is lifting due to underlying subfloor issues.
Step 6: Reinstall Baseboards
Once the floor is level and dry:
- Reattach baseboards to the wall (not the floor)
- Leave a small gap between the bottom of the baseboard and the laminate surface
- This allows natural expansion and contraction without future issues
Alternative Repair Methods
Using a Laminate Floor Repair Kit
For cosmetic damage where the swelling has caused surface chips or scratches, a laminate repair kit can help. These kits typically include:
- Wax filler sticks in various colours
- A melting tool or iron
- Scraper and smoothing tools
- Colour-matching markers
Apply the coloured wax to fill surface damage, smooth it level, then use the marker to recreate the grain pattern. This won’t fix structural swelling but can disguise minor cosmetic damage after the swelling has been resolved.
When to Call a Professional
Consider hiring a professional flooring fitter if:
- More than 30% of the floor is affected
- The subfloor itself is damaged or wet
- You suspect the issue is rising damp or a structural leak
- The laminate was glued down rather than click-locked
- You need to make an insurance claim (professional assessment is often required)
At TEKA Flooring, our fitting team has over 35 years of experience with laminate installation and repair. If you’re in the Peterborough area, you can book a site survey and we’ll assess the damage in person.
How to Prevent Laminate Flooring from Swelling
Prevention is always easier (and cheaper) than repair. Here’s how to protect your laminate long-term:
1. Clean Up Spills Immediately
The number one rule for laminate flooring. Blot (don’t rub) any spills within minutes. Pay special attention to areas near:
- Kitchen sinks and dishwashers
- Bathroom doors (if laminate extends to the threshold)
- Pet water bowls
- Plant pots
2. Maintain Proper Humidity Levels
Keep indoor humidity between 30–60% year-round. Use a hygrometer to monitor levels, and run a dehumidifier during humid months. In winter, ensure adequate ventilation to prevent condensation.
3. Use the Right Cleaning Method
Never wet-mop laminate flooring. Instead:
- Use a damp (not wet) microfibre mop
- Wring out thoroughly — the mop should feel almost dry
- Use laminate-specific cleaners (avoid soap-based products)
- Dry the floor immediately if you notice excess moisture
For more detail, see our full guide on how to clean laminate floors.
4. Ensure Proper Installation
Many swelling issues stem from installation mistakes. Ensure:
- Expansion gaps (8–12mm) exist on all sides
- A moisture barrier is installed over concrete subfloors
- The subfloor was dry before installation (below 12% moisture)
- Planks were acclimatised for 48 hours before fitting
5. Use Protective Measures in High-Risk Areas
- Place mats at external doors and wet areas
- Use drip trays under plant pots and pet bowls
- Install waterproof mats under kitchen appliances
- Consider waterproof LVT flooring in kitchens and bathrooms instead
Swollen Laminate Flooring: FAQs
How long does it take for swollen laminate to dry out?
With a dehumidifier running, most minor swelling will reduce within 48–72 hours. More severe water damage can take 1–2 weeks to fully dry. Always use a moisture metre to confirm dryness before attempting repairs.
Will swollen laminate go back to normal on its own?
Sometimes, yes — if the exposure was brief and the core hasn’t been permanently damaged. Minor swelling from humidity changes often resolves when conditions return to normal. However, laminate that has been soaked through rarely returns fully to its original state.
Can you use a hair dryer or heat gun on swollen laminate?
We don’t recommend it. Direct heat can cause the laminate surface to blister, crack, or delaminate from the core. Slow, ambient drying with a dehumidifier is much safer and more effective.
Is swollen laminate flooring covered by insurance?
It depends on the cause. Sudden water damage from burst pipes or appliance failures is usually covered by home insurance. Gradual damage from humidity or poor maintenance typically isn’t. Check your policy and document the damage with photos.
Should I replace the whole floor or just the damaged planks?
If fewer than 30% of planks are damaged and you can source matching replacements, individual plank replacement is the most cost-effective option. If the floor is old, discontinued, or extensively damaged, full replacement with a quality laminate may be more practical.
When Replacement Is the Better Option
Sometimes, repair simply isn’t worth it. Consider replacing the floor entirely if:
- The laminate is more than 10 years old
- Damage covers more than a third of the total area
- The product is discontinued and matching planks are unavailable
- The subfloor itself needs remediation
- You want to upgrade to a more water-resistant option like LVT or waterproof SPC laminate
If you’re replacing, consider investing in a higher-quality laminate with better water resistance. Modern laminates with wax-sealed edges and HDF cores rated for wet areas perform significantly better than older products.
Summary
Repairing swollen laminate flooring without replacing it is absolutely possible in most cases. The key steps are:
- Stop the moisture source
- Remove baseboards and check expansion gaps
- Dry thoroughly (48–72 hours minimum)
- Flatten remaining raised areas with weights
- Replace individual planks only where necessary
- Prevent future damage with proper maintenance
Acting quickly gives you the best chance of saving your floor. The longer water sits, the more damage it does to the HDF core — so don’t wait.
Need help with your laminate flooring? Browse our range of high-quality laminate flooring at TEKA Flooring, or book a free consultation with our fitting team. We offer professional installation with a 2-year fitting guarantee across the Peterborough area.
Related guides: