If you’re planning a new flooring project, understanding how to level a floor before laying flooring is one of the most important steps you can take. A smooth, even subfloor ensures your chosen material—whether laminate, vinyl, or engineered wood—performs well, looks flawless, and lasts for years. Skipping this step can lead to uneven surfaces, creaks, and premature wear, which can be costly to fix later. In this guide, we’ll walk you through the process in a simple and practical way.
Why Floor Levelling Matters
Before diving into the process, it’s worth understanding why levelling is essential for any flooring installation. Even small imperfections in the subfloor can become more noticeable once the final flooring is laid, especially with thinner materials. Taking the time to level your floor properly helps ensure a professional finish and long-term performance.
A. Prevents Visible Imperfections
Uneven subfloors can lead to bumps, gaps, or ridges in your finished flooring. These flaws are particularly noticeable with materials like luxury vinyl tiles (LVT) or laminate.
B. Improves Durability
When flooring sits on an uneven base, it experiences uneven pressure. Over time, this can lead to cracks, warping, or loosening joints.
C. Enhances Comfort and Safety
A level floor feels more stable underfoot and reduces trip hazards—especially important in high-traffic areas or family homes.
Read also: How Do You Mop a Floor? Learn the Effective Way Here!
Tools and Materials You’ll Need
Having the right tools and materials ready before you begin will make the levelling process much easier and more efficient. Using proper equipment not only saves time but also ensures better results. Investing in quality materials can make a significant difference in achieving a smooth and durable finish.
A. Spirit Level or Laser Level
Essential for identifying uneven areas across your floor.
B. Self-Levelling Compound
A popular solution for smoothing out minor dips and irregularities.
See product: TEKA ProLevel Self-Levelling Compound
C. Floor Grinder or Sander
Used to remove high spots in concrete or wooden subfloors.
D. Primer and Sealant
These help prepare the surface and ensure the levelling compound adheres properly.
See product: UltraBond Floor Primer Plus
Assessing the Condition of Your Subfloor
Before applying any levelling solution, it’s crucial to thoroughly assess the condition of your existing subfloor. This step helps you identify potential problems that could affect the final result. Taking time to evaluate the surface properly is a key part of learning how to level a floor before laying flooring effectively.
A. Check for High and Low Spots
Use a long straightedge or spirit level to identify uneven areas. Mark dips and raised sections clearly.
B. Inspect for Damage
Look for cracks, holes, or loose boards. These issues should be repaired before levelling begins.
C. Determine the Subfloor Type
Concrete and timber subfloors require slightly different approaches, so knowing your base material is essential.
Read also: Understanding The Things to Consider when Replacing Flooring
Preparing the Floor Surface
Preparation is one of the most important stages in the entire levelling process. A clean, dry, and stable surface ensures that the levelling compound adheres correctly and performs as expected. Skipping or rushing this stage can compromise the final result, no matter how good your materials are.
A. Clean Thoroughly
Remove dust, debris, grease, and old adhesive. A vacuum and mild cleaning solution usually do the trick.
B. Repair Cracks and Holes
Fill any visible gaps with a suitable filler or patching compound.
C. Apply Primer
Priming helps the levelling compound bond effectively to the surface. Allow it to dry fully before moving on.
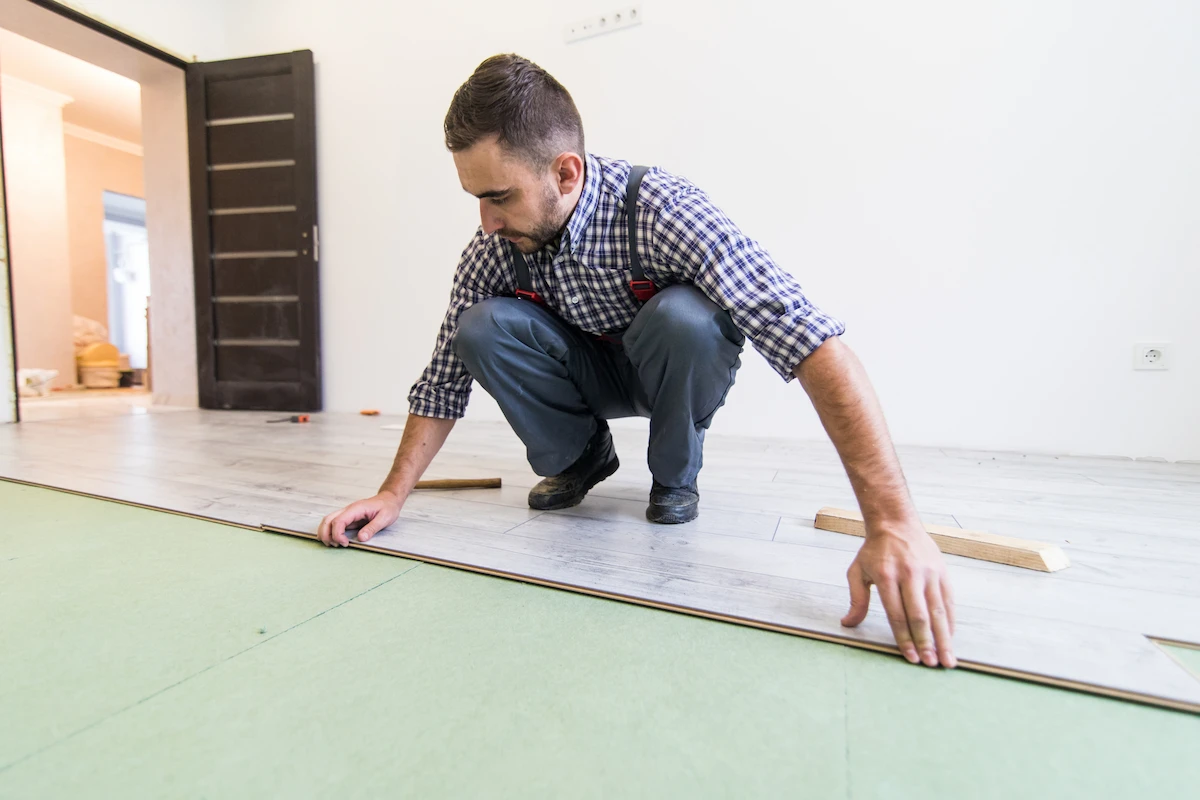
Levelling the Floor
This is the most critical stage when mastering how to level a floor before laying flooring, as it directly impacts the final outcome. Applying the levelling compound correctly ensures a smooth and even surface ready for installation. Taking your time and following the correct method will help you achieve professional-quality results.
A. Mix the Levelling Compound
Follow the manufacturer’s instructions carefully. The consistency should be smooth and pourable, without lumps.
B. Pour and Spread Evenly
Start at one corner of the room and pour the compound onto the floor. Use a trowel or spreader to distribute it evenly.
C. Allow It to Self-Level
Most modern compounds are designed to spread and settle naturally. However, you may need to guide it slightly in larger areas.
D. Let It Cure Properly
Drying times vary, but typically range from a few hours to 24 hours. Avoid walking on the surface until it’s fully set.
See product: QuickSet Rapid Levelling Screed
Dealing with Timber Subfloors
Timber subfloors require a slightly different approach compared to concrete due to their natural flexibility and movement. If not handled correctly, wooden bases can cause levelling compounds to crack or shift over time. Understanding these differences is essential for achieving a stable and long-lasting result.
A. Secure Loose Boards
Tighten any loose floorboards with screws to eliminate movement.
B. Use Plywood Overlay
In some cases, adding a thin plywood layer can create a more even base.
C. Apply Flexible Levelling Compound
Choose a compound designed specifically for timber to prevent cracking due to movement.
Common Mistakes to Avoid
Even with the best intentions, it’s easy to make mistakes when levelling a floor. Being aware of common pitfalls can save you time, money, and frustration. Avoiding these errors is an important part of successfully learning how to level a floor before laying flooring.
A. Skipping the Preparation Stage
Failing to clean or prime the floor can lead to poor adhesion and uneven results.
B. Using Too Much Water in the Mix
Over-thinning the compound weakens its strength and affects performance.
C. Rushing the Drying Process
Installing flooring too soon can trap moisture and damage the material.
Final Checks Before Installing Flooring
Before installing your new flooring, it’s essential to carry out a few final checks to ensure everything is in perfect condition. This step helps confirm that your levelling work has been successful and that the surface is ready for installation. Taking a little extra time here can prevent costly issues later on.
A. Recheck with a Level
Ensure the surface is completely even across the entire area.
B. Light Sanding if Needed
Minor imperfections can be smoothed out with a light sanding.
C. Clean Again
Remove any dust or residue before installing your chosen flooring.
Ready for a Perfect Flooring Finish
Learning how to level a floor before laying flooring is a vital step that can dramatically improve the quality and lifespan of your new floor. With the right preparation, tools, and techniques, you can achieve a smooth, professional finish that enhances both the look and performance of your space. Whether you’re tackling a DIY project or preparing for professional installation, a properly levelled subfloor is the foundation of success.
If you’d rather leave it to the experts, TEKA Flooring Peterborough is here to help. Our experienced team offers both premium flooring products and professional fitting services to ensure flawless results every time. Visit our showroom to explore your options or get in touch via WhatsApp for a quick consultation—your perfect floor starts with the right foundation.
Read also: What Is the Best Flooring for School and Education Facilities?