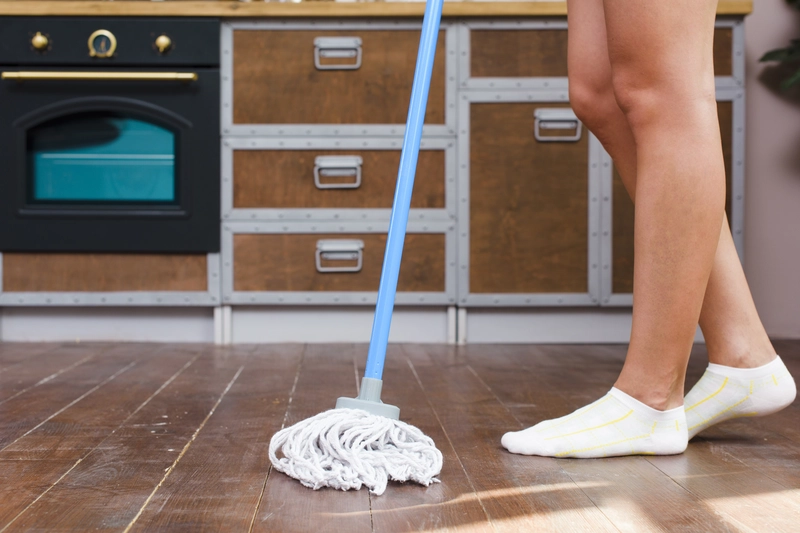
Mopping a floor may appear to be a straightforward task; however, executing it correctly is crucial for maintaining a clean and inviting home environment. How do you mop a floor effectively?
This guide outlines the essential tools and materials required for effective mopping, including the selection of an appropriate mop and the choice of a suitable cleaning solution. It also addresses important preparatory steps and the proper mopping technique which provides useful tips for addressing stubborn stains.
Tools and Materials Needed to Mop a Floor
To effectively mop a floor and maintain cleanliness in your home, several essential tools and materials are required, including cleaning equipment like buckets and detergents.
A high-quality mop is vital for dirt and grime removal, while a sturdy bucket is necessary for holding your cleaning solution, which typically consists of water and a suitable detergent. Additionally, it’s important to consider the type of flooring, such as wooden, vinyl, porcelain, or ceramic tiles, as this will influence the choice of cleaning solution and method.
1. Mop
How do you mop a floor? Of course the first essential thing is to prepare the mop. A mop is an tool for effective floor cleaning, designed to tackle dirt and grime with ease, making it essential for maintaining a clean and healthy living environment in homes and workplaces alike. Its versatility accommodates a range of cleaning tasks, ensuring that surfaces are not only cleaned but also sanitised, depending on the chosen mop type and method of use.
Various types of mops serve different cleaning needs, each with distinct advantages, especially in high-traffic areas:
- Sponge Mops: Ideal for absorbing spills, they boast a soft surface that easily conforms to various contours, making them particularly effective on uneven floors. Their sponge material excels in cleaning up liquid messes rapidly.
- Traditional Mops: Often characterised by their long cotton or microfibre strands, traditional mops offer superior dirt pick-up and are excellent for larger areas. They provide a thorough cleaning but require proper care to avoid mildew build-up.
- Microfibre Mops: Known for their remarkable cleaning efficiency, these mops attract dirt and dust effectively, often requiring minimal cleaning solution to achieve excellent results.
The mop-head type significantly influences cleaning effectiveness. Soft, absorbent heads are suited for delicate surfaces, while tougher fibres handle stubborn stains on more resilient flooring. Regular maintenance and replacement of the mop-head ensure optimal performance.
It’s essential to select suitable cleaning solutions based on flooring material, as some might be sensitive to harsh chemicals, ultimately preserving the integrity of the surface.
1. Bucket
A sturdy bucket is essential for holding and mixing your cleaning solution, ensuring you have the right amount of water for efficient mopping. Choosing the correct bucket size can significantly impact the overall effectiveness and efficiency of your cleaning tasks. A well-sized bucket not only accommodates a sufficient volume of liquid but also ensures ease of manoeuvrability during mopping. Consider using separate buckets to differentiate between clean and dirty water, as this simple practice helps prevent re-soiling your surfaces.
To mix the cleaning solution properly, always follow the manufacturer’s instructions regarding water-to-solution ratios, as using too much detergent can leave a residue that attracts more dirt. This not only hampers your cleaning results but can also lead to additional work later on.
- Use a larger bucket for initial tasks to minimise the number of refills.
- Keep a smaller, dedicated bucket for rinsing out your mop, ensuring cleaner results.
By maintaining these practices, you’ll elevate your cleaning efficiency and achieve sparkling results.
3. Cleaning Solution
Choosing the right cleaning solution is crucial for effective mopping, as it helps eliminate bacteria, allergens, and germs from your floors, ensuring not only a pristine appearance but also a healthier living environment for you and your family.
Understanding the various cleaning solutions available is essential for maintaining your floors. Different cleaning solutions cater to specific floor types, which include:
- Wooden Floors: Look for gentle cleaners that won’t strip the finish or warp the wood.
- Vinyl Floors: A simple mixture of vinegar and water can effectively remove stains.
- Porcelain Tiles: Commercial detergents designed for tiles can break down tough grime.
- Ceramic Surfaces: Opt for solutions that restore shine without scratching.
Selecting the appropriate formula not only combats dirt effectively but also ensures the longevity and safety of your surfaces, preventing mould and bacteria build-up.
4. Water
Water plays a pivotal role in the mopping process, serving as the primary medium for your cleaning solution and crucial for rinsing. Using clean, warm water significantly enhances the effectiveness of the cleaning routine.
Warm water not only dissolves dirt and grime more efficiently, but it also allows the detergent to work more effectively, breaking down stubborn stains with ease.
To achieve optimal results, it is essential to frequently change the water during the mopping process. Consider the following key points to maintain your floors:
- Using warm water improves cleaning power.
- Regular water changes prevent the spread of dirt.
- Maintaining clean water helps prolong the life of your floors.
Prioritising water temperature and cleanliness plays a vital role in effective floor maintenance, ensuring surfaces remain spotless and inviting.
Preparation Before Mopping
Proper preparation before mopping is essential to ensure that the floor is ready for effective cleaning and to minimise the risk of spreading dirt or allergens around your home. This includes regular vacuuming and spot-cleaning.
Start by clearing the area of furniture, mats, and any other items that may obstruct your cleaning efforts. This will allow you to access the entire surface area and achieve a spotless finish.
Next, use a broom or vacuum cleaner to remove dust, dirt, and allergens from the floor, making the mopping process far more effective.
1. Clear the Floor
Clearing the floor of all furniture and obstacles is the first crucial step in the mopping process. This action not only sets the stage for effective cleaning but also minimises the risk of damaging both the surface and your belongings during the mopping routine.
Having a clear space allows for better manoeuvrability and ensures that dirt and debris are efficiently removed from every corner. To facilitate this, consider the following tips:
- Plan: Survey the area before starting. Knowing what you need to move can save time.
- Use furniture sliders: These handy tools make it easy to push heavy items across the floor without scratching them.
- Move smaller items first: Clear things like rugs, plants, and decor to make larger pieces easier to shift, ensuring an empty, accessible space.
By decluttering the area, one can achieve a more thorough cleaning, ensuring that dirt isn’t just pushed around but actually removed, ultimately enhancing the cleanliness of the space.
2. Sweep or Vacuum the Floor
Sweeping or vacuuming the floor before mopping is essential for removing dirt and allergens that may interfere with the cleaning process. A vacuum cleaner is particularly effective in capturing fine debris.
When one considers the choice between a broom and a vacuum cleaner, it is clear that each method offers distinct advantages that can significantly impact overall cleanliness. For instance, while a broom might be more accessible for quick clean-ups, utilising a vacuum cleaner can be more efficient in capturing fine dust and debris that often goes unnoticed. The ability of vacuum cleaners to reach into corners and edges ensures that no dirt is left behind, which is particularly important in high-traffic areas.
Sweeping Techniques:
- Start in a corner and sweep towards the centre.
- Use a dustpan to collect debris effectively.
Vacuuming Techniques:
- Utilise attachments for corners and upholstery.
- Adjust the height for different types of flooring.
Employing these techniques not only aids in the immediate cleaning but also enhances the effectiveness of mopping, ensuring a deeper clean on all surfaces.
Steps to Mop a Floor
How to mop a floor? Mopping a floor is a straightforward process that requires attention to detail and adherence to specific steps to ensure thorough cleaning and maintenance of your flooring. By following these steps, you can achieve a spotless finish that keeps your home looking pristine.
1. Fill the Bucket with Water and Cleaning Solution
The first step in the mopping process is to fill your bucket with clean water and an appropriate cleaning solution tailored to your floor type, ensuring an effective clean that genuinely addresses the unique needs of each surface while maintaining its integrity over time. Additionally, having sponges handy can help with spot treatments and hard-to-reach areas.
When determining the correct ratio of cleaning solution to water, it is crucial to consider the specific flooring materials, especially in high-traffic areas like the entryway:
- Hardwood floors: Generally, a mixture of 1 cup of cleaner per gallon of water is recommended to preserve the wood’s finish.
- Tiled flooring: A stronger solution might be appropriate, such as 2 cups per gallon, to tackle dirt and grime effectively.
- Carpeted surfaces: Use a specialised carpet cleaner as per label instructions, often requiring only a few ounces per gallon. For vinyl flooring, ensure the use of a compatible cleaner to maintain shine and durability.
Safety precautions should always be observed when mixing cleaning chemicals. It is advisable to install clear labels and instructions for easy reference:
- Read labels carefully and never combine different cleaners unless specified by the manufacturer, as harmful reactions may occur.
- Work in well-ventilated areas to minimise inhalation of fumes.
- Wear gloves and protective eyewear, particularly when handling strong solutions.
Ensuring the solution is effective for germ and bacteria removal is essential. This can be verified by:
- Allowing the solution to sit on the surface for the recommended time.
- Using a disinfectant that meets the appropriate safety and efficacy standards.
By taking these steps, achieving a thorough clean becomes manageable and effective, providing peace of mind for maintaining a healthy environment.
2. Dip the Mop in the Bucket
After preparing your cleaning solution, the next step involves dipping the mop into the bucket to soak it with the cleaning mixture. Thoroughly rinse the mop before soaking to remove any residual chemicals.
This process requires utmost care to ensure that the mop absorbs an even amount of the solution without becoming overly saturated. Hold the mop submerged for a few extra seconds to ensure thorough absorption.
- Begin by gently submerging the mop head into the liquid, allowing it to soak for a few seconds before wringing out excess water.
- Once submerged, lift the mop slightly and squeeze it gently to promote absorption while controlling the amount of excess liquid.
- Using the correct type of mop is equally crucial; for instance, a microfibre mop can enhance dirt capture compared to traditional cotton mops, making it an optimal choice for various surfaces.
Consistent technique in these steps can lead to a more efficient cleaning process, ensuring that surfaces are left spotless with minimal effort.
3. Wring Out Excess Water
Wringing out excess water from the mop is an essential step to prevent over-saturation of the floor during cleaning, as an overly wet mop can lead to unsightly puddles, create safety hazards, and even cause damage to flooring materials over time. Understanding proper techniques for achieving just the right level of moisture is key to maintaining their appearance and longevity.
There are various techniques one can employ to effectively wring out the mop. Below are some of the most popular methods:
- Built-in Wringer: Many modern mops come with a built-in wringer feature, which allows you to simply press down on the handle to squeeze out excess water effortlessly.
- Manual Methods: If using a traditional mop, folding the mop head and twisting it can be a simple yet effective way of wringing without causing damage.
- Bucket Wringer: Utilising a mop bucket that has a wringer attachment can enhance efficiency, allowing for better control over the moisture levels.
Ensuring the mop is neither too wet nor too dry is crucial, especially when cleaning agents are used on certain flooring types. This balance helps prevent streaks and reduces the risk of water damage, making effective wringing out an essential part of the cleaning process.
4. Apply and Begin Mopping in a Corner
Starting in a corner of the room when mopping is a strategic approach that helps ensure you clean the entire section without missing spots.
By beginning in one corner, you can methodically work your way toward the exit, reducing the risk of stepping on wet surfaces that may lead to slips and falls. This systematic method not only maintains safety but also enhances cleaning efficiency.
- Divide the area into manageable sections, allowing focused attention on each part.
- Maintain a consistent pattern — whether you choose a straight line or a circular motion, consistency avoids overlap and ensures thorough cleaning.
- Keep your mop damp but not soaking wet to minimise excess moisture left on the floor.
- Regularly change the mop water to avoid spreading dirt back onto clean areas.
By adhering to this approach, you can achieve an impeccable clean while prioritising safety.
5. Rinse and Repeat
Rinsing the mop frequently and repeating the mopping process is a critical cleaning method vital for achieving a truly clean floor, free from dirt and residue.
Cleaning enthusiasts understand that the key to pristine floors lies not only in an efficient method but also in consistency. After every section, it is imperative to rinse the mop thoroughly in a clean water bucket. This practice prevents the unpleasant scenario of redistributing dirt that has already been collected, ensuring that stains and grime do not simply shift around rather than being eliminated.
- It is advisable to change the cleaning solution every 100 square feet or every so often, depending on the level of soiling.
- Maintaining cleanliness through regular mop rinsing and solution changes plays a crucial role in the overall effectiveness of the mopping process.
By adhering to these guidelines, anyone can contribute to a healthier indoor environment while significantly improving floor cleanliness.
How Do You Mop A Floor?
To achieve the best results while mopping, it’s essential to follow some tips that can enhance your cleaning effectiveness and ensure your floors remain spotless over time.
By employing the right techniques, changing your cleaning solution as needed, and using appropriate motions, you can significantly improve the cleanliness and maintain the durability of your flooring surfaces.
1. Change the Water and Cleaning Solution as Needed
Regularly changing the water and cleaning solution is crucial for maintaining effective cleanliness while mopping. It’s essential to be observant during your cleaning routine, as certain signs can serve as indicators that a change is necessary.
For instance, if the water begins to appear visibly dirty or cloudy, it’s a clear signal that contaminants have accumulated. If one notices a lingering unpleasant odour or feels that the mop isn’t picking up dirt effectively, it’s likely time for a refresh.
Using fresh solutions not only enhances the removal of dirt but also targets bacteria more effectively. Ensuring a clean environment contributes significantly to overall hygiene and can prevent the spread of germs, making it vital to prioritise these changes.
2. Use a Figure-8 Motion for Tough Stains
Using a figure-of-eight motion while mopping can be particularly effective for removing tough stains and ensuring a thorough clean, especially on various types of flooring such as hardwood, tiles, and laminate. By employing this technique, individuals can maximise the reach of their cleaning efforts, effectively targeting hard-to-reach areas and providing a consistent application of pressure throughout the process.
The figure-of-eight motion not only allows for deeper penetration into the surface but also ensures that dirt and grime are effectively lifted and trapped within the mop, rather than just moved around. Here are some key benefits of this technique compared to traditional mopping methods:
- Enhanced Cleaning Efficiency: The unique motion mimics the natural way our hands move, creating a more ergonomic approach.
- Time-Saving: Fewer passes are needed to achieve a spotless surface, cutting down overall cleaning time.
- Better Surface Contact: The figure-of-eight motion allows the mop to cover more area, ensuring that all sections receive equal attention.
Adopting this mopping technique can significantly improve cleaning outcomes while also making the task less labour-intensive.
3. Use a Separate Mop for Different Types of Floors
Utilising a separate mop for different types of floors can help prevent damage and maintain the integrity of your flooring surfaces.
Using the appropriate tools for each flooring type not only enhances cleaning effectiveness but also significantly contributes to the longevity of these surfaces. For instance, utilising a mop designed specifically for wooden floors ensures that the wood is treated delicately, avoiding harsh chemicals that could lead to warping or discolouration. On the other hand, special mops for vinyl and ceramic tiles can remove grime without scratching their unique coatings.
Here’s a brief overview of dedicated mops for various surfaces:
- Wooden Floors: Soft microfibre mops to avoid scratches.
- Vinyl Floors: Mops with non-abrasive pads to protect the surface.
- Ceramic Tiles: Sturdy mops designed to handle heavy-duty cleaning.
- Porcelain Tiles: Mops that can handle various cleaning solutions without damage.
By investing in these specialised tools, the cleaning process becomes more efficient, ensuring that each surface is treated correctly and remains in top condition.
How Often Should You Mop a Floor?
Determining how often you should mop the floor depends on several factors, including the type of flooring, the amount of foot traffic, and the presence of pets or children in your home.
Regular maintenance is crucial to prevent the build-up of dirt and allergens that can impact both cleanliness and health. For high-traffic areas, a weekly mopping routine may be necessary, while less frequently used spaces may only require monthly attention.
Conclusion: Enjoy Your Clean Floor!
Mastering the art of mopping is essential for maintaining a clean floor and promoting a hygienic environment in your home.
By implementing effective strategies, individuals can significantly enhance their cleaning routine. Proper mopping techniques not only elevate the appearance of your floors but also contribute to the overall health of your living space.
It’s crucial to understand that the choice of cleaning solutions and tools plays a vital role in achieving optimal results. Regularly scheduled cleaning not only prevents the accumulation of dust and grime but also ensures a safe environment for children and pets.
For professional cleaning services or expert advice on keeping your floors spotless, TEKA Cleaning is here to help. Our team provides high-quality cleaning solutions tailored to your needs, ensuring that your floors stay in top condition with minimal effort. Whether you’re looking for regular maintenance or a deep clean, trust TEKA to deliver exceptional results every time. Contact us today for more information!
Read also: