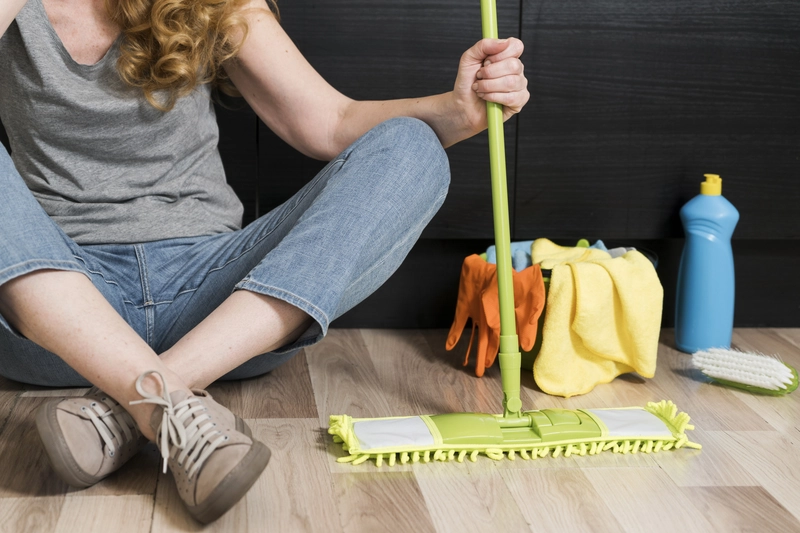
Mopping is an essential household chore that keeps your floors looking fresh and clean. Whether you’re tackling hardwood, tile, or laminate floors, knowing the right tools and techniques on how to mop a floor makes a difference.
This piece covers must-have mopping tools, step-by-step instructions for different floor types, and tips for achieving great results by using the proper method and frequency. Get ready to transform your cleaning routine and enhance the appearance of your floors with these practical insights.
Tools Needed for Mopping Floors
To effectively mop a floor, whether it’s hardwood, tile floors, vinyl, or laminate floors, you need several essential tools that facilitate the entire cleaning process, including a vacuum cleaner to remove loose dirt.
A high-quality mop ensures thorough dirt removal, while a sturdy bucket is essential for holding your cleaning solution.
Additionally, a suitable cleaning solution plays a vital role in maintaining the floor’s integrity and removing grime without leaving streaks. Accessories like microfibre cloths or sponges help reach those tight corners, and protective gear can safeguard your hands and knees during the task.
1. Mop
A mop is an essential cleaning tool for effectively removing dirt and grime from various floor surfaces, including hardwood, tiles, and laminate. Understanding the different types of mops available, such as a Swiffer or a traditional brush, can significantly enhance the cleaning experience and results.
Traditional mops, often made from cotton, are great for general cleaning but may need to be rinsed frequently. On the other hand, microfibre mops are highly efficient due to their ability to capture dust and dirt with ease, making them suitable for delicate surfaces. Swiffer mops, known for their convenience and disposable pads, are ideal for quick clean-ups.
- Traditional Mops: Versatile but may leave behind excess water.
- Microfibre Mops: Excellent for thorough cleaning without scratching.
- Swiffer Mops: Perfect for fast and efficient cleaning sessions.
By knowing these distinctions and employing the correct techniques in using these tools, one can avoid damaging the floor while ensuring effective cleaning. Applying the cleaning solution carefully will help maintain the floor’s integrity.
2. Bucket
A bucket is necessary for mixing water and your chosen cleaning solution, ensuring that you have enough liquid for efficient mopping and the ability to tackle larger surface areas effectively, thus promoting an overall cleaner environment in your home or workplace.
In terms of selecting the right bucket, a variety of options are available, catering to different cleaning needs and preferences. For instance, standard buckets usually come in sizes ranging from 9 to 23 litres, making them suitable for various tasks around the house or office.
Here are some popular bucket options:
- Traditional Buckets: Typically made from plastic, these are lightweight and easy to handle.
- Wringing Buckets: Equipped with built-in wringing mechanisms, these buckets allow for easy removal of excess water, helping to prevent muddy floors and enhance your household cleaning routine.
- Dual-Compartment Buckets: Perfect for separating clean and dirty water, ensuring that a clean bucket is always used for the solution.
Using a clean bucket is crucial; otherwise, contamination from dirt left in the bucket can compromise the effectiveness of your cleaning solution, leading to unsatisfactory results.
3. Cleaning Solution
Choosing the right cleaning solution is crucial for maintaining your floors and ensuring they remain free of dirt and stains without causing damage, as different surfaces require tailored care. Avoiding common pitfalls could prevent costly repairs or replacements in the future.
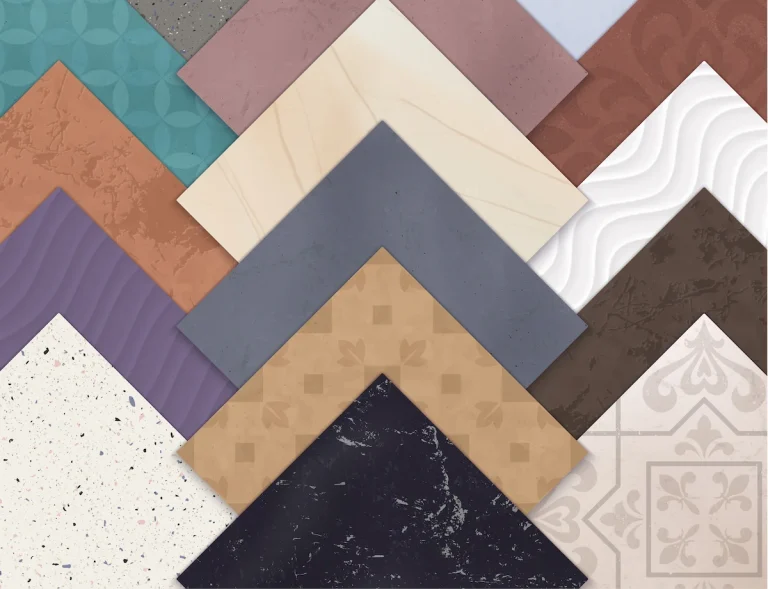
In terms of finding the ideal cleaning method, it is important to consider the specific materials of your floors. Here are some common types of flooring and suitable cleaning solutions:
- Hardwood: Opt for a gentle soap solution, such as diluted washing-up liquid, to preserve the wood’s natural shine.
- Tile: A strong commercial cleaner designed for tiles can effectively cut through grime, while always remembering to follow the manufacturer’s instructions for dilution.
- Vinyl: Regular mopping with warm water and a small amount of vinegar can help remove sticky residues without damaging the surface.
It is essential to read labels carefully to understand the appropriate usage and mixing ratios, ensuring that the chosen cleaning solution not only cleans efficiently but also protects your investments.
4. Microfiber Cloth or Sponge
Using a microfibre cloth or sponge can be an effective way to reach small areas and tackle stubborn spots that the mop may miss, especially in corners and around tightly fitted appliances where typical cleaning tools fail to penetrate effectively. These materials are designed with fine fibres that not only attract and trap dirt but also reduce streaks, ensuring a polished finish on various surfaces. Microfibre’s unique structure enables it to lift particles away rather than just spreading them around, making it a superior choice for those who desire a thorough clean. Always follow the label instructions to maintain the microfiber’s effectiveness.
When deciding between a sponge and a microfibre cloth, consider the type of surface you’re cleaning and the nature of the mess:
- Sponges are ideal for scrubbing tough stains or debris on hard surfaces, providing a bit of abrasion to aid in removal.
- Microfibre cloths excel at dusting and wiping down delicate surfaces, leaving them streak-free and shiny.
To ensure these cleaning tools last longer:
- Wash microfibre items in warm water without fabric softeners to preserve their absorbency.
- Avoid high heat when drying, as it can damage the fibres.
By regularly maintaining these tools, one can maximise their effectiveness and enjoy the numerous benefits of using microfibre without frequent replacements.
5. Protective Gear (Optional)
While not always necessary, wearing protective gear can enhance your comfort and safety while mopping floors in your home.
This is especially true during extended cleaning sessions where the strain on your body can become quite significant. By utilising options such as gloves or knee pads, one can mitigate discomfort and potential injury.
- Gloves protect your hands from harsh cleaning chemicals, ensuring skin integrity and preventing allergic reactions.
- Knee pads provide cushioning, easing pressure on your knees when cleaning low surfaces or when mopping large areas.
In particular, using protective gear becomes increasingly beneficial when dealing with potent cleaning solutions that may irritate bare skin or when taking on the challenging task of mopping large floors that require extended bending over. Such precautions not only improve safety but also make the process more enjoyable. For a comfortable experience, regularly using knee pads during tedious cleaning activities can be very advantageous.
How to Mop a Floor
The mopping method for each type of floor may differ. Here’s a breakdown of the best approach for each one.
1. Hardwood Floor
Mopping hardwood floors requires a careful approach to ensure the wood remains in good condition while effectively removing dirt and stains. Begin by sweeping or vacuuming the area to eliminate loose dirt and debris that could scratch the surface during mopping. Using a vacuum cleaner with a soft brush attachment is recommended for optimal results.
Next, prepare a suitable cleaning solution specifically designed for hardwood floors to avoid damage and maintain shine. After dipping the mop into the solution, wring it out thoroughly before mopping in a gentle figure-of-eight motion.
Finally, dry the floor with a microfibre cloth to avoid water damage and streaks, ensuring the hardwood remains pristine.
a. Sweep or Vacuum the Floor
Before mopping hardwood floors, it is essential to sweep or vacuum the area to remove any loose dirt and debris that could scratch the surface, ensuring that the cleaning process is both efficient and effective in maintaining the floor’s aesthetic appeal.
Employing proper sweeping and vacuuming techniques is crucial to preserving hardwood floors. A soft-bristled broom is ideal for sweeping, as it captures dust without causing any damage. For vacuuming, using vacuums specifically designed for hardwood floors can greatly enhance your cleaning routine. These vacuums often feature a setting that prevents scratching and typically have rubberised wheels that won’t harm the surface.
- Canister vacuums: Lightweight and easy to manoeuvre, perfect for reaching corners.
- Stick vacuums: Compact and efficient, ideal for quick clean-ups.
- Robot vacuums: Great for automated cleaning without manual effort.
By removing debris, these methods help prepare the floor for mopping, enhancing overall cleaning efficiency and ensuring a spotless finish.
b. Prepare the Cleaning Solution
To achieve an optimal cleaning, it’s important to prepare a cleaning solution that suits your floor’s material. For vinyl flooring, using a mixture of warm water and gentle detergent like dish soap can prevent damage while removing dirt and grime. Always follow the label instructions to ensure the proper dilution and application method.
Creating an appropriate cleaning solution for hardwood floors is crucial to avoid damaging the wood while ensuring cleanliness. This process not only preserves the beauty of the flooring but also extends its lifespan, making it essential to choose the right ingredients and ratios for the task at hand.
To begin with, a pH-neutral cleaner is highly recommended, as it helps to prevent any potential damage that may arise from using harsh chemicals. Experts often suggest such solutions. A simple yet effective mix can be achieved by combining:
- 1 cup of white vinegar
- 1 gallon of warm water
- A few drops of a gentle washing-up liquid
This blend not only cleans efficiently but is also safe for hardwood surfaces. Always remember to conduct a spot test in an inconspicuous area before applying any solution, ensuring compatibility with your specific flooring type.
c. Dip the Mop in the Solution and Wring it Out
After preparing the cleaning solution, dip the mop in it and wring it out to ensure it is damp, not soaking wet.
Properly managing the moisture level in a mop is crucial, especially when cleaning hardwood floors, as excess water can lead to warping and damage. To achieve the right balance, consider following these simple yet effective steps:
- Initial Dip: Submerge the mop head thoroughly in the cleaning solution, allowing it to absorb enough liquid.
- Wringing Technique: Hold the mop firmly and twist it in one direction to effectively expel excess moisture. This motion promotes a more controlled application.
- Check for Excess: After wringing, gently run the mop over a surface to see if it leaves puddles. If it does, repeat the wringing process until it feels just damp.
These practices not only ensure a cleaner surface but also protect the integrity of the flooring.
d. Mop in a Figure-Eight Motion
Mopping in a figure-eight motion helps to cover more area effectively while preventing water accumulation in one spot.
This technique not only enhances the efficiency of cleaning but also minimises the chances of streaks and residue on the floor. When utilising the figure-eight mopping technique, it’s essential to focus on smaller sections of the surface to ensure thoroughness. By breaking the area into manageable parts, one can maintain a consistent motion. This approach creates a systematic pattern that facilitates better coverage and allows for even distribution of the cleaning solution. Keeping the mop wet but not dripping helps to avoid excess moisture, which is vital in preventing streaking.
- Start in one corner of the room.
- Work your way out, using smooth, deliberate movements.
- Regularly rinse the mop to prevent spreading dirt.
This method proves to be a practical solution for achieving clean, streak-free floors.
e. Rinse the Mop and Change the Solution if Needed
Periodically rinsing the mop and changing the cleaning solution is essential to ensure dirt is not redistributed back onto the floor.
As the cleaning process progresses, it is crucial to be mindful of the frequency with which the mop is rinsed and the solution replaced.
Rinsing the mop every few strokes or when it appears dirty not only extends the life of the mop but also enhances its ability to pick up grime effectively. Similarly, changing the cleaning solution after a certain area or when it becomes murky ensures that the cleaning efficacy remains high.
Regularly assessing the condition of both the mop and the water will significantly impact achieving a thorough clean throughout the space.
f. Dry the Floor with a Microfiber Cloth
After mopping, use a dry microfibre cloth to wipe down the hardwood floor, ensuring that no moisture is left to damage the wood.
This vital step plays a significant role in maintaining the floor’s integrity, as excess moisture can lead to warping and other forms of deterioration over time. By employing a microfibre cloth, you can effectively absorb leftover moisture due to its unique fibre structure, which is specifically designed to trap water without scratching the surface.
Drying the floor thoroughly not only enhances its appearance but also reduces the risk of water damage, thereby prolonging the lifespan of your flooring.
Here are some key benefits of this practice:
- Prevents long-term structural damage.
- Maintains a clean and polished look.
- Reduces the risk of slips and falls.
- Ensures a healthier indoor environment by minimising mould growth.
Ultimately, incorporating this simple routine can make a substantial difference in the longevity and safety of your hardwood floors.
2. Tile Floor
Cleaning tile floors requires a slightly different approach to hardwood, focusing on effectively removing grime and ensuring shine without damaging the grout. Institutions like Barnard College recommend specific methods to handle such surfaces efficiently.
Start by sweeping or vacuuming the tile floor to eliminate loose dirt, then prepare a suitable cleaning solution that can tackle tough stains and grime.
After dipping the mop into the solution, ensure it is adequately wrung out to prevent excess water from damaging the grout. Mop in a back-and-forth motion, rinsing the mop frequently and changing the solution as needed, then dry the floor with a microfiber cloth for a spotless finish.
a. Sweep or Vacuum the Floor
Before mopping tiled floors, ensure you sweep or vacuum thoroughly to clear away any loose debris that could scratch the tiles.
This preliminary step not only protects the surface from potential damage but also enhances the effectiveness of the cleaning process. A thorough cleaning starts with the right tools; feather dusters and microfibre brooms are excellent for capturing dust and small particles without scratching the tile. Alternatively, a vacuum equipped with a hard floor setting ensures that all debris, from crumbs to pet hair, is efficiently removed.Using a soft-bristle broom helps avoid any risk of scratching, especially on glazed tiles. Consider investing in a vacuum designed specifically for hard surfaces, as it tends to have better suction capabilities.
Furthermore, this cleaning stage is essential for preparing the floor for mopping, as any leftover dirt can hinder the effectiveness of your cleaning solution and leave your tiles looking dull.
b. Prepare the Cleaning Solution
Prepare a cleaning solution that is specifically formulated for floor tiles, ensuring it can effectively remove grime without damaging the grout.
In the quest for spotless floor tiles, selecting the right cleaning solution is essential. Utilising a blend that not only tackles dirt but also prioritises the integrity of the grout will yield the best results.
Homemade cleaners made from simple ingredients like vinegar and bicarbonate of soda are economical options, yet care must be taken to avoid excessive acidity, which can weaken grout over time. On the other hand, commercial cleaners designed for tile flooring often offer specialised formulas that provide a deeper clean while safeguarding grout.
Here’s a quick overview of recommended cleaning options:
- Homemade Solutions: Ideal for regular maintenance.
- Commercial Cleaners: Convenient for stubborn stains.
- pH-neutral Solutions: Best for preserving grout.
Being mindful of the types used will ensure your flooring remains pristine and durable, whether you’re cleaning a simple flat or a large commercial space.
c. Mop in a Back-and-Forth Motion
When mopping tiled floors, use a back-and-forth motion to ensure thorough cleaning of the tiles and grout lines, as this technique promotes efficiency while allowing for deep penetration into those hard-to-reach areas that often collect dirt and grime. The regular repetition of this motion not only covers large spaces effectively but also helps the cleaner fully saturate the surface, ensuring that every inch receives attention.
One effective method to maintain consistency and avoid missing spots while employing this technique involves breaking the area into manageable sections. This allows for a focused cleaning strategy.
Here are some additional tips to consider, as noted by experts:
- Start in a corner and work your way towards an exit to ensure you don’t step on freshly cleaned tiles.
- Use a consistent amount of pressure while mopping to maintain even coverage.
- Periodically lift the mop to inspect areas for missed spots, especially in corners and along edges.
Remember, the back-and-forth technique is not just about movement but developing a rhythm that suits your cleaning pace and maintains the quality of cleanliness in your tiled spaces.
d. Rinse the Mop and Change the Solution if Needed
Rinsing the mop regularly and changing the cleaning solution is essential to prevent reapplying dirt to the tiled floor.
Many may overlook the significance of this practice, yet it plays a crucial role in achieving a spotless environment. Here are some key indicators that it may be time for a mid-clean rinse:
- Visual cues: If the mop head appears discoloured or saturated with grime, it’s a clear indication that the cleaning solution is losing its effectiveness.
- Odour assessment: A musty or unpleasant smell emanating from the mop further indicates that the dirt is being redistributed instead of removed.
- Floor stickiness: If the tiles start feeling tacky after mopping, it suggests that residue might be left behind, necessitating a solution change.
By observing these signs and regularly maintaining the cleaning routine, one can ensure a consistently pristine surface.
e. Dry the Floor with a Microfiber Cloth and Tools like Swiffer
After mopping, it is important to dry the tile floor with a microfibre cloth to prevent moisture build-up that could lead to slippery surfaces. This simple step not only enhances safety but also plays a crucial role in maintaining the tile’s appearance and longevity.
Promptly drying the floor with a microfibre cloth has several benefits.
- Effective Absorption: Tools like the BOSHENG Mop and microfibre cloths are designed with unique weaves that absorb a significant amount of moisture without leaving behind streaks or water spots.
- Preventing Damage: By using a microfibre cloth to remove water immediately, you help prevent potential damage from lingering moisture, which can cause grout to deteriorate and tiles to lose their sheen.
- Enhanced Aesthetics: A quick drying also keeps the floor looking pristine, free from unsightly water marks that can mar its overall appearance.
In short, choosing to dry the tile floor promptly after mopping ensures a safer, cleaner, and more attractive living space.
3. Laminate Floor
Mopping laminate floors requires a careful approach to protect the surface while maintaining cleanliness, focusing on using minimal water. Begin by sweeping or vacuuming the floor to remove loose dirt and debris.
Next, prepare a cleaning solution suitable for laminate surfaces that won’t warp or damage the material. Mop using a gentle circular motion, being cautious not to oversaturate the floor.
Finally, dry the laminate surface with a microfibre cloth to ensure it stays in pristine condition.
a. Sweep or Vacuum the Floor
To prepare laminate floors for mopping, it is essential to sweep or vacuum away loose dirt and debris that could cause scratches.
Using the right cleaning methods is crucial, as these surfaces are delicate and can be easily damaged by harsh tools. A microfiber dust mop works wonders in picking up fine particles without scratching the floor.
If opting for a vacuum, ensure it has a setting suitable for hard floors, avoiding those with beater bars that may harm the laminate. It’s also wise to regularly check for any loose dirt with a soft-bristled broom, which helps maintain the appearance of your flooring.
- Regular sweeping helps significantly reduce the risk of scratches.
- Vacuuming with appropriate settings ensures thorough cleaning.
Ultimately, these methods will enhance the longevity and aesthetic of laminate surfaces.
b. Prepare the Cleaning Solution
When preparing a cleaning solution for laminate floors, ensure it is pH-neutral to avoid damaging the surface. Choosing the right cleaning solution is crucial for maintaining the appearance and longevity of laminate flooring. Users looking for effectiveness often consider both homemade and commercial options to suit their needs. Homemade solutions, such as a mixture of vinegar and water, can be cost-effective and environmentally friendly. It is essential to dilute vinegar properly, as too much acidity can harm the laminate surface.
Commercial cleaners, formulated specifically for laminate, are widely available and provide a convenience that many homeowners appreciate.
Make sure to read the label for pH-balanced options to ensure safety.
Both approaches have their merits, but understanding the specific needs of the flooring type will result in the best care.
c. Mop in a Gentle Circular Motion
Mopping laminate floors in a gentle circular motion helps cover the surface without oversaturating it.
This technique not only facilitates an even distribution of cleaning solution but also significantly reduces the risk of water damage, which is critical for maintaining the integrity of laminate.
When using this approach, the cleaner penetrates the surface effectively, lifting dirt and grime without pooling water that can seep into seams and cause warping.
Utilising a circular mopping technique minimises contact with moisture, ensuring that floors dry more quickly. This method also allows for a deeper clean as the circular motion reaches into crevices that a straightforward back-and-forth method might miss.
Ultimately, such a strategy not only preserves the beauty of laminate floors but enhances their durability, making it a sensible choice for homeowners.
d. Rinse the Mop and Change the Solution if Needed
Rinsing mops regularly and replacing the cleaning solution is key to maintaining cleanliness and avoiding dirt redepositing, ensuring that the floors not only appear immaculate but are also free from harmful bacteria and grime accumulation that can lead to eventual health concerns.
When you are maintaining your floors, recognising the signs that indicate it’s time to rinse the mop and refresh the cleaning solution is crucial. Here are some indicators to watch for:
- Colour Change: If the mop becomes visibly dirty or changes colour while cleaning, it’s time for a rinse.
- Odour: A musty or unpleasant smell from the mop can signal the need for a cleaning solution change.
- Streaking: If the floors start to show streaks despite using a clean mop, the current solution may be ineffective.
- Stretch of Cleaning: If you have been cleaning for a long time without a rinse, it’s wise to refresh both the mop and the cleaning solution.
By keeping an eye on these signs, one can ensure optimal effectiveness in the cleaning process.
e. Dry the Floor with a Microfiber Cloth
After mopping, use a dry microfiber cloth to remove any moisture from the laminate floor, preventing water damage.
Prompt drying is essential not only to maintain the aesthetic appeal of laminate flooring but also to protect its integrity. Laminate surfaces are susceptible to water damage, and any lingering moisture can lead to warping, swelling, or other irreversible effects.
Microfiber cloths play a crucial role in achieving a streak-free and completely dry surface by effectively absorbing excess moisture without scratching the finish. They are designed to glide smoothly over the floor, ensuring a thorough clean while minimising the risk of residue.
Follow these tips for optimal results:
- Always wring out microfiber cloths to ensure they’re damp, not soaking wet.
- Work in sections to manage the cleaning process efficiently.
- Regularly check the cloth; if it becomes saturated, switch to a fresh one to maintain effectiveness.
By implementing these practices, one can effortlessly extend the life of their laminate floors and preserve their beauty.
Tips and Tricks for Mopping Different Types of Floors
Mopping different types of floors, such as hardwood, tiles, laminate, and vinyl, requires specific techniques and tips to achieve optimal cleaning results without damaging the surfaces, a task that can benefit from tools like Swiffer.
Each flooring type presents unique challenges, from maintaining the finish on hardwood to preventing water damage on laminate.
By understanding these nuances and employing effective mopping techniques, you can ensure your floors remain clean and well maintained.
1. Avoid Using Too Much Water
Using too much water can cause significant damage to hardwood and laminate floors, leading to warping and other issues, which can be not only costly to repair but also detrimental to the home’s overall aesthetic appeal and value.
To maintain the beauty and longevity of these surfaces, it is essential to adopt a careful approach when cleaning. Here are some effective tips:
- Ensure the mop is just damp by wringing out excess water thoroughly before use.
- Consider using a microfibre mop, which requires less moisture while still being highly effective at picking up dirt and grime.
- Test a small, inconspicuous area first to check for any adverse reactions to the cleaning method.
Excess moisture can not only warp wooden planks but can also lead to mould growth and other complications. By being mindful of water usage, one can keep these beautiful floors looking pristine for years to come.
2. Use a Neutral pH Cleaning Solution
A neutral pH cleaning solution is essential for protecting the finish of hardwood, tile, and laminate floors while effectively removing dirt. Using pH-neutral cleaners not only safeguards the floor’s finish but also creates a safer environment by minimising the risk of residue buildup that can lead to long-term damage.
Unlike harsh alkaline or acidic cleaners, which can strip protective coatings and alter the surface texture, these gentle solutions maintain the integrity of various flooring types. Incorporating these cleaners can be crucial in extending the life of your floors, ensuring they stay looking pristine and functional for years to come.
The use of neutral pH cleaners is a proactive step in floor maintenance that not only benefits the surfaces but also enhances overall cleanliness and aesthetics.
3. Don’t Let the Cleaning Solution Sit on the Floor
Allowing the cleaning solution to sit on the floor can lead to streaks and residue that compromise the floor’s appearance, potentially resulting in costly repairs and unsightly damage over time.
Different types of flooring react uniquely to prolonged exposure. For instance, hardwood floors can absorb moisture, leading to warping and discolouration, while tile surfaces may become slippery and hazardous. Thus, it is crucial to be mindful of how long a cleaning solution remains on the surface.
To ensure effective cleaning without damaging your flooring, consider the following tips:
- Work in small sections: This allows you to manage the cleaning solution effectively and reduces drying time.
- Use a damp mop: Avoid soaking your floors, as excessive water can harm certain materials.
- Rinse regularly: Diligently rinsing the mop keeps your solution from becoming dirty and minimises residue.
By adhering to these guidelines, maintaining the pristine look of your flooring becomes a much simpler task. Remember, using the right techniques ensures long-lasting cleanliness.
4. Rinse the Mop Frequently
To ensure optimal results, it is advisable to rinse the mop every 10-15 minutes while tackling larger areas or when the dirt level becomes apparent. This practice significantly enhances cleaning efficiency, as a clean mop head picks up more debris and grime, leading to a noticeably improved shine.
Smaller areas may require less frequent rinsing, perhaps every 20-30 minutes, depending on traffic and dirt accumulation. When cleaning heavily soiled spots, more frequent rinsing is essential to avoid spreading the residue.
By adopting this method, one can achieve a deep clean, ensuring that floors remain hygienic and free from unwanted dirt and germs.
5. Dry the Floor Thoroughly
Thoroughly drying the floor after mopping is essential to prevent slips and potential water damage to hardwood and laminate surfaces.
Taking prompt action can greatly enhance safety within a home, as wet floors pose a significant hazard. Utilising microfibre cloths plays a crucial role in achieving a dry, streak-free finish, thanks to their absorbent and non-abrasive properties. These cloths excel in attracting and holding moisture, making them ideal for quick clean-ups.
To ensure that every corner is adequately dry, consider these effective tips, endorsed by experts in Washington and beyond:
- Work in sections, systematically drying each area before moving on to the next.
- Use a fan or open windows to increase air circulation, which can also speed up the drying process.
- Check for damp spots by walking barefoot, as this will help identify any missed areas that need extra attention.
How to Mop a Floor Like a Pro
Mopping a floor like a professional involves using high-quality equipment, an effective cleaning solution, and proper techniques that leave your floors sparkling clean.
Establishing a regular mopping schedule and employing the right tools will not only enhance the efficiency of your cleaning routine but also extend the lifespan of your flooring.
Pay close attention to tough spots, ensuring that dirt and grime are effectively removed without causing damage. By mastering these fundamental practices, you can keep your floors looking pristine and maintain a healthy home environment.
1. Use a Quality Mop
Investing in a quality mop is crucial for achieving optimal cleaning results on hardwood and tiled floors, as well as ensuring the longevity of these surfaces and maintaining a hygienic environment in your home.
A well-designed mop can make all the difference in your cleaning routine, especially when it comes to adapting to various flooring types.
Choosing the right materials—such as microfiber, sponge, or cotton—can enhance dirt pickup and reduce streaks. For instance, microfiber mops are highly effective on hardwood, as they gently lift dust without scratching. Conversely, traditional string mops may suit tiled floors better, given their stronger scrubbing capabilities.
- Hardwood: A microfiber spray mop is recommended for ease of use and versatility.
- Tiled: A heavy-duty spin mop can tackle grime effectively.
- Laminate: A flat mop is ideal for its gentle touch, avoiding water damage.
By selecting the right mop tailored to your specific flooring needs, you can maintain cleanliness and protect your surfaces over time.
2. Choose the Right Cleaning Solution
Selecting the appropriate cleaning solution for your flooring type is essential to prevent damage and ensure effective dirt removal, as using the wrong product can lead to unsightly stains, dull finishes, or even irreversible harm to the surface beneath. Consideration of the specific material beneath your feet will not only preserve its beauty but also enhance its longevity, as each type responds differently to various cleaning agents.
For instance, hardwood floors require a gentle touch; a pH-balanced solution is often recommended to maintain the natural sheen without compromising the finish.
- Tile: For ceramic or porcelain tiles, a mild detergent mixed with warm water usually works wonders, removing grime while protecting grout integrity.
- Laminate: Similar to hardwood, laminate benefits from a specific cleaner, as excessive moisture can warp the planks.
- Vinyl: A simple mixture of vinegar and water can effectively clean vinyl surfaces, helping maintain their original lustre without causing damage.
Choosing the right cleaning solution not only ensures a sparkling clean floor but also plays a crucial role in its overall maintenance and appearance. Organizations such as the Better Business Bureau endorse products that combine efficacy with safety.
3. Follow a Regular Mopping Schedule
Establishing a regular mopping schedule is key to maintaining clean floors and preventing the build-up of dirt and grime.
A well-planned routine can significantly improve the appearance and longevity of various flooring types. For instance, high-traffic areas such as kitchens and entrance halls might require mopping every few days to manage the accumulation of soil and stains effectively.
In contrast, less frequented spaces, like guest rooms, may only need attention once a week or fortnightly. Keeping a meticulous cleaning plan not only enhances the overall aesthetic but also reduces wear and tear. Regular upkeep can lead to fewer repairs and deeper cleans over time.
Thus, homeowners should take into account their household activity levels and adjust accordingly to maintain an inviting and healthy environment for their families.
- High-traffic areas: mop every 2-3 days
- Moderate traffic zones: mop weekly
- Low traffic rooms: mop fortnightly
Consistency is essential for achieving the best results.
4. Use Proper Techniques
Employing proper mopping techniques is vital for ensuring that dirt is effectively removed without damaging the flooring, a point often emphasized by cleaning experts like Jolie Kerr.
When considering different flooring materials, effective cleaning methods can vary significantly. For hardwood floors, gentle motions paired with minimal moisture are essential to prevent warping.
In contrast, tiles can withstand more vigorous scrubbing; however, attention to the grout lines is crucial to avoid staining. The right amount of pressure applied during mopping not only aids in lifting stubborn dirt but also protects the surface from scratches.
Microfiber mops are excellent for capturing dust and debris. For vinyl, a flat mop can provide a more thorough clean with less risk of puddling. Always follow up with a damp mop to remove any soap residue that could attract more dirt.
Utilising these tailored techniques ensures that floors remain both pristine and undamaged.
5. Pay Attention to Tough Spots
Addressing tough spots promptly with the right cleaning solution and technique ensures that dirt and grime do not accumulate over time, which can lead to more significant issues and harder-to-remove stains. The best approach involves understanding which surfaces require special attention and tailoring your cleaning methods accordingly.
This helps maintain a clean environment and preserves the integrity of household surfaces.
Common tough spots often include:
- Kitchen grease on hobs and splashbacks
- Bathroom mould in showers and around sinks
- Spills on carpets and upholstery
By employing effective strategies, such as using targeted cleaning agents and regularly inspecting high-traffic areas, households can avoid the long-term effects of neglected stains. Consider using a Swiffer for quick and efficient cleaning.
It’s essential to encourage everyone in the home to address spills immediately, thereby cultivating a proactive cleaning culture that minimises labour in the long run.
For professional cleaning services or expert advice on keeping your floors spotless, TEKA Cleaning is here to help. Our team provides high-quality cleaning solutions tailored to your needs, ensuring that your floors stay in top condition with minimal effort. Whether you’re looking for regular maintenance or a deep clean, trust TEKA to deliver exceptional results every time. Contact us today for more information!
Read also: