Water stains on wood flooring and wooden furniture can be a significant concern, detracting from the aesthetic appeal of furniture and hardwood flooring. Understanding the underlying causes and how to remove water stains from wood is essential for effective stain prevention and wood restoration.
This article presents practical recommendations for maintaining the integrity of wood surfaces, outlines effective methods for removing both fresh and older water stains, and offers strategies for restoring the original wood finish. By following these guidelines, individuals can remove stains and achieve beautifully maintained wood surfaces and home décor.
The Causes of Water Stains on Wood
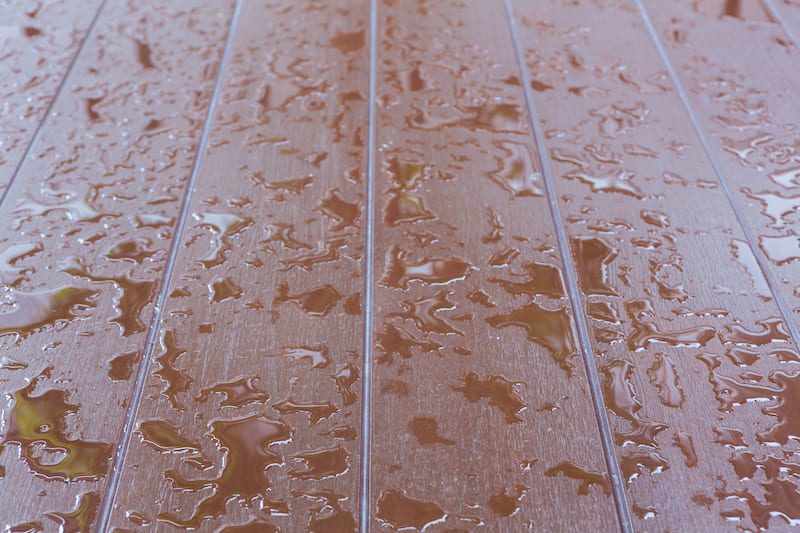
Water stains on wood can arise from various factors, including spills, humidity, and inadequate maintenance, resulting in surface discolouration that detracts from the aesthetic appeal of wooden furniture and flooring.
Recognising the underlying causes of these stains is crucial for effective stain removal and furniture maintenance. For example, light stains may be attributed to condensation or minor spills, whereas dark water stains may suggest more significant water damage due to prolonged exposure.
Additionally, different types of wood products and finishes can respond differently to moisture, which can influence the treatment process.
Preventing Water Stains on Wood
Preventing water stains on wood is essential for preserving the beauty and durability of wooden furniture and wood finishes in residential décor. Implementing effective measures, such as the use of coasters and place mats, can substantially mitigate the risk of spills resulting in surface stains.
Furthermore, applying protective sealants to wooden surfaces serves as a barrier against moisture. Regular maintenance of furniture with natural cleaners, such as mineral oil, olive oil, and other DIY solutions, can also enhance wood protection, ensuring that wooden pieces retain their pristine condition.
1. Using Coasters and Placemats
Utilising coasters and placemats is an effective method for preventing water stains on wooden surfaces, particularly in areas where food and beverages are frequently consumed. This practice ensures that the aesthetic appeal of furniture is preserved over time.
These essential accessories serve a dual purpose; they not only protect wooden surfaces but also enhance the overall appearance of a room. By incorporating coasters and placemats into one’s home, individuals can achieve both functionality and style, allowing for a seamless integration with existing décor.
- Materials: Coasters and placemats are available in a variety of materials, including cork, bamboo, ceramic, and silicone, each offering unique advantages. For example, cork is biodegradable and water-resistant, while bamboo contributes a rustic charm. Ceramic options often feature intricate designs, making them a favoured choice for decorative purposes.
- Designs: The range of designs available extends from minimalist to ornate, allowing for alignment with various interior styles. One may choose neutral tones to foster a serene environment or select vibrant patterns to introduce a lively splash of colour.
Ultimately, the selection of appropriate coasters and placemats not only protects furniture but also reflects individual taste, effectively bridging the gap between protection and aesthetic appeal.
2. Wiping Up Spills Immediately
Promptly addressing spills is essential in preventing water stains on wood, as immediate action can limit the moisture’s absorption into the wood grain, which is crucial for furniture maintenance.
When a spill occurs, the first step is to use a clean, dry microfibre cloth or microfiber cloth to absorb as much liquid as possible without rubbing, as this may cause additional damage to antique furniture. Microfibre cloths are particularly effective due to their fine fibres, which efficiently trap and hold liquid. It is crucial to gently blot the affected area, avoiding excessive pressure that could push moisture deeper into the surface.
Once the majority of the spill has been absorbed, it may be beneficial to apply a specially formulated wood cleaner or a DIY solution created from common household ingredients, such as vinegar and olive oil, or a vinegar solution with baking soda. This approach not only assists in removing residual moisture but also enhances the shine of wood surfaces.
Common household supplies for cleanup:
- White vinegar
- Olive oil
- Washing-up liquid
- Water
It is important to remember that swift action is vital in preventing irreversible stains. Delaying the cleanup process can lead to deep moisture penetration, making it significantly more challenging to restore the wood’s original appearance. Consulting cleaning experts may be advisable for professional help.
3. Using Protective Sealants and Furniture Polish
Applying protective sealants and furniture polish is an essential practice for preserving wood surfaces and preventing water stains.
These sealants are available in various formulations, each designed to complement different wood finishes while maintaining the natural beauty of the wood. They provide durable protection against moisture and potential damage. For instance, oil-based sealants are particularly effective at enhancing the richness of the wood grain, whereas water-based options offer advantages such as quick drying times and low odour during application.
Selecting the appropriate sealant is contingent upon the specific finish of the furniture and its intended use.
- Application Process: Commence by thoroughly cleaning the surface to eliminate any dust or debris. Apply the selected sealant using a brush or cloth, ensuring to follow the wood grain for uniform coverage.
- Reapplication: It is prudent to regularly assess the condition of the sealant, as factors such as sunlight exposure and humidity can influence its durability. Generally, reapplication is recommended every 1 to 3 years to ensure optimal protection.
By following these guidelines, wooden furniture can maintain its beauty and functionality over extended periods, significantly reducing the risk of water damage.
How to Remove Fresh Water Stains from Wood
How to get water stains out of wood? Removing freshwater stains from wood is crucial for preserving the integrity of the wood surfaces and restoring their natural beauty. Timely intervention can facilitate effective cleaning and prevent the stains from becoming permanent.
One of the most recommended methods involves gently blotting the stain with a microfibre cloth, which absorbs the moisture without compromising the wood grain. Furthermore, using a hairdryer on a low setting can effectively evaporate any residual moisture, thereby aiding in the stain removal process and ensuring that the wood finish remains intact.
1. Blotting the Stain
Blotting the stain is one of the initial and most effective steps to undertake when addressing fresh water stains on wood surfaces. This technique significantly mitigates the impact of the stain, thereby enhancing the wood’s potential for recovery and preserving its natural aesthetic.
When implementing this method, it is essential to utilize a clean microfiber cloth. Microfiber is particularly effective in absorbing moisture without leaving lint or causing additional damage to the surface. The following outlines the proper technique for blotting:
- Gently press the cloth onto the stain without rubbing, as friction may cause the stain to penetrate deeper into the wood.
- Work from the outer edges of the stain towards the centre to prevent the expansion of the affected area.
- Regularly inspect the cloth to ensure it remains clean; replace it immediately upon showing signs of saturation.
By employing this blotting technique, the risk of further damage is minimised, and the surface is better prepared for any necessary subsequent cleaning or refinishing.
2. Using a Hairdryer for Stain Treatment
Utilising a hairdryer can serve as an effective method for stain treatment and removing moisture from fresh water stains on wood, provided it is employed correctly. It is essential to apply the appropriate techniques throughout the process to ensure the preservation of the wood while effectively eliminating unsightly marks.
To initiate the process, direct the hairdryer at the stain while setting it to a low or medium heat setting. Maintain a distance of at least 15 to 30 centimetres from the wood surface to avoid overheating the area. It is advisable to move the dryer in a circular motion to evenly distribute the heat, which facilitates the evaporation of moisture without causing further damage.
- Begin by assessing the area to ensure it is dry and clean, using household supplies if necessary.
- Test the hairdryer on a concealed section of the wood initially to observe how it reacts to heat.
- If the stain begins to diminish, gradually increase the heat while carefully monitoring for any signs of surface discoloration or water damage.
Once the stain appears to have been removed, allow the wood to cool before any tactile contact or the application of additional treatments. After this heat treatment, it may be prudent to apply a wood conditioner, mineral oil, or polish to restore its natural lustre and protect against future stains. Regular maintenance, including cleaning solutions, will enhance the longevity of the wood and preserve its beauty. Consider employing DIY solutions for furniture cleaning to keep your wooden surfaces in excellent condition.
3. Applying Mayonnaise or Petroleum Jelly
The application of mayonnaise, vinegar and baking soda, or petroleum jelly is an unconventional yet effective technique for removing freshwater stains from wooden surfaces.
This method may appear surprising; however, it utilises the unique properties of these substances to penetrate and lift the stain without causing damage to the underlying finish. The fats and oils contained in these household items work to dissolve the water molecules that are trapped within the wood, loosening their adherence and facilitating the restoration of the surface.
To effectively employ this method, please follow these steps:
- Apply a small amount of either mayonnaise or petroleum jelly directly onto the stained area.
- Gently massage the substance into the stain using a soft cloth, ensuring even coverage.
- Allow the preparation to sit for a duration of at least 30 minutes to 1 hour, which is essential for the restorer to take effect. This method is one of many household remedies that can be utilised for surface cleaning.
- After the designated time, wipe away the excess with a clean, dry cloth and evaluate the results.
If the stain persists, it is advisable to repeat the process while avoiding harsh scrubbing to protect the wood finish. Finally, it is recommended to conclude the procedure with a light wood polish to revitalise the area once the stain has been successfully removed. Consider using mineral spirits as an alternative to ensure a thorough cleaning.
How to Remove Water Stains from Wood
When dealing with old stains, cleaning tips from experts at Direct Wood Flooring can provide valuable guidance.
Eliminating old water stains from wood can be more complex than addressing fresh stains; however, effective methods such as sanding, wood bleach application, and the use of specialised stain removers can significantly enhance the appearance of wooden furniture.
Old stains typically penetrate deeper into the wood finish, necessitating a more intensive approach to achieve successful stain removal while preserving the integrity of wooden surfaces. For instance, sanding can efficiently eliminate the top layer of the stain, while wood bleach can effectively lighten dark marks resulting from prolonged exposure to water.
1. Sanding the Stain
Note that while sanding is effective, it is not recommended for laminate or vinyl tiles as these surfaces require different care.
Sanding the stain is a widely recognised technique for the removal of old water stains from wood surfaces, as it effectively prepares the surface for subsequent treatment.
To achieve optimal results, it is important to understand the various types of sandpaper available, which range from coarse to fine grits. Initially utilising medium-grit sandpaper facilitates the effective removal of the stain, while fine-grit sandpaper is used to smooth the surface for a flawless finish. When sanding, it is crucial to maintain a consistent technique; employing sweeping motions and applying even pressure ensures that the wood is sanded uniformly. For antiques, a gentler approach may be required to preserve delicate finishes.
To determine when sufficient material has been removed, it is advisable to frequently check the surface for uniformity and to assess its texture by hand.
- Avoid applying excessive pressure, as this may gouge the wood.
- Mask surrounding areas to prevent unintentional damage.
It is essential to keep in mind that the objective is to achieve a smooth surface, prepared for any subsequent treatment, whether that involves applying a fresh coat of stain or a protective finish.
2. Using a Wood Bleach
Using chlorine bleach can effectively lighten old water stains on wood, thereby restoring the aesthetic appeal of wooden products.
When applying wood bleach, it is essential to adhere to proper procedures to ensure both safety and effectiveness. The first step is to select the appropriate type of bleach, which generally falls into two categories:
- Chlorine-based bleaches
- Oxygen-based bleaches
Chlorine-based bleaches, which contain chlorine, are typically more potent and suitable for treating stubborn stains, while oxygen-based bleaches are gentler and ideal for delicate finishes.
Before commencing the bleaching process, it is crucial to wear protective gear, including gloves, goggles, and a mask, to protect against harmful fumes. Additionally, ensure that the workspace is well-ventilated to minimise health risks.
To apply the bleach, use a brush or cloth to spread it evenly across the surface. It is important to monitor the wood frequently, as the duration required for bleaching may vary depending on the type of wood.
Once the desired level of lightness is achieved, rinse the wood thoroughly with water to neutralise the bleach, and allow it to dry completely. It is advisable to test some wood bleach products on a small, inconspicuous area first, as they may alter the wood’s natural grain or colour, potentially leading to undesirable outcomes.
3. Applying a Stain Remover
The application of a specialised stain remover can effectively eliminate old water stains from wooden surfaces, thereby rejuvenating the appearance of furniture.
In the endeavour to restore the beauty of wooden surfaces, it is essential to understand the importance of selecting the appropriate stain remover based on the specific type of stain encountered. Different wood finishes react uniquely to various products, and identifying the particular finish will assist in choosing the most suitable stain remover.
For example, oil-based stains typically necessitate a remover specifically formulated for oils, whereas water-based solutions are generally more effective on finishes treated with lacquers.
When applying the stain remover, it is advisable to utilise a clean, soft cloth to gently dab the affected area, allowing the remover to penetrate the stain without damaging the surrounding wood. After treatment, it is important to rinse the area with a damp cloth to eliminate any residue, followed by thorough drying.
Regular maintenance, including the periodic application of a protective wood polish, can significantly enhance the efficacy of the stain removal process and help prevent future stains.
How to Restore the Wood’s Finish
Proper restoration not only enhances the natural grain of the wood but also offers added protection against potential future stains and damage, thereby ensuring that the furniture continues to be a beautiful element of home décor. Here’s the tips.
1. Using a Wood Polish
The application of wood polish is a fundamental step in the restoration process, aimed at enhancing the shine and protecting the wood surface. This practice ensures that both aesthetics and longevity are prioritized in the care of furniture.
Various types of wood polish are available on the market, each designed to meet specific needs and accommodate different wood types. The most common varieties include:
- Wax Polish: Ideal for occasional use, this type provides a natural sheen while nourishing the wood.
- Oil-based Polish: This option penetrates the wood, offering deeper nourishment and a more robust shine, making it particularly effective for high-use items.
- Acrylic or Synthetic Polish: Suitable for modern finishes, this polish provides a protective coating that resists moisture and dust.
When applying wood polish, it is important to utilise specific techniques, such as:
- Wiping on a thin layer using a soft cloth.
- Employing circular motions to ensure even distribution.
To achieve optimal results, it is advisable to integrate polishing with other restoration methods, such as sanding or buffing. Regular application, approximately every few months, can significantly enhance both the appearance and durability of wood products.
2. Applying a Stain or Varnish
Applying a stain or varnish is a crucial aspect of restoring a wood finish and ensuring protection against moisture and future water stains, enhancing the polish shine of the surface.
Selecting the appropriate product for this task is essential, as it can significantly affect both the appearance and longevity of the wood. Stains are available in various shades to achieve desired effects, while varnishes come in different sheens, such as matt, satin, and gloss. Understanding these options can be especially useful when working with Direct Wood Flooring products. A thorough understanding of the underlying wood type and its unique properties will aid in selecting the most suitable option.
Here are the key steps to follow:
- Preparation is fundamental: Begin by sanding the surface to a smooth finish to enhance adhesion.
- Application technique is vital: Utilise a high-quality brush or cloth to apply even strokes, and it is advisable to work in the direction of the wood grain.
- Allow for appropriate drying times: Adhere to the manufacturer’s guidelines for drying, which typically range from 2 to 8 hours between coats, to prevent clumping or bubbling.
- Consider maintenance: For long-term protection, it is advisable to apply a fresh coat of varnish every few years or as required, and to keep the surface clean using gentle cleaners.
By adhering to these detailed steps, one can achieve a durable and aesthetically pleasing finish while extending the life of the wood, whether it be new furniture or cherished antiques.
3. Buffing the Surface
Buffing the surface represents the final stage in the wood restoration process, playing a crucial role in achieving a polished finish. This step ensures that each piece of furniture or woodwork not only presents an aesthetically pleasing appearance but also provides a smooth tactile experience. The buffing technique can significantly enhance the overall appearance of wood by highlighting the nuances in the grain and colour while adding an extra layer of protection against everyday wear and tear.
In the process of buffing wood surfaces, various techniques and tools may be utilised to attain optimal results. This procedure typically begins with thorough sanding to eliminate imperfections, followed by the careful selection of suitable buffing pads and compounds, such as those used in Direct Wood Flooring projects.
The following are some valuable considerations:
- Tools: Electric buffers or polishers are commonly employed due to their precision and efficiency. For finer detailing, hand-held buffing pads can be particularly effective.
- Products: Buffing compounds, including waxes and oils, not only deliver a brilliant finish but also provide protective properties against pests and stains.
The advantages of buffing extend beyond mere visual enhancement. An effectively buffed surface improves durability, making it resistant to scratches and moisture damage, thus ensuring longevity. This protective measure allows the natural beauty of the wood to be preserved over time, contributing to both functional and aesthetic appeal. Incorporating DIY solutions such as using mineral oil can further protect and enhance wood surfaces.
Precautions and Tips for Removing Water Stains from Wood
Taking appropriate precautions and adhering to expert recommendations can significantly enhance one’s ability to effectively remove water stains from wood, thereby ensuring optimal results from wood cleaning efforts. Success in stain removal is contingent upon a careful approach to addressing these delicate surfaces.
Ahead of initiating the cleaning process, it is essential to recognise that wood is a porous material that can readily absorb liquids and chemicals. To prevent any potential damage during cleaning, one should always begin by:
- Testing any cleaning solutions on a discreet area to assess for any adverse reactions.
- Selecting the appropriate tools, such as soft cloths or gentle scrubbers, to avoid scratching the wood’s surface.
- Following manufacturer guidelines to ensure compatibility with specific wood products.
Experts advise against the use of excessive water, as an abundance of moisture can lead to additional staining or warping. Exercising patience and employing a gentle touch are crucial when addressing persistent watermarks, as hastiness in the process may result in unwanted damage to the finish.
Water stains on wood can be frustrating, but with the right techniques, you can often restore your floors and furniture to their original beauty. Whether you’re using heat, vinegar, baking soda, or professional wood cleaners, acting quickly gives you the best chance of success. However, if the stains are too deep or the wood has been permanently damaged, replacement might be your best option.
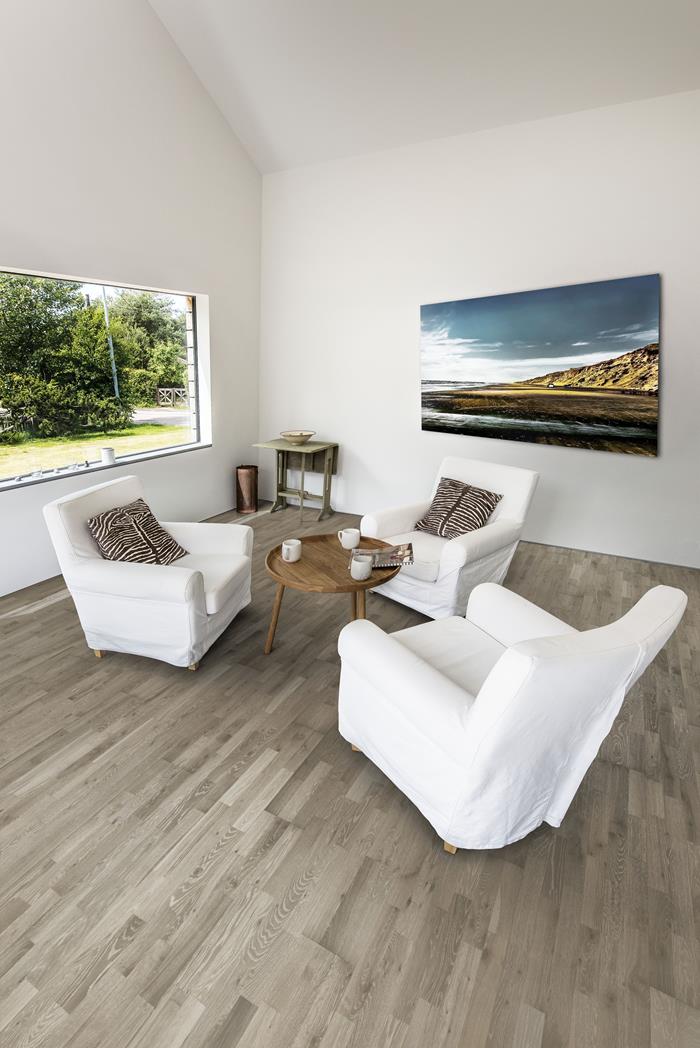
If your wood flooring has seen better days, consider upgrading to a high-quality, durable option from TEKA Flooring. We offer a wide range of premium flooring solutions designed to withstand spills, stains, and everyday wear and tear. Plus, our expert fitting services ensure a flawless installation, giving your home a fresh, elegant look.
Don’t settle for damaged floors, visit TEKA Flooring today and find the perfect engineered wood flooring for your space!
Read also: