Are you considering a home makeover and replacing your old carpet with a more stylish and durable option? Laminate flooring may be the ideal solution. If you are considering this idea, you may be wondering how to replace carpet with laminate flooring.
This article delves into the specifics of laminate flooring, emphasizing its benefits and advantages compared to carpet. It provides a comprehensive overview of the replacement process, including preparation, removal, installation, and maintenance. Whether you are a DIY enthusiast or opting to hire a professional, you will discover how straightforward it can be to transform your space with laminate flooring.
What Is Laminate Flooring?
Laminate flooring is a multi-layer synthetic flooring product, designed to mimic the appearance of natural materials like hardwood floors or stone while offering significant advantages in durability, maintenance, and cost-effectiveness. This type of flooring is often chosen when replacing carpet due to its superior qualities.
Made up of a high-density fibreboard core, a photographic layer that simulates the surface design, and a protective overlay, laminate flooring is a popular choice for homeowners looking to replace carpets and update their living spaces.
The Benefits of Laminate Flooring
The benefits of laminate flooring are numerous, making it a popular choice among homeowners who are undertaking home renovation projects.
From its affordability and ease of installation to its durability against wear and tear, laminate flooring stands out as a practical alternative to traditional flooring options. Advancements in technology have led to the creation of waterproof laminate, which is ideal for areas prone to spills and moisture, such as kitchens and bathrooms. Homeowners appreciate that laminate can easily mimic the look of hardwood or stone without incurring the high costs associated with those materials.
- Scratch resistance ensures that floors maintain their beauty, even in high-traffic areas, making it an ideal choice for homes with children and pets.
- Fading resistance allows for vibrant colours to last without dulling over time.
- Maintenance is a breeze, only requiring regular sweeping and occasional mopping.
These characteristics make laminate flooring an excellent choice for DIY enthusiasts looking to enhance their spaces, particularly when considering flooring options that need to balance aesthetics with durability, ensuring that their investment remains robust and attractive in the long run.
Why Replace Carpet with Laminate Flooring?
Replacing carpet with laminate flooring not only brings a modern touch to your home but it can dramatically enhance the aesthetic appeal and functionality of your home, addressing common issues associated with old carpets, such as stains, odours, and wear due to high foot traffic.
Many homeowners find themselves frustrated with the maintenance required to keep carpets clean and fresh, especially in homes with children and pets.
In contrast, laminate flooring offers a stylish and practical solution that complements various design themes and can be installed in any room, making it a top choice in flooring options during home renovation.
The Drawbacks of Carpet
The drawbacks of old carpets can be significant, especially for homeowners seeking a more practical flooring solution.
Old carpets require frequent and expensive cleaning to maintain their appearance and hygiene, often leading to costly professional services or intensive DIY efforts. Beyond routine cleaning, wear and tear are inevitable over time, with carpets becoming threadbare or frayed in high-footfall areas.
This deterioration not only diminishes aesthetic appeal but also results in increased costs for premature replacement. Carpets can become a breeding ground for allergens such as mould, dust mites, and pet dander, exacerbating respiratory issues for sensitive individuals.
- Regular vacuuming is essential yet often overlooked.
- Stains from everyday life can lead to longer-term damage.
- Homeowners may find themselves trapped in a costly cycle of maintenance.
Consequently, many opt for laminate flooring as a more sustainable alternative, allowing for easier upkeep and improved living conditions.
The Advantages of Laminate Flooring
The advantages of laminate flooring are compelling, making it an attractive choice for those looking to upgrade their homes. Not only does laminate provide a wide array of styles that imitate hardwood and stone, but it also boasts features such as ease of installation, minimal maintenance, and enhanced durability against stains and scratches. Waterproof laminate options allow homeowners to incorporate this versatile flooring in moisture-prone areas, such as kitchens and bathrooms, without fear of damage.
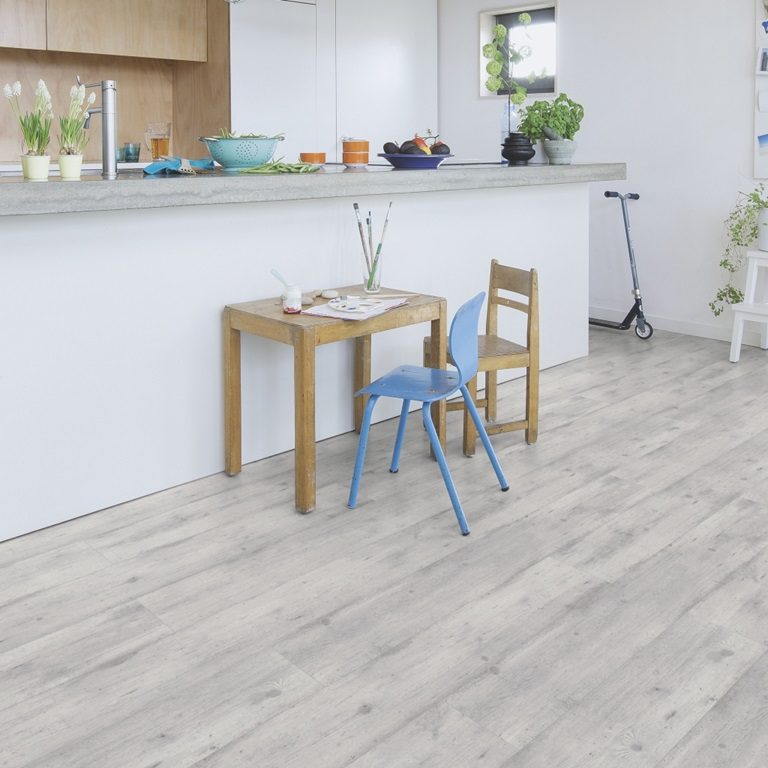
When considering laminate flooring, one finds it particularly beneficial for households with children and pets due to its resistance to wear and tear. The imitative nature of laminate means that families can choose from various designs like rustic oak or sleek walnut, seamlessly enhancing the aesthetics of any room.
- Its cost-effectiveness extends beyond initial purchases, as the durability of laminate reduces the need for frequent replacements and repairs, making it a popular choice in home renovation projects.
- For instance, a busy family environment thrives with easy-to-clean surfaces that repel spills and accidents without hassle.
- In addition, laminate’s quick installation can save valuable time, making it a practical choice for those who wish to minimise disruption during the renovation process.
Ultimately, laminate flooring stands as a smart investment for homeowners desiring style, functionality, and resilience in their living spaces.
How to Replace Carpet with Laminate Flooring
Preparing for the replacement process of your flooring with laminate requires careful planning and the right tools and materials to ensure a successful DIY project. This involves removing old carpets carefully, checking the subfloor condition, and making necessary repairs. Understanding the scope of the project and having a clear plan can make the installation process smoother and more efficient.
The Tools and Materials Needed
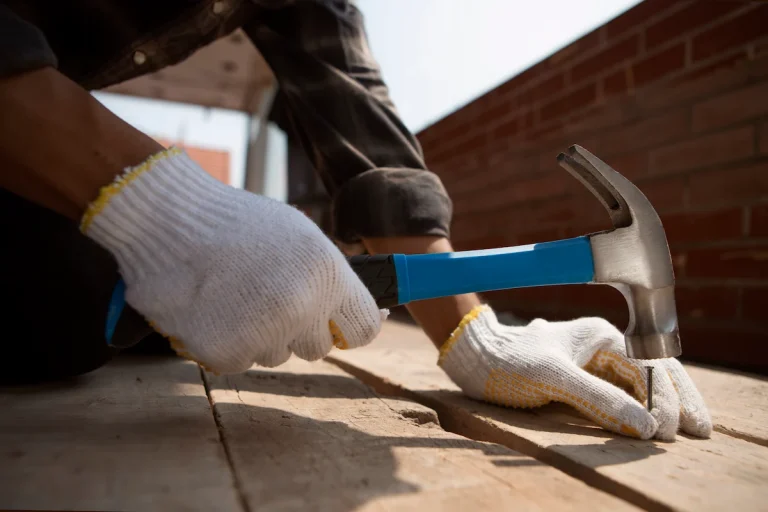
The tools and materials required for installing laminate flooring are essential for achieving a professional finish and ensuring a seamless installation. Key items include laminate planks, an underlay for moisture protection and sound absorption, a utility knife for cutting, and potentially a floor leveler to achieve a flat surface. Having a measuring tape, a hammer, and a tapping block can facilitate the proper installation and alignment of the laminate planks.
To further enhance the installation process, it is advisable to use spacers that maintain expansion gaps around the perimeter of the room, including a baseboard gap. These gaps are vital as they allow the flooring to expand and contract with temperature changes without causing damage.
- Installing laminate flooring also involves using a saw, especially a mitre saw or a jigsaw, for precise cuts around corners and awkward spaces.
- A straightedge or square can help ensure that cuts are straight, which is crucial for overall aesthetics.
- A pry bar can assist in removing old flooring or adjusting the laminate during installation.
By having the right tools and materials at hand, including an angle grinder for precision cuts and a floor leveler for a flat surface, the efficiency and outcome of the installation can be significantly improved, paving the way for a durable and visually appealing flooring solution.
The Area for Laminate Flooring
Accurately measuring the area for laminate flooring is a crucial step in the flooring installation process, as it determines the amount of material needed and helps to avoid costly mistakes. Start by measuring the length and width of the room, factoring in any irregularities like gaps or alcoves that may affect the total area. Once you have the measurements, it is essential to add extra for cutting and waste, especially if your subfloor condition requires level adjustments. Remember to consider the flooring costs involved in purchasing sufficient laminate planks and underlayment.
To ensure precision, calculate the total square metres by multiplying the length by the width of the measured area. If the area includes multiple sections, break them down into rectangles and sum their total square metres for an accurate overview.
Next, allow for additional material—typically around 10% of the total area—to accommodate any cutting or mistakes during installation. This precaution helps avoid delays and ensures a uniform appearance. However, the exact amount of extra material you’ll need can vary depending on a few factors.
Assess the need for any subfloor preparation. If the subfloor has noticeable imperfections, such as unevenness or damage, consider levelling it with appropriate materials before laying down the laminate. This step is vital for achieving a smooth and long-lasting installation.
Removing Carpet and Preparing the Subfloor
Removing carpet and preparing the subfloor is a critical phase in the flooring installation process that lays the foundation for your new laminate flooring. Begin by carefully removing the old carpet and carpet pad using a utility knife or box cutter to cut the carpet into manageable sections, often seen as a rewarding DIY project.
Ensure that the subfloor condition is assessed and cleaned thoroughly, as any debris, tack strips, or adhesives left behind can compromise the integrity of the laminate installation.
How to Properly Remove the Carpet
To properly remove the carpet, start by using a utility knife to cut the carpet into strips, making it easier to manage during the removal process. Carefully lift each strip away from the floor, taking special care to detach the carpet underlay underneath and remove any tack strips that may be securing the edges. This method minimises damage to the subfloor and prepares the area effectively for the new laminate flooring.
After cutting the strips, it’s best to work in smaller sections to maintain control over the process. Begin at a corner of the room and pull the carpet towards you, easing it away from any staples or adhesive. If you encounter stubborn areas, a heat gun can soften the adhesive, making it easier to peel off the carpet.
Next, handle the carpet underlay. It’s often glued down, requiring extra attention. Use a floor scraper to gently pry up the underlay; make sure to proceed slowly to prevent damaging the surface below. If there are any tack strips attached to the floor, remove them carefully using a pry bar, ensuring that you pull out the nails as they can pose safety hazards.
By following these steps methodically, the area will be clean, safe, and properly prepared for the laminate installation.
How to Clean and Prepare the Subfloor for Laminate Flooring
Cleaning and preparing the subfloor for laminate flooring is vital to ensure a flawless installation and longevity of the new flooring. Start by thoroughly sweeping and vacuuming the entire area to remove dust, debris, or remnants from the old carpet. Next, inspect the subfloor for any necessary repairs or levelling, as an uneven surface can lead to issues with the laminate planks fitting together properly during installation.
To begin, it is important to identify any moisture issues that could compromise the integrity of the subfloor.
- After cleaning, utilise a moisture meter to assess the moisture levels.
- In case of excessive moisture, consider employing a dehumidifier or moisture barrier.
Ensure that any cracks or imperfections are adequately repaired. This may involve filling gaps with an appropriate compound or plywood patches for more significant damage. A well-prepared subfloor should not only be clean but also dry and level, which sets the foundation for a successful laminate flooring installation that prevents future complications and enhances aesthetic appeal.
Installing the Laminate Flooring
Installing laminate flooring involves several steps that require precision and attention to detail to ensure a beautiful and durable finish.
Begin by laying down the underlay, which provides cushioning and moisture protection, before carefully arranging the laminate boards in your desired pattern. It’s essential to follow the manufacturer’s instructions for installation, ensuring that the joints between boards are properly aligned to achieve a seamless look.
How to Lay Out and Cut the Laminate Flooring
Laying out and cutting laminate flooring requires careful planning and precision to ensure each plank fits perfectly within your designated space. This meticulous approach ultimately contributes to a stunning and cohesive look in your room, making the effort worthwhile.
Start by arranging the laminate planks in a layout that appeals to your aesthetic preferences, paying close attention to the direction of the planks, which can influence the visual perception of the room. Use a utility knife or angle grinder to cut the planks to size, ensuring that the ends fit snugly against walls and other fixtures.
Before you begin, gather all necessary tools such as a straight edge, measuring tape, and saw to ensure a smooth process.
- Step 1: Measure the area carefully, as accurate dimensions are crucial for a perfect fit.
- Step 2: Lay out the planks in the room, leaving space for expansion gaps.
- Step 3: When measuring the length for cuts, always subtract the required expansion allowance from your total measurement.
- Step 4: Align your cuts using a straight edge to maintain uniformity across each plank.
- Step 5: Frequently check the alignment and tightness of your planks as you proceed, ensuring a seamless design throughout the space.
How to Install the Laminate Flooring
To install laminate flooring successfully, begin by placing the first row of laminate planks along the longest wall, ensuring they are aligned correctly and leaving the necessary expansion gap. Continue installing subsequent rows, using a tapping block to secure the planks together without damaging the edges, and maintain a staggered pattern to enhance the floor’s visual appeal. It is crucial to follow the manufacturer’s instructions throughout the process to ensure the durability and aesthetic quality of your newly installed floor.
Plus the initial steps, pay close attention to the alignment of the planks, as even a slight misalignment can affect the overall appearance of the floor. As you move through the installation, consider the following tips to help with installing underlayment:
- Use spacers to help maintain the necessary expansion gaps around the perimeter of the room, avoiding future buckling.
- Inspect each plank’s end before locking them together, looking out for any damage that might affect the quality.
- If you encounter stubborn planks that won’t engage properly, try adjusting the angle slightly before applying the tapping block more firmly.
By implementing these strategies, you can troubleshoot issues efficiently, ensuring a long-lasting and attractive finish for your laminate flooring project.
Finishing Touches and Maintenance
Finishing touches and maintenance are crucial to preserving the beauty and functionality of your laminate flooring after installation. Install skirting boards to cover the expansion gaps around the perimeter of the room and create a polished look, while also considering the use of transition strips in doorways to provide a seamless connection between different flooring types.
Regular maintenance, including sweeping and occasional damp mopping, will help maintain the integrity of the laminate and prolong its lifespan.
How to Add Finishing Touches
Adding finishing touches to your laminate flooring installation not only enhances the aesthetics of the room but also provides functional benefits. Start by installing skirting boards around the perimeter of the room to cover expansion gaps, ensuring a clean transition between the wall and the floor. Consider the use of decorative trim or transition strips in doorways to create a cohesive look and further protect your laminate flooring from wear and tear.
To truly elevate the overall appearance, incorporating design elements that harmonise with your existing decor is essential. For instance, selecting skirting boards that match or complement the colour of your laminate can tie the room together seamlessly. You could explore different styles ranging from modern to traditional to find the perfect fit for your space.
- Consider using rounded or angular trims for a stylish edge.
- Transition strips should be chosen not only for functionality but also for their aesthetic appeal, with options available in metals, wood, or vinyl, aligning with your theme.
- Ensure that any decorative elements you select maintain the integrity of the flooring, adding elegance without compromising durability.
How to Maintain and Care for Laminate Flooring
To maintain and care for laminate flooring effectively, it is essential to adopt a regular cleaning routine that prevents dirt and grime from accumulating. Start by sweeping or vacuuming the surface to remove loose debris, followed by damp mopping with a non-abrasive cleaner specifically formulated for laminate. Avoid using excessive moisture, as it can warp the laminate; instead, focus on maintaining dryness to prolong the longevity of your flooring.
Plus these initial steps, homeowners should be aware of the importance of regular maintenance techniques that will further enhance the flooring’s durability and appearance. For instance, using area rugs in high-traffic areas can help prevent scratches and scuffs. Ensure that any furniture placed on laminate floors has felt pads attached to the legs, which can also minimise damage over time.
- Tip 1: Conduct a thorough clean at least once a week to maintain a spotless environment.
- Tip 2: When addressing scratches, consider using a laminate repair kit that matches the floor’s colour to seamlessly blend repairs.
- Tip 3: Regularly check for water damage or loose seams, as early detection can prevent further complications.
By establishing these practices, the integrity of laminate flooring can be preserved, allowing it to remain both visually appealing and structurally sound for years to come. This can be a rewarding DIY project for homeowners looking to enhance their living spaces.
Laminate flooring offers a perfect blend of elegance, durability, and affordability, making it an ideal choice for both homes and businesses. At TEKA Flooring, we provide premium laminate flooring designed for lasting performance. Our collection ensures exceptional quality and a stunning finish you can rely on.
Our team of experts will help you find the perfect laminate style for your needs and ensure a professional installation for impeccable results. Transform your space with TEKA Flooring and experience unmatched quality and service.
Read also:


