Wood flooring is a popular choice for adding warmth and beauty to a home. From solid wood to engineered, laminate, and vinyl options, there are a variety of types to choose from. Before diving into the wood flooring installation process, it is important to prepare well by measuring, customising the wood, and preparing the subfloor. In this article, we will discuss the tools and materials needed, as well as provide complete wood flooring installation guidelines. We will cover maintenance tips, common mistakes to avoid, and more. So, let’s explore the steps to install wood flooring that can help enhance your space!
Key Takeaways:
- Proper preparation is key for a successful wood flooring installation. This includes measuring and acclimating the flooring, as well as preparing the subfloor.
- Choosing the right type of wood flooring is important, whether it’s solid, engineered, laminate, or vinyl. Each type has its own unique qualities and installation methods.
- Maintenance and care are essential for keeping wood flooring looking beautiful. This includes regular cleaning and preventative measures to avoid damage.
What Is Wood Flooring?
Wood flooring, also known as hardwood flooring, refers to any flooring made from wood materials such as solid wood or engineered wood.
Wood flooring installation involves laying down wooden boards to create a stunning and timeless foundation for any space. Each plank is carefully crafted from natural wood, offering a unique charm that can’t be replicated with synthetic materials. The durability of wood flooring is unmatched, with solid wood floors lasting for generations when properly maintained. Its natural composition not only adds warmth to a room but also improves indoor air quality by reducing allergens. Wooden flooring installation enhances the aesthetic appeal of a home, elevating its ambience and increasing property value.
Types of Wood Flooring
Wood flooring comes in various types, including solid wood flooring, engineered wood flooring, laminate wood flooring, and vinyl wood flooring, each offering unique characteristics and benefits.
a. Solid Wood Flooring
Solid wood flooring is crafted from a single piece of hardwood, providing a timeless and authentic look to any space.
One of the outstanding characteristics of solid wood flooring is its exceptional durability. Hardwood floors are known for their ability to withstand heavy foot traffic and last for many years, making them a wise investment for any home. Solid wood flooring offers the advantage of multiple refinishing options. With proper care and maintenance, hardwood floors can be sanded and refinished several times, allowing you to refresh the look of your flooring over time.
b. Engineered Wood Flooring
Engineered wood flooring consists of multiple layers of wood veneer bonded together, offering enhanced stability and resistance to moisture compared to solid wood flooring.
The construction of engineered wood flooring involves a top layer of real wood that provides an authentic hardwood appearance. This outer layer is backed by several layers of high-density fibreboard or plywood, making it more dimensionally stable than traditional solid wood planks.
A notable advantage of engineered wood flooring is its ability to be installed in moisture-prone areas such as basements and kitchens, where solid hardwood might be at risk of warping or damage. The versatile nature of this flooring option allows for various installation methods, including floating, glue-down, or nail-down, catering to different preferences and needs.
See product: Ted Todd Project Tattenhall – Narrow Herringbone (450mm x 90mm)
c. Laminate Wood Flooring
Laminate wood flooring is a synthetic flooring product that replicates the look of hardwood with a printed layer under a clear protective coating.
This type of flooring is highly versatile and can be installed in various rooms of the house, including living rooms, bedrooms, kitchens, and even basements. One of the key advantages of laminate wood flooring is its affordability compared to traditional hardwood flooring, making it a budget-friendly option for homeowners looking to achieve a high-end look without breaking the bank.
Laminate flooring is known for its easy maintenance as it is resistant to stains, scratches, and fading, making it a practical choice for busy households with pets or young children. The visual appeal of laminate wood flooring is another standout feature, offering a wide range of designs and finishes that closely mimic the natural beauty of real wood.
d. Vinyl Wood Flooring
Vinyl wood flooring combines the aesthetic of wood with the durability of vinyl, providing a cost-effective and water-resistant flooring solution.
This type of flooring is known for its versatility, making it suitable for any room in the house, including moisture-prone areas like bathrooms and kitchens. Installation of vinyl wood flooring is relatively easy, as it can be installed over various subfloors such as concrete, plywood, or existing vinyl flooring. Maintenance is a breeze with vinyl wood flooring, requiring only regular sweeping and occasional mopping to keep it looking new.
Preparing for Wood Flooring Installation
Proper preparation is essential before wood flooring installation to ensure a successful and long-lasting result.
- One of the key steps in preparing for wood flooring installation is to measure the materials accurately. Taking precise measurements ensures that you have the right amount of wood and other supplies for the project.
- It is crucial to acclimatise the wood to the environment where it will be installed. This process helps the wood adjust to the temperature and humidity levels of the space, reducing the risk of warping or buckling.
- Another important aspect of preparation is preparing the subfloor. This involves ensuring that the subfloor is clean, level, and free of any debris or imperfections that could affect the installation. Properly preparing the subfloor provides a stable base for the wood flooring, allowing it to lie flat and securely.
a. Measuring and Ordering Materials
Accurate measurement and ordering of materials are crucial steps in preparing for wood flooring installation to avoid unnecessary delays or shortages.
Ensuring precise measurements of the floor area and carefully calculating the required materials not only saves time and money but also guarantees a seamless installation process. Proper planning is essential to estimate quantities of wood flooring, underlay, adhesive, and trim accurately, reducing the risk of running out of supplies mid-project. By adhering to detailed material ordering procedures, such as calculating for waste and considering plank orientation for visual appeal, homeowners and contractors can ensure a successful and efficient wood flooring installation.
b. Acclimating the Wood Flooring
Allowing the wood flooring to acclimatise to the room’s temperature and humidity levels is essential to prevent issues such as warping or buckling post-installation.
During this process, the wood flooring adjusts to the environment of the room, aligning its moisture content with the surrounding conditions. This gradual acclimatisation helps minimise the risk of excessive expansion or contraction after installation.
By giving the wood flooring time to adapt, you enhance its stability and performance over time, ensuring a longer lifespan for your flooring investment. Proper acclimatisation is particularly crucial with solid hardwood floors, as they are more sensitive to fluctuations in moisture levels.
c. Preparing the Subfloor
The subfloor must be clean, level, and dry before wood flooring installation to ensure a smooth and durable final result.
Properly preparing the subfloor is crucial in maximising the longevity and appearance of your wood flooring. Begin by thoroughly inspecting the subfloor for any moisture issues to prevent future damage. Use a moisture meter to check the moisture content and address any high levels before proceeding.
Next, address any uneven areas by employing self-levelling compounds or shims to create a flat surface. Ensure that the subfloor is free of debris, dirt, and grease by thoroughly cleaning and sweeping the area. Taking these necessary steps will set the foundation for a successful wood flooring installation.
Tools and Materials Needed for Wood Flooring Installation
Having the right tools and materials is essential for a successful wood flooring installation project.
When embarking on a wood flooring installation project, there are several key tools and materials that you will need to gather. You will require a good set of basic hand tools such as a hammer, tape measure, chalk line, and handsaw for precise cutting. Power tools like a flooring nailer, jigsaw, and circular saw are essential for efficiency.
In terms of materials, don’t forget the underlayment, which acts as a moisture barrier and noise reducer. The wood flooring itself, whether solid hardwood or engineered wood, is, of course, the star of the show. And let’s not overlook essential finishing materials like wood glue, sandpaper, and finish products to protect and enhance the wood.
a. Tools
Common tools used for wood flooring installation include a tape measure, a circular saw, a rubber mallet, and a flooring nailer.
These tools play a vital role in ensuring a successful wood flooring installation process. The tape measure is essential for accurate measurement of the room dimensions and proper planning of the layout. A circular saw is crucial for cutting the wood planks to fit the space precisely, ensuring a seamless finish.
The rubber mallet is critical for gently tapping the planks together without causing damage, while the flooring nailer simplifies the process of securing the planks in place swiftly and securely.
b. Materials
Essential materials for wood flooring installation include wood flooring planks, underlayment, adhesive, and transition strips.
Wood flooring planks serve as the base structure of the flooring, providing the aesthetic appeal and foundation for the overall look. Underlayment is crucial for moisture protection and sound insulation, ensuring a comfortable environment. Adhesive plays a critical role in securing the planks in place, creating a lasting bond between the flooring and the subfloor. Transition strips, on the other hand, offer a seamless finish between different flooring surfaces, enhancing both the visual appeal and safety of the installation.
Step-by-Step Guide for Wood Flooring Installation
To know how to lay wood flooring, of course there is a step by step that must also be understood and followed.
Following a step-by-step guide can help simplify the wood flooring installation process and ensure a professional finish.
First and foremost, it’s essential to prepare the subfloor by ensuring it is clean, level and dry to promote strong adhesion of the new flooring material.
Next, acclimatise your wood planks in the installation room for at least 48 hours to avoid expansion or contraction post-installation.
Then, determine the layout pattern you want for your flooring, whether it be a classic herringbone or traditional parallel planks. Remember to leave a 1/2-inch expansion gap around the perimeter of the room to accommodate natural fluctuations in wood due to humidity changes.
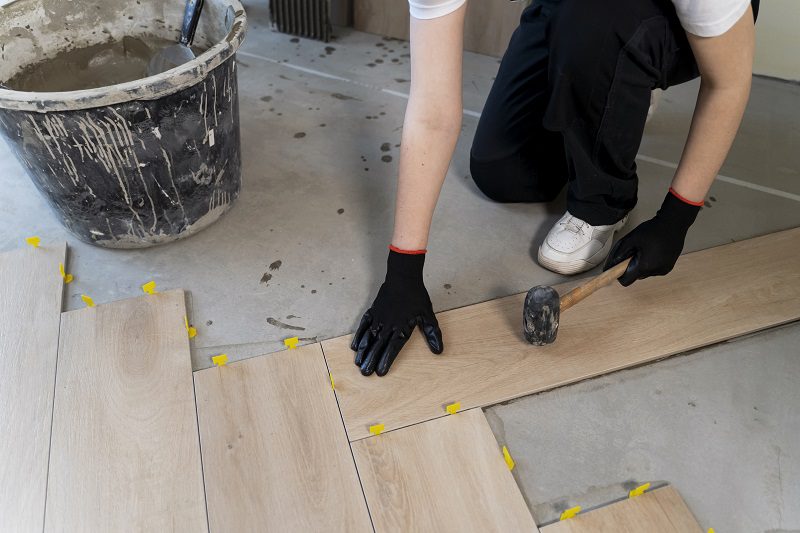
Proceed by starting the installation from the longest, straightest wall, working row by row, ensuring each plank is snugly connected. Utilise a tapping block and a rubber mallet to gently secure the planks in place without causing damage.
a. Preparing the First Row
The initial step in wood flooring installation involves preparing the first row of planks to establish a solid foundation for the rest of the floor.
When beginning the process, it’s crucial to carefully measure the room to ensure that the first row is aligned correctly. This involves using a chalk line to mark the starting point and maintaining an appropriate expansion gap along the walls to accommodate any potential expansion and contraction of the wood.
- Before laying down the planks, it’s essential to check the subfloor for any irregularities and make necessary adjustments to ensure a level surface.
- Using spacers between the planks and the walls will help maintain consistent spacing and facilitate a smooth finish.
- Ensuring that the first row is straight and even will set the tone for the entire flooring installation process, making subsequent steps much more manageable.
b. Installing the First Row
Carefully installing the first row of wood flooring sets the tone for the entire installation project, ensuring a straight and uniform layout.
One crucial step when installing the first row is ensuring the subfloor is clean, level, and dry to guarantee a solid foundation. It is advisable to use spacers between the flooring and the walls to leave room for expansion. Pay attention to ensuring the ends of the planks are staggered for a more visually appealing result. When interlocking the boards, be mindful of the manufacturer’s guidelines to ensure a secure fit and prevent any gaps or unevenness in the layout.
c. Installing the Remaining Rows
Continuing the installation by laying the remaining rows of wood flooring requires precision and attention to detail to maintain a seamless and professional finish.
As you progress with the installation, it’s crucial to pay close attention to pattern variations to ensure a harmonious look across the floor. This may involve arranging the planks in different sequences or orientations. Cutting techniques play a significant role in fitting the last rows, especially along walls and edges. Precision cuts are essential for a snug fit that complements the overall pattern.
When installing the final rows, alignment strategies become critical. Ensuring the last rows align perfectly with the existing ones creates a polished end result. Techniques such as using spacers and tapping blocks can help maintain proper spacing and alignment.
d. Cutting and Fitting the Last Row
Trimming and fitting the last row of wood flooring may require precise measurements and cuts to ensure a snug and professional appearance along the room’s edges.
When reaching the final stages of a wood flooring installation project, the challenge of cutting and fitting the last row is paramount. Achieving a seamless transition between the last row and the existing flooring can be tricky, especially when dealing with irregular room shapes or corners. To tackle this, skilled installers often resort to innovative techniques such as scribing or using specialised cutting tools to match the contours of the room precisely.
Ensuring that the last row fits snugly without any gaps or overlaps is crucial for a polished finish. This requires meticulous attention to detail and the use of appropriate tools to make accurate cuts that align perfectly with the room’s perimeter. The final touches, such as adding moulding or trim pieces, play a vital role in concealing any imperfections and giving the flooring a professional look.
e. Installing Trim and Finishing Touches
Adding trim and final touches to the wood flooring installation enhances the overall aesthetics and provides a polished look to the completed project.
In terms of trim installation, there are various options to choose from, including skirting boards, cornices, shoe moulding, and quadrants. Each type of moulding can add a different style and flair to the room, complementing the wood flooring perfectly. Transitions play a crucial role in ensuring a seamless flow between different rooms or flooring types. Properly installed transitions not only enhance the visual appeal but also improve the functionality of the space.
Sealing the wood floors after installing trim is vital to protect the surface from moisture, spills, and daily wear and tear. Whether opting for a polyurethane finish, oil-based sealer, or wax treatment, sealing the wood flooring adds durability and longevity to the investment. It also simplifies maintenance, making it easier to clean and preserve the beauty of the floors for years to come.
Should I Hire a Professional to Install Wood Flooring?
Now that you know the step-by-step guide to wood flooring installation, you might consider taking the project yourself, to avoid labour costs associated with hiring a professional installer. Additionally, you might find satisfaction in the sense of accomplishment that comes with completing a home improvement project independently.
While it is possible to install wood flooring yourself, it is highly recommended to hire a professional for the best results. DIY installation requires a certain level of skill and expertise. Improper installation can lead to issues such as uneven floors, gaps between planks, or even damage to the flooring itself. Furthermore, DIY projects often take longer to complete, as you may need to invest time in researching techniques, gathering materials, and troubleshooting problems along the way.
On the other hand, professional installers have the experience, skills, and knowledge to ensure a successful and long-lasting installation. They also have access to specialized tools and equipment that can streamline the installation process and produce superior results. Moreover, you can save valuable time and effort by hiring professional wood floor installation services. Furthermore, many professional installers offer warranties of their workmanship, providing you with added peace of mind.
Therefore, TEKA Flooring is proud to provide flooring fitting services that are carried out by professionals in the field. At TEKA Flooring, we pride ourselves on delivering unrivalled quality, precision and expertise in every project we undertake.
With a team of highly skilled professionals and a commitment to customer satisfaction, we ensure that your flooring installation is not just a service, but an experience. From start to finish, we prioritize attention to detail, reliability, and efficiency, ensuring that your vision for your space becomes a reality. We also provide 24-month fitting guarantee for your peace of mind.
Maintenance and Care for Wood Flooring
Regular maintenance and proper care are essential for preserving the beauty and longevity of wooden flooring.
In terms of cleaning wooden floors, it’s crucial to use a mild detergent mixed with water for routine cleaning. Avoid strong chemicals or excess water, as they can damage the wood. Also, consider placing mats at each entrance to prevent dirt and grit from being tracked onto the floor, which can cause scratches over time.
Intermittent refinishing is recommended to restore the shine and protect the wood. It’s advisable to check for any signs of wear and tear and deal with them promptly to prevent further damage.
a. Cleaning and Maintenance Tips
Routine cleaning practices and maintenance routines help keep wood flooring looking pristine and protected against wear and tear.
Implementing a regular sweeping or vacuuming schedule is crucial to prevent dirt and debris from scratching the wood’s surface. Using a damp mop with a mild wood floor cleaner can effectively remove stubborn stains without damaging the finish. It’s essential to immediately wipe up any spills to prevent moisture from seeping into the wood and causing warping.
Applying a protective coating such as wax or polyurethane can offer an extra layer of defence against scratches and moisture damage. Regularly inspecting the flooring for any signs of damage, such as cracks or discolouration, allows for timely repairs to maintain its longevity and appearance.
b. Preventative Measures
Implementing preventive measures such as using area rugs, furniture pads, and controlled humidity levels can safeguard wood flooring from potential damage and prolong its lifespan.
Further, to protect wood flooring, it’s essential to place furniture pads under heavy items to prevent scratches and dents caused by shifting furniture. Utilising area rugs in high-traffic areas can reduce wear and tear on the wood. Maintaining consistent, controlled humidity levels between 30-50% can prevent the wood from warping or swelling.
Shielding wood flooring from direct sunlight exposure by using curtains or blinds can prevent discolouration and fading. Placing felt pads under furniture legs and regularly cleaning with a soft-bristle broom or vacuuming can minimise scratches and debris accumulation, preserving the wood’s natural beauty.
Common Mistakes to Avoid During Wood Flooring Installation
Avoiding common mistakes during wood flooring installation is crucial to achieving a professional and visually appealing result.
One of the most critical errors to avoid is failing to properly acclimatise the wood to the environment before installation. This can lead to issues such as warping or buckling of the planks over time. Overlooking subfloor preparation can result in uneven surfaces, causing problems with the finished appearance of the floor. Misusing tools, such as not using the correct nail size or angle, can impact the integrity of the installation. It is also important to adhere strictly to the manufacturer’s instructions regarding installation techniques and materials for optimal results. Rushing the installation process can compromise the quality and durability of the wood flooring, so taking the time to do it right is essential.
a. Not Acclimating the Wood Flooring
Failing to acclimatise wood flooring before installation can lead to dimensional changes and installation problems down the line, compromising the overall quality and longevity of the floor.
When wood flooring is not properly acclimatised, it can result in buckling, warping, or gaps appearing between the planks as the wood reacts to the moisture levels in its new environment. These issues can be unsightly, cause tripping hazards, and ultimately necessitate costly repairs or even replacement.
Acclimatisation is crucial as it allows the wood to adjust to the temperature and humidity of the room, minimising the risk of future problems. Taking the time to acclimatise the flooring can save you both time and money in the long run, ensuring a smooth and durable installation.
b. Not Preparing the Subfloor Properly
Inadequate subfloor preparation can result in uneven surfaces, moisture issues, and eventual flooring damage, highlighting the significance of proper subfloor prepping procedures.
One critical aspect of subfloor preparation is installing a moisture barrier to prevent moisture from seeping into the wood flooring, which can cause warping and mould growth.
Levelling the subfloor is essential to ensure a smooth and even surface for the wood flooring installation, avoiding any unsightly bumps or dips that can compromise the integrity of the floors.
Cleanliness plays a crucial role in subfloor preparation as any debris, dust, or dirt left on the subfloor can affect the adhesion of the flooring materials, leading to potential issues in the long run.
c. Not Using the Correct Tools
Using improper or inadequate tools during wood flooring installation can lead to installation errors, material damage, and safety hazards, emphasising the importance of selecting the right tools for the job.
One essential tool for wood flooring projects is a floor nailer, which helps secure the wood planks to the subfloor with precision and efficiency. These nailers come in different types, including manual and pneumatic, offering flexibility based on the project requirements.
Another vital tool is a quality jigsaw, ideal for cutting intricate shapes and curves on the wood planks, ensuring a perfect fit around corners and edges. Safety goggles, gloves, and ear protection are crucial safety considerations to prevent accidents and protect against dust and noise exposure during the installation process.
d. Not Following the Manufacturer’s Instructions
Ignoring or deviating from the manufacturer’s installation guidelines can compromise the performance, warranty, and longevity of the wood flooring, emphasising the necessity of adhering to specified instructions.
Following the manufacturer’s recommendations not only ensures a seamless installation process but also plays a significant role in maximising the durability and visual appeal of the flooring. In addition, sticking to the specified guidelines is crucial for maintaining the product warranty intact, as many manufacturers require strict compliance with installation instructions to uphold warranty coverage.
e. Rushing the Installation Process
Hastening the wood flooring installation process can lead to errors, misalignments, and long-term issues that may require costly repairs, underscoring the importance of patience and precision in installation.
When rushing through the installation, crucial steps like acclimatizing the wood to the environment may be overlooked, leading to potential warping or buckling of the floorboards down the line. Proper planning includes assessing the subfloor for any imperfections and ensuring it is levelled to prevent uneven surfaces. Rushed installations often skip these critical checks, risking uneven flooring and compromising the longevity of the installation.
Investing time in detailed measurements and careful cutting of planks not only ensures a visually appealing outcome but also minimizes the wastage of expensive materials. Quality assurance through meticulous installation techniques, such as staggering the planks and allowing expansion gaps, is vital to a durable and flawless wood flooring project.
These are the complete wood flooring installation guidelines that you can follow. Once again, it’s best to consider using a professional and trusted flooring fitting service to avoid any risks.
If you use flooring fitting services from TEKA Flooring, then you don’t need to worry because there is a 24-month warranty. Furthermore, TEKA Flooring’s team of experts also have a combined experience of more than 30 years, so the quality is guaranteed. Call us today to get a FREE quote on 01733 731 930.
Read also: Solid Wood Vs Engineered Wood: Read This Before You Buy It