If one is considering a stylish and practical flooring solution, Amtico flooring may be an ideal choice. Renowned for its durability, versatility, and aesthetic appeal, Amtico provides a wide array of design options suitable for any space. If you are considering this flooring brand, you may be wondering how to lay Amtico flooring.
This guide encompasses all aspects of Amtico flooring, including its benefits, preparation steps, installation process, and finishing touches. Whether you are a DIY enthusiast or prefer to engage as a professional, this comprehensive guide will assist in ensuring the success of your Amtico flooring project.
What Is Amtico Flooring?
Amtico flooring is a premium luxury vinyl tile (LVT) solution that presents a comprehensive selection of designs, styles, and textures tailored for both residential and commercial environments. Since its establishment in 1990, Amtico has cultivated a reputation for quality and durability, enhancing flooring projects with a distinctive aesthetic appeal.
With a diverse range of options, including the refined Brushed Oak and the sophisticated Signature Collection, Amtico flooring is a preferred choice for homeowners and businesses that prioritise durability along with a touch of vintage elegance.
The Benefits Of Amtico Flooring
Selecting Amtico flooring for residential or commercial environments presents numerous advantages that establish it as an exemplary flooring choice. These benefits encompass its remarkable durability, minimal maintenance needs, and an extensive array of designs that can harmonise with any decor style.
As a brand accredited by the National Institute of Carpet and Floorlayers (NICF), Amtico guarantees high-quality service and products that are built to endure over time. Furthermore, the lifelike wood and stone finishes offer significant aesthetic appeal, while their compatibility with underfloor heating systems contributes to enhanced comfort in various spaces.
1. Durable and Long-lasting
Amtico flooring is esteemed for its durability and long-lasting performance, making it an exceptional choice for both residential and commercial applications. The luxury vinyl tile (LVT) construction of Amtico flooring provides significant resistance to wear and tear, enabling it to endure heavy foot traffic without compromising its aesthetic appeal. This durability is particularly important in high-use areas, ensuring that the flooring retains its visual and functional integrity over time.
The layering process of Amtico flooring consists of a robust backing, a reinforced core, and a durable wear layer, which together create a resilient structure. This design effectively protects against scratches, dents, and stains, which are frequently encountered in environments such as retail establishments and busy restaurants where foot traffic is constant.
When compared to traditional hardwood or ceramic tile options, Amtico’s luxury vinyl tile offers significant advantages in both maintenance and longevity.
- Retail spaces benefit from its resistance to spills and heavy-duty traffic.
- In hospitality settings, it cultivates a welcoming atmosphere that can withstand daily operations.
From luxurious hotels to bustling cafés, careful evaluation of flooring choices is essential in maintaining the standards of these high-profile establishments.
2. Easy to Maintain
One of the notable features of Amtico flooring is its ease of maintenance, which is advantageous for both busy homeowners and commercial property managers. Due to its durable design, routine cleaning requires minimal effort, allowing the floors to be maintained in pristine condition. Regular sweeping and occasional mopping with suitable cleaning solutions are sufficient to preserve the flooring’s appearance and longevity, ensuring it remains an attractive addition to any environment.
To maximise the benefits of Amtico flooring, it is essential to implement comprehensive maintenance practices that emphasise both cleaning and protective measures. Regularly scheduled cleaning routines can effectively prevent dirt and debris from becoming embedded in the surface. The following practices are recommended:
- Use Soft Brushes: When sweeping, utilise a soft-bristled broom to avoid scuff marks.
- Mopping Solutions: Select specialised Amtico cleaning solutions or pH-neutral floor cleaners.
- Spill Management: Promptly address any spills to prevent staining.
- Furniture Protectors: Employ felt pads under furniture legs to avoid scratches.
- Regular Inspections: Periodically assess the flooring for any signs of wear and address them promptly to maintain its aesthetic appeal.
By adhering to these guidelines, one can significantly extend the lifespan of their flooring, ensuring that it retains its aesthetic charm for many years.
3. Wide Range of Designs and Styles
The extensive range of designs and styles available through Amtico flooring constitutes one of its most significant advantages, offering a multitude of possibilities for personalisation in both residential and commercial environments. From the rustic appeal of vintage flooring options to the contemporary elegance of the Signature Collection, Amtico accommodates a wide array of aesthetic preferences. This versatility enables property owners to craft unique spaces that reflect their individual styles and branding objectives.
The remarkable adaptability of Amtico flooring ensures that it can seamlessly integrate into a variety of settings, enhancing not only functionality but also overall visual appeal. Collections such as the Signature Collection, which features intricate designs and exceptional craftsmanship, and the commercial range, which balances durability with aesthetic considerations, allow users to select the ideal style to meet their specific needs.
- Signature Collection: Renowned for its innovative patterns and textures, making it suitable for high-end residential applications.
- Commercial Range: Specifically engineered to endure heavy foot traffic while maintaining an elegant appearance.
This deliberate approach to flooring promotes limitless creativity and cultivates an inviting atmosphere in any environment.
Alternative Floorings to Amtico
Karndean flooring is an excellent alternative to Amtico, offering many of the same benefits in terms of durability, design flexibility, and ease of maintenance, while also catering to a variety of budgets. Known for its high-quality luxury vinyl tile (LVT) products, Karndean provides a vast range of realistic wood and stone effects, giving homeowners and businesses the opportunity to achieve premium aesthetics without the cost or upkeep of natural materials.
Karndean flooring is renowned for its resilience, making it a popular choice for high-traffic areas in both residential and commercial settings. Additionally, the brand offers various collections, such as Knight Tile and Art Select, to suit different design preferences and project requirements.
Karndean also tends to offer a more affordable price without compromising on the quality. Its straightforward installation options and compatibility with underfloor heating systems make it a practical and versatile choice for those seeking an alternative to Amtico.
Whether you’re drawn to Karndean’s affordability, unique designs, or robust performance, it stands as a compelling option for stylish and functional flooring. At Teka Flooring we are certified premium retailers of Karndean Flooring offering the full collection at the best prices. For more information, send us a message, visit our website and get in touch with us!
What Do You Need To Prepare Before Laying Amtico Flooring?
Preparing for the installation of Amtico flooring is an essential step that contributes to a successful outcome, regardless of whether a DIY approach is taken or a professional fitter is employed.
Proper preparation of the subfloor is imperative, as it establishes the foundation for the flooring’s performance and longevity, directly influencing the adhesion and functionality of the tiles within the designated area.
This preparation process entails cleaning, levelling, and, if necessary, repairing the subfloor to create an optimal surface for installation. Additionally, gathering the appropriate tools and materials in advance will facilitate the installation process and improve the overall quality of the finished result.
1. Clean and Level Subfloor
The initial step in preparing to install Amtico flooring involves ensuring that the subfloor is both clean and level, as any imperfections may adversely affect the flooring’s performance and aesthetic appeal. A thorough cleaning process is essential to remove dust, debris, and residues from previous flooring materials, while leveling the surface is critical to achieving a flat and stable base that promotes optimal adhesion. Dedicating time to properly prepare the subfloor will significantly enhance the longevity and functionality of the Amtico flooring.
To commence the process, it is imperative to identify any imperfections on the subfloor. This includes examining the surface for uneven areas, cracks, or patches that may have been previously overlooked. The use of a straight edge or level can aid in accurately pinpointing these deviations.
Upon identification, the following methods should be employed to address any issues:
- Cleaning: Thoroughly sweep the area and utilise a vacuum to effectively remove dust. A damp mop may also be beneficial for eliminating stubborn residues.
- Levelling Compound: In cases of significant low spots, the application of a levelling compound is recommended. This self-levelling material can be poured to create a flatter surface.
- Patch Repair Kits: For cracks or holes, a patch repair kit is advisable. It is essential to adhere to the manufacturer’s instructions to achieve optimal results.
Essential tools to have on hand include a trowel for applying compounds, a floor scraper for the removal of old adhesives, and a level for checking the flatness of the surface.
Investing in high-quality products and taking meticulous measures during installation can yield a successful outcome, ensuring that your Amtico flooring, such as the Signature range or Amtico Spacia, maintains its aesthetic appeal for many years to come, whether it’s in residential or commercial spaces.
2. Appropriate Tools and Materials
Having the appropriate tools and materials is crucial for the successful installation of Amtico flooring, whether one is undertaking a DIY installation or collaborating with a NICF accredited professional installer. Essential tools include a utility knife for cutting tiles, a trowel for spreading adhesive, and a roller to ensure proper adhesion once the tiles are positioned. The selection of high-quality adhesive and underlay materials specifically designed for Amtico flooring, possibly enhanced with fast-drying cement, will greatly impact the overall success of the installation.
To facilitate an efficient installation process, it is advisable to have several specialised tools readily available. These may include:
- A measuring tape for accurately gauging and planning the installation layout.
- A chalk line for marking straight lines, ensuring precise tile placement.
- A floor scraper for removing any existing floor coverings and preparing the subfloor.
- A spacer to maintain consistent gaps between tiles.
Investing in high-quality materials not only enhances the aesthetic appeal of the space but also ensures durable flooring that performs over time. Utilising reliable products minimizes maintenance issues in the future, providing peace of mind long after the installation has been completed. Maintenance tips can further extend the lifespan of your flooring.
3. Measuring and Planning the Layout
Measuring and planning the layout is a critical step in the process of installing Amtico flooring, as it ensures that the tiles are arranged in a visually appealing and functional manner.
When undertaking such a project, it is imperative to acknowledge that effective visual arrangements can significantly enhance both the aesthetic and usability of the completed space. To achieve precise measurements and minimise the risk of costly errors, it is essential to employ several practical methods:
- Utilise a laser level to create straight lines and establish accurate reference points.
- Create a scale diagram of the room, incorporating any obstacles such as cabinets or pillars, to visualise the tile placement.
- Perform a dry layout by temporarily positioning the tiles on the floor without adhesive, enabling you to assess their fit before proceeding with permanent installation.
Various layouts, including herringbone or diagonal arrangements, can profoundly influence both the appearance and functionality of the flooring, guiding the selection of a style that complements the space while optimising traffic flow.
Ultimately, meticulous preparation will result in a professional finish that enhances both the beauty and practicality of any room.
How To Lay Amtico Flooring
The installation of Amtico flooring, such as Amtico vinyl or the Amtico Form collection, requires a methodical approach that can be executed either through a do-it-yourself (DIY) method or by hiring a professional fitter to achieve optimal results.
The process generally entails preparing and cutting the tiles, applying adhesive, and arranging the tiles according to the desired layout. Regardless of whether one opts to undertake the project independently or seek the assistance of a professional, adhering to the correct procedures is essential for ensuring a visually appealing and durable floor that enhances the overall aesthetics of the environment.
1. Prepare and Cut the Tiles
To initiate the installation of Amtico flooring, the first task is to accurately prepare and cut the tiles in accordance with the planned layout. This process entails measuring the necessary dimensions and utilising a utility knife or tile cutter to achieve clean and precise cuts. Properly prepared tiles not only fit better but also minimise material waste, thereby enhancing the efficiency and cost-effectiveness of the installation process. Whether you’re working with Brushed Oak or another design from the Signature Collection, attention to detail is key.
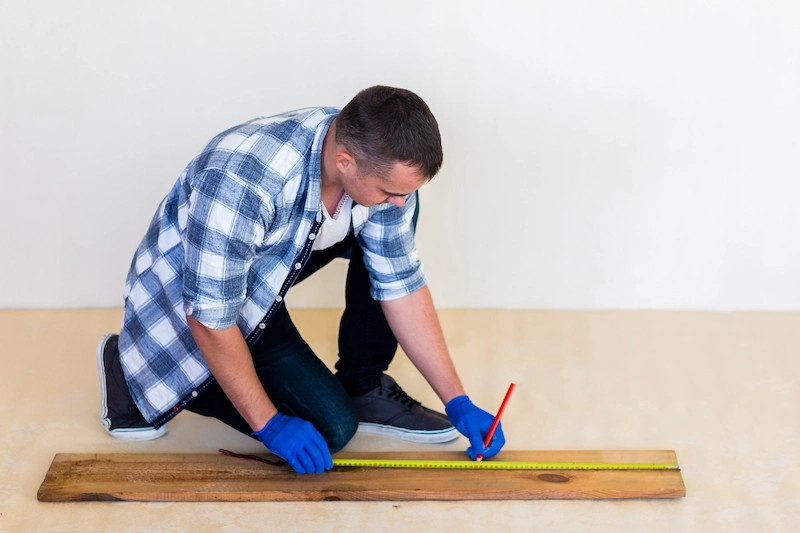
When working with Amtico tiles, it is essential to employ effective measuring and cutting techniques. Begin by laying out each tile in the intended position to facilitate a visual assessment of the desired final appearance. Utilise a measuring tape to determine dimensions with precision, ensuring that each tile aligns perfectly with the adjacent pieces.
The following tips are valuable to consider:
- Mark with Precision: Make clear and accurate markings on the tile surface prior to cutting.
- Cut Methodically: Employ straight cuts whenever possible to maintain a clean edge.
- Test Cuts: Always conduct a trial cut on a spare piece to evaluate your technique.
Common mistakes include miscalculating dimensions or making uneven cuts. If issues such as jagged edges arise, it may be beneficial to use sanding paper to smooth out any imperfections. Addressing these concerns promptly will significantly enhance the overall quality of the installation.
2. Apply Adhesive and Lay the Tiles
Once the tiles are adequately prepared, the subsequent step in the process is to apply adhesive and lay the tiles according to the desired pattern. It is essential to use the appropriate adhesive specifically formulated for Amtico flooring to ensure optimal adhesion and longevity. Adhering closely to the manufacturer’s instructions for both the adhesive and the installation process will facilitate a successful layout and mitigate potential issues, such as lifting or bubbling, in the future.
To commence the application, it is imperative to ensure that the surface is clean and dry, free from any dust or debris.
- Using a notched trowel, spread the adhesive evenly across a small section of the floor, working in manageable areas to prevent the adhesive from drying out.
- Once the adhesive is applied, press the tiles firmly into place, ensuring consistent pressure is maintained throughout the process.
To achieve optimal alignment, it is advisable to begin at the centre of the layout and work outward. This technique often results in a more symmetrical pattern and enhances the overall aesthetic appeal. Common challenges may include misalignment and uneven application of the adhesive.
A practical solution to these challenges is to employ spacers between tiles to maintain consistent gaps and ensure straight lines. Periodically stepping back to assess the overall alignment will aid in identifying any discrepancies early, thus allowing for necessary adjustments before the adhesive sets.
3. Use a Roller to Ensure Proper Adhesion
After laying the tiles, it is essential to utilise a roller to ensure proper adhesion between the tiles and the subfloor, thereby reinforcing the bond created by the adhesive. This step is critical in preventing future issues, such as lifting or shifting tiles, and ensures a seamless and long-lasting result. The rolling process effectively eliminates air pockets and promotes an even distribution of adhesive, contributing to the overall durability of the Amtico flooring.
Implementing effective techniques during this process can significantly influence the final outcome of any flooring project. The use of a roller not only applies firm pressure to the tiles against the adhesive but also ensures that the adhesive fills any gaps thoroughly, resulting in a stronger bond.
For optimal results, it is advisable to time the rolling process to occur soon after tile installation, ideally within a few hours before the adhesive begins to set. The following tips can enhance this technique:
- Ensure the roller is adequately weighted to apply sufficient pressure.
- Use smooth, even strokes in multiple directions to cover all areas thoroughly.
- Check for any missed spots or bubbles while rolling, as addressing these issues will strengthen the adhesive connection.
Common mistakes to avoid include rolling too late, which may compromise adhesion, or failing to adjust pressure based on tile thickness, resulting in uneven bonding. By being deliberate in this phase, one will promote a secure and lasting finish for the flooring.
Tips For A Successful Amtico Flooring Installation
For those interested in exploring high-quality options further, consulting with a reputable carpet retailer, such as Teka Flooring, can provide valuable insights and options tailored to the UK.
Achieving a successful Amtico flooring installation necessitates meticulous planning and execution, as well as strict adherence to best practices throughout the process. By following expert recommendations and guidelines, whether one is undertaking a DIY installation or collaborating with a professional installer, the quality and longevity of the flooring project can be significantly enhanced. Proper subfloor preparation, as advised by subfloor manufacturers, is also critical to ensure a flawless finish.
Key considerations include initiating the installation from the centre of the room, allowing for appropriate expansion gaps, and ensuring an even application of adhesive, all of which contribute to a flawless final result.
1. Start from the Centre of the Room
Initiating the installation of Amtico flooring from the centre of the room is a vital practice that facilitates a balanced and visually appealing layout. This approach promotes even tile placement and minimises the likelihood of unsightly cuts or uneven edges along the walls. By establishing a reference point at the centre, one can ensure that the design flows harmoniously throughout the entire space, resulting in a professional finish.
To accurately determine the centre point, one can follow these straightforward steps:
- Measure the length and width of the room.
- Mark the midpoint along both dimensions using a chalk line or a straight edge.
- The intersection of these lines will indicate the new centre point.
Maintaining alignment during installation is essential, as it significantly impacts the overall aesthetics. To achieve this, it is advisable to regularly check the layout against the established centre line using a level or measuring tape. This practice is particularly important for those working with the Signature Collection, which offers a variety of intricate designs and patterns.
Additionally, it is prudent to periodically step back and evaluate the installation from various angles. This practice enables the identification of any potential misalignments early in the process, ensuring a flawless final appearance.
2. Leave a Gap for Expansion
Leaving appropriate expansion gaps is a critical consideration when installing Amtico flooring, as it enables the material to naturally expand and contract in response to temperature fluctuations. Neglecting to account for this can lead to issues such as buckling or warping of the tiles over time, thereby compromising the flooring’s integrity. By ensuring proper gaps, one can preserve both the aesthetic appeal and functionality of Amtico flooring for many years. This advice is particularly crucial for those undertaking a DIY installation.
To achieve optimal performance, it is essential to consider the recommended expansion gaps based on the size of the installed area. Generally, a gap of 5 to 10 mm around the edges should be maintained, particularly in areas subjected to variable temperature conditions, such as near large windows or heating vents.
The careful placement of these gaps is imperative; they should be evenly distributed around the perimeter and near fixed objects such as cabinets and pillars. This is especially important for Amtico Form and Amtico Spacia ranges, which are popular choices for their durability and aesthetic appeal.
- Plan the layout to incorporate these gaps seamlessly.
- Ensure a consistent distance is measured from walls and obstructions.
- Utilise spacers during installation to prevent misalignment.
Integrating these practices into the installation process not only enhances the durability of the flooring but also preserves its aesthetic appeal, ultimately resulting in long-lasting satisfaction.
3. Use a Trowel to Spread Adhesive Evenly
Using a trowel to spread adhesive evenly is a critical step in the Amtico flooring installation process, ensuring that each tile adheres properly to the subfloor. An even layer of adhesive promotes strong adhesion and prevents issues such as lifting or uneven surfaces. Selecting the appropriate notched trowel size is essential for achieving optimal adhesive coverage, which directly influences the success of the flooring project. This is especially true for LVT (Luxury Vinyl Tile) installations.
To master the technique of trowelling, it is important to hold the tool at the correct angle, typically around 45 degrees, to allow for better control while spreading. An even application of adhesive is crucial for achieving a flat and stable foundation.
The following are key techniques and tips:
- Choose the Right Adhesive: Different adhesives may necessitate different trowel sizes. Always consult the manufacturer’s recommendations for compatibility.
- Use Consistent Pressure: Apply even pressure while dragging the trowel across the surface to maintain a uniform thickness.
- Avoid Overloading: Excess adhesive on the trowel can lead to lumps and gaps. Dip only the edge of the trowel to prevent excess accumulation.
- Keep the Trowel Clean: Regularly clean off any adhesive buildup on the trowel to ensure a smooth application.
By focusing on the type of adhesive and the appropriate trowel size, installers can enhance the longevity and appearance of their flooring.
4. Use a Straight Edge to Ensure Straight Lines
Utilising a straight edge during the installation of Amtico flooring is paramount for ensuring straight lines and achieving a professional appearance. This tool serves as a guide for tile placement, preventing misalignment that may compromise the overall aesthetic. Maintaining straight lines is particularly critical in larger areas where the visual impact is more pronounced, making the use of a straight edge a straightforward yet effective technique. This is especially important when installing intricate designs like Parquet patterns.
To optimise the effectiveness of the straight edge, it is advisable to regularly measure and mark reference points along the installation surface. This practice reduces the likelihood of deviations.
Here are several key tips for maintaining alignment over longer distances:
- Ensure that the straight edge is adequately levelled prior to commencing the layout, as any imperfections can create ripple effects throughout the installation.
- For larger areas, employing multiple straight edges in tandem can enhance accuracy across expansive surfaces.
- Regularly verify alignment at intervals during installation, as floors may shift slightly due to various factors.
When alignment issues arise, effective troubleshooting can often resolve them:
- Revisit the initial reference points and adjust any misaligned tiles gradually, avoiding the temptation to force them into place.
- Utilise a level or laser alignment tool to identify any discrepancies in the layout.
By adhering to these best practices, the overall installation quality can be significantly improved, ensuring a stunning finish that impresses at first glance.
How To Finish The Amtico Flooring Installation
Choosing Amtico flooring ensures a high-quality finish that will last for years.
Completing the installation of Amtico flooring necessitates meticulous attention to detail, as this final phase ensures that the flooring is fully prepared for use. This process includes cleaning the surface to eliminate any excess adhesive and debris, thereby allowing the flooring to exhibit its full aesthetic potential.
Furthermore, the installation of trims and thresholds facilitates a seamless transition between various flooring types, contributing to a polished and professional finish that enhances the overall appearance of the space.
Clean and Remove Excess Adhesive
Cleaning and removing excess adhesive from Amtico flooring is a vital step in the finishing process, ensuring that the newly installed floor appears immaculate and free from imperfections. Any adhesive residue remaining on the surface can lead to sticky spots that attract dirt, thereby detracting from the overall aesthetic of the flooring. Employing appropriate cleaning solutions and techniques will aid in restoring the floor’s shine and preserving its pristine condition for years to come. For those with Brushed Oak styles, special care should be taken to maintain its unique texture.
To maintain the visual appeal and longevity of the floor, homeowners should consider specific methods tailored to this type of flooring. It is advisable to utilise a pH-neutral cleaner specifically formulated for vinyl surfaces, as this will ensure that the chemical composition does not damage the finish or alter the flooring’s sheen.
- A microfiber mop or a soft cloth can effectively lift dirt without scratching the surface.
- For stubborn adhesive residues, a mixture of warm water and a few drops of washing-up liquid can prove effective.
After cleaning, it is essential to regularly dust or vacuum the floor to eliminate grit, which can wear down the surface finish. Additionally, employing furniture pads under heavy items can prevent scratches, thereby helping to keep the floor looking new for an extended period.
Allow Time for Adhesive to Dry
Allowing sufficient time for the adhesive to dry is essential after the installation of Amtico flooring, as this process ensures a strong bond between the tiles and the subfloor.
Rushing this critical step may lead to complications such as tile movement or bubbling, ultimately compromising the durability of the flooring. Adhering to the manufacturer’s guidelines regarding drying times will facilitate a smooth transition to using the flooring without any issues.
To fully appreciate the significance of this phase, it is important to consider various factors that can influence drying duration, including ambient temperature, humidity levels, and ventilation in the area. Proper drying time is essential, especially for those using the Signature range or Cleo designs.
- Higher humidity can extend the drying process, while low temperatures may impede adhesion.
- Additionally, it is imperative to refrain from walking on the newly installed tiles or placing any heavy objects on the surface until the adhesive has completely cured.
Observing these precautions not only contributes to a successful installation but also enhances the longevity of the flooring investment.
Install Trims and Thresholds
Installing trims and thresholds represents the final step in the completion of an Amtico flooring installation, contributing to a clean and professional appearance that enhances the overall aesthetic of the space. These finishing elements facilitate a smooth transition between various flooring types while simultaneously protecting the edges of the Amtico flooring from potential wear and tear. The selection of appropriate trims and thresholds that complement the flooring will play a crucial role in achieving a polished and cohesive design. Consider consulting with NICF (National Institute of Carpet and Floorlayers) accredited professionals for the best results.
Choosing suitable trims and thresholds necessitates careful consideration of various styles and materials that align with both the aesthetic and functional requirements of the room. Popular options include:
- Timber: Provides a classic, warm finish that harmonises well with natural flooring.
- Vinyl: A versatile choice that closely matches the design of Amtico flooring.
- Metal: Delivers a modern touch, making it ideal for contemporary décor.
During installation, it is essential to ensure that the selected trims maintain the proper height for accessibility and do not disrupt the seamless flow of the flooring. For easy installation, consider consulting with NICF accredited professionals.
Ultimately, these choices will significantly influence not only the visual appeal but also the durability and functionality of the space.
Laying Amtico flooring can completely transform the look and feel of your space, offering a stylish, durable, and low-maintenance solution for any room. By following the steps outlined above—preparing the surface, planning your layout, and carefully installing each tile—you can achieve a professional-quality finish. However, installing flooring requires attention to detail, the right tools, and a steady hand, so don’t hesitate to seek professional assistance if needed.
At TEKA Flooring, we specialise in premium flooring solutions and expert fitting services. Our team is fully trained to install Amtico flooring with precision, ensuring a flawless finish that enhances your home or business. Whether you’re a DIY enthusiast in search of high-quality materials or prefer to leave the work to the experts, we’re here to help.
Take the hassle out of your flooring project. Contact TEKA Flooring today for a free consultation or to find out more about our Amtico flooring options and professional fitting services. Your dream floor is just a call away!
Read also:


