Laying vinyl click flooring (LVT) can transform the look and feel of any room, providing a sleek and durable surface that is both attractive and easy to maintain. However, to achieve the best results, it’s important to follow the guide on how to lay vinyl click flooring with precision.
Luxury Vinyl Tiles or known as LVT has been gaining popularity recently. It has special characteristics such as being stylish, durable, and affordable. People prefer to use vinyl tiles as an alternative to alter from expensive materials to affordable materials.
Reason to Choose LVT Flooring
When it comes to luxury, aesthetic, simple, and best flooring options, Luxury Vinyl Tile, or known as LVT flooring has been gaining popularity recently. It replicates the appearance of various materials like solid wood, stone, or tile. On top of that, Luxury Vinyl flooring is easy to install, easy to maintain, and resistant to moisture and stains.
Before choosing LVT, you need to make sure that you opt for the best vinyl click flooring. You may see various ranges of Luxury Vinyl Tile brands offered by TEKA Flooring.
Therefore, TEKA Flooring provides Karndean, Floorify, and Luvanto so that you can designate many varieties of LVT. Also, LVT allows you to be laid by a professional fitting service or DIY.
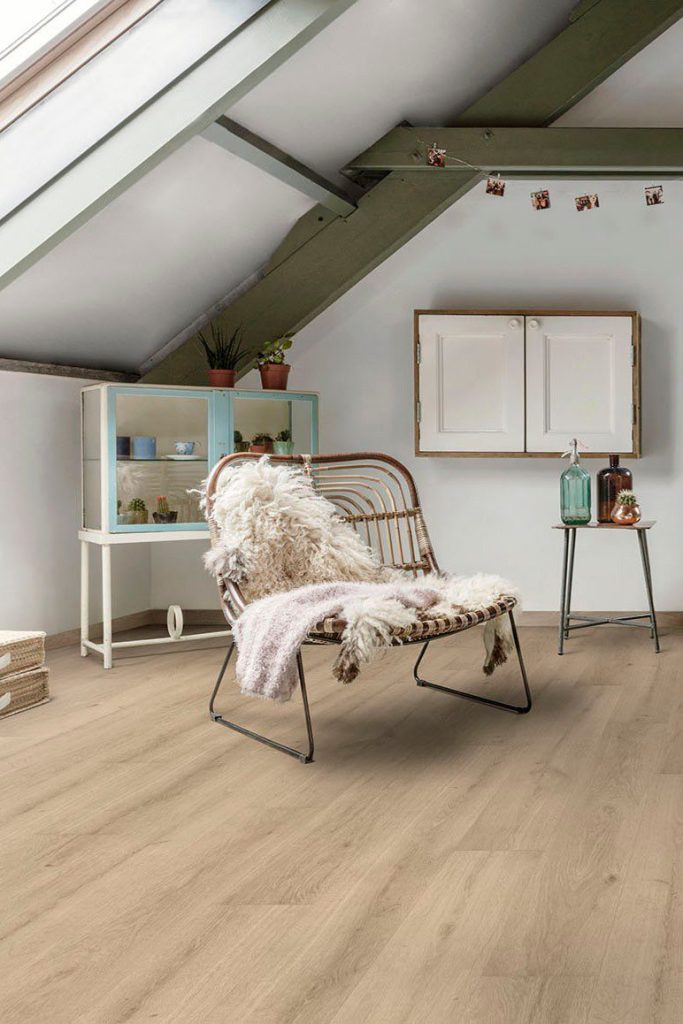
See product: Floorify Planks Crémant
Tools and Preparation to Lay Vinyl Click Flooring
Professional fitting service is the easy way to lay vinyl click flooring instead of DIY. However, In this article, we will deep dive into LVT installation to make you install it at ease. We will jump into the step of how to install LVT flooring like a professional!
How to install vinyl click flooring? Having a complete preparation kit is a good start to installing Luxury Vinyl Tile. Either you wanna DIY or call a professional to get the job done. Therefore, these should be taken into consideration when you are preparing for installation.
You may require these tools to install LVT neatly and perfectly:
- Tape measure
- LVT underlay
- Vacuum cleaner
- Rubber mallet
- Ruler
- Pencil
- Stanley knife
- 7-10 mm spacer and pull bar (flooring kit)
- Masking tape
- Mitre saw
- Hammer
- Square
- Builders level or spirit level
Additional tools to help you when you DIY your LVT:
- Safety goggles
- Face masks
- Dust masks
How To Lay Vinyl Click Flooring
There are several steps in the guide on how to lay vinyl click flooring with precision that you need to pay attention to, starting from measuring the room to finishing.
1. Measuring the Room
How to fit vinyl click flooring? Measure the room’s dimensions to determine the number of vinyl plank or wood flooring needed. It is also essential to plan the layout, ensuring that you have a balanced design and accounting for any obstacles like doorways or cabinets. In addition, you need to check recesses or chimney breasts, any alcoves, fireplace, nooks and crannies in your room.
Remove any furniture, rugs, or obstacles from the floor to get a clear and accurate measurement. Ensure you have a measuring tape or a measuring device with a ruler or a tape measure function. Make sure it is long enough to cover the entire length and width of the floor.
Choose a corner of the floor as your starting point. Measure the length of one side of the floor by extending the measuring tape from one wall to the opposite wall. Make sure the tape is straight and not sagging in the middle. Note down the measurement.
From the end of the first measurement, extend the measuring tape perpendicular to the first measurement, measuring the width of the floor. Again, make sure the tape is straight and not sagging. If the floor has irregular shapes, such as alcoves or corners that protrude or are recessed, measure them separately and note down their dimensions.
If you have multiple rooms or areas to measure, repeat the process for each room separately. For square or rectangular rooms, you may also want to measure the diagonal distance from one corner to the opposite corner. This measurement can help ensure accuracy and identify any discrepancies in the measurements.
Once you have completed measuring all the sides and areas, double-check your measurements to ensure accuracy. Record all the measurements for reference.
2. Prepare Spot Level on the Flooring
Before starting to lay your luxury vinyl flooring, you need to ensure the condition of your floor. If it is higher compared to other parts, then sand down the high spots, however, if it is lower, then, you have to fill in the spots. The entire floor should be on the same level to start off the vinyl plank flooring.
Depending on the extent of the unevenness, you can choose between different levelling methods. Common options include self-levelling compounds, floor patching compounds, or floor levelling underlayment. If you are using a self-levelling compound or floor patching compound, carefully follow the instructions provided by the manufacturer. Mix the compound as directed, ensuring it reaches the desired consistency.
Pour or spread the levelling material onto the uneven spot, starting from the lowest point and working towards the highest point. Use a trowel or squeegee to spread and smooth out the material, ensuring it fills in all the low areas. Follow the manufacturer’s guidelines regarding thickness and drying time.
Once the levelling material is applied, use a straightedge, level, or a long, straight board to smooth and level the surface. Move it back and forth in a sawing motion to eliminate any high spots and distribute the material evenly. After levelling, let the material cure and dry according to the manufacturer’s instructions. This typically takes several hours or even a day, depending on the product used. Once the levelling material is fully dry, inspect the spot to ensure it is now level. Use a level or measuring tool to verify that the surface is even.
3. Assure Your Subfloor is Squeaky Clean
This is the step that you cannot miss. You need to make sure that you have already cleaned the subfloor using a vacuum cleaner. This helps you to maintain vinyl tiles from evaporation within vinyl tile or debris. When you put items of furniture on the entire floor, it helps to prevent them from bending, separating, or requiring to be replaced and avoid any issues.
4. Acclimatise Vinyl Flooring
Luxury vinyl requires to be put in a temperature room between 18 – 28 degrees. Also, it will take 48 hours at least to get used to the different conditions. Avoid opening the vinyl tile from the box to adapt to the room conditions depending on humidity and temperature in the room. You need to make sure to lay them flat in order to properly acclimate.
5. LVT Underlay
Does vinyl flooring need underlay? Before starting to install your Luxury Vinyl Tiles, the right underlay needs to be installed in order to protect your flooring. You may use an LVT underlay role to bed imperfect subfloor surfaces of your floor. You can lay your underfloor heating before putting on the LVT underlay. The thickness of LVT underlay is usually 1mm-1.5mm foam with a high density and a moisture barrier.
Another alternative is to use a self-adhesive vinyl tile underlay because it has anti-slip protection and strong construction so that your LVT installation can be stronger and easier. The underlays are rolled out based on the right angle that you use as the direction of the floor is being installed.
6. Begin Luxury Vinyl Flooring
Click vinyl flooring basically has two sides which are the long and the short edge. The long edge refers to the female click system, meanwhile, the short edge refers to the male click system. Begin installation along a straight wall. Remove the tongue edge of the first plank or tile, leaving the groove side facing the wall.
Use spacers along the wall to maintain an expansion gap, typically around ¼ inch, lay the second plank at an angle, aligning the tongue with the groove of the first plank. Gently press down to click them together. Repeat this process, clicking each subsequent piece together until you reach the end of the row. Use a utility knife or Stanley knife to trim the last piece, leaving the same expansion gap as the first row.
For the second row and beyond, connect the planks or tiles at an angle and press them down ensuring a tight fit. Stagger the joints between rows by at least 6 inches to create a natural-looking pattern.
Use a tape measure and a Stanley knife to cut planks or tiles to fit around the doorway, cabinets, or other obstacles. Remember to give some space by using spacers for the required expansion gap.
Continue installing rows until you reach the last one. Measure and cut the planks or tiles to fit against the final wall, again leaving the necessary expansion gap. Use a pull bar or tapping block to ensure a tight fit between the last row and the previous ones. Once the flooring is in place, reinstall or install baseboards and other trims to cover the expansion gap and provide a finished look.
7. Look After Your LVT Flooring
Maintaining Luxury Vinyl Tiles is relatively easy and requires regular cleaning and some precautions to ensure their longevity. Here are some tips to help you maintain your click vinyl flooring:
- Sweep or Vacuum regularly: Remove loose dirt, dust, and debris by vacuuming or sweeping the floor regularly. This prevents the buildup of dirt that can scratch the surface of LVT flooring.
- Use Doormats: Place doormats at entryways to trap dirt and moisture from outside. This helps prevent tracking dirt onto the LVT, reducing the need for frequent cleaning.
- Clean Spills Immediately : Wipe up any spills promptly to prevent staining or damage to the LVT. Use a damp cloth or mop to clean the affected area.
- Avoid Harsh Chemicals: When cleaning luxury vinyl tiles, avoid using abrasive or harsh chemical cleaners, as they can damage the surface. Instead, use mild cleaners specifically designed for vinyl flooring or a mixture of warm water and a gentle cleaner.
- Mop with Care: Damp-mop the luxury vinyl tiles using a soft mop or microfiber cloth. Avoid excessive water and make sure the mop is just slightly damp, as excessive water can seep into the seams and cause damage.
- Use Protective Pads: Place rubber pads under furniture legs to prevent scratches or dents when moving or rearranging furniture on the luxury vinyl tiles.
- Avoid Scratches: While luxury vinyl tiles are generally resistant to scratches, it is a good practice to avoid dragging heavy furniture on vinyl flooring or sharp objects across the floor.
- Trim Pet Nails: If you have pets, trim their nails regularly to minimise the risk of scratching LVT flooring.
- Protect from Sunlight: Prolonged exposure to direct sunlight can cause fading or discolouration of luxury vinyl flooring. Use curtains, blinds, or UV-blocking window film to protect your floor from excessive sunlight.
- Regular Maintenance : Occasionally, use a manufacturer’s instruction floor polish to maintain the lustre and protect the surface of the luxury vinyl tiles. Follow the instructions provided with the product about new flooring. Always refer to the manufacturer’s instructions when it comes to cleaning luxury vinyl tiles for specific maintenance and recommendations.
For those seeking a touch of luxury, luxury vinyl flooring options at TEKA Flooring provide enhanced durability and a premium aesthetic appeal, mimicking the look of natural materials with added benefits.
We invite you to our flooring store in Peterborough to explore our stunning range of vinyl flooring options in person. Our friendly team is ready to assist you, answer any questions, and help you make the best choice for your home.
Read also: