Have you ever wondered how to remove vinyl flooring? Whether you’re looking to update your space or just need to replace damaged flooring, knowing how to properly remove vinyl flooring is essential.
In this comprehensive guide, we will explore the different types of vinyl flooring, reasons for removing it, essential tools and materials needed, step-by-step instructions, as well as tips and tricks to make the process as smooth as possible.
So, if you’re ready to tackle this project, keep reading to learn everything you need to know about removing vinyl flooring.
What Is Vinyl Flooring?
Vinyl flooring is a popular choice for many homeowners due to its durability, affordability, and versatility in design options. It is a synthetic flooring material that comes in various styles, including tiles and lino, mimicking the look of natural materials like wood or stone.
One of the key benefits of vinyl flooring is its easy installation process, making it a convenient option for those looking to upgrade their floors without the hassle of a long and complicated installation.
Vinyl flooring can be installed over most existing floors, such as concrete, hardwood, or plywood, saving time and money on removing the old flooring. It is also a comfortable and warm underfoot, providing a cosy feel in any room.
Types of Vinyl Flooring
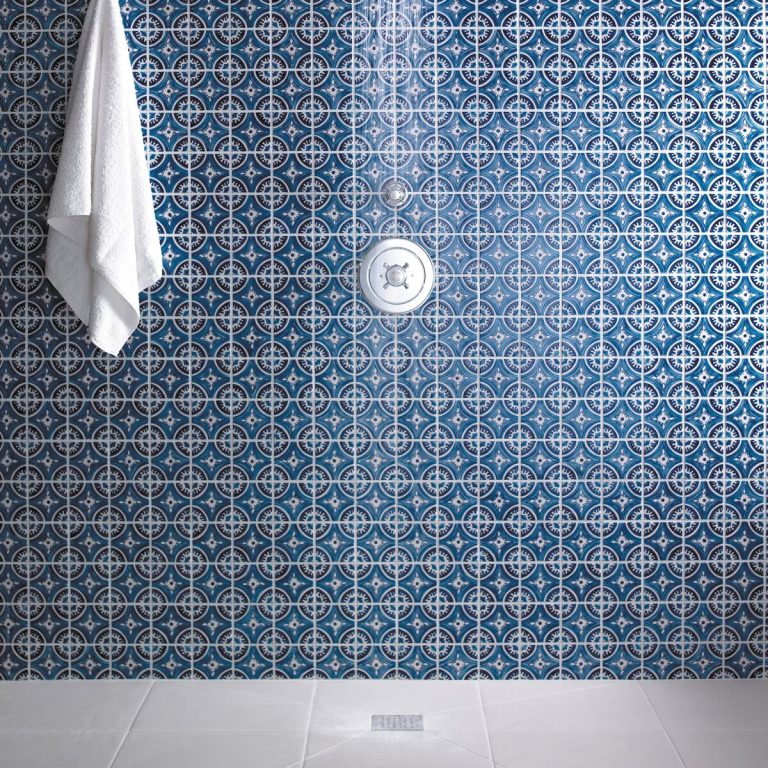
There are primarily two types of vinyl flooring: sheet vinyl and vinyl tile. Vinyl tile flooring can further be categorised into options like ceramic tiles or quarry tiles, each offering unique aesthetics and properties.
Sheet vinyl flooring comes in large rolls, providing a seamless look and easy maintenance, making it suitable for high-traffic areas like kitchens and bathrooms.
On the other hand, vinyl tile flooring offers more design flexibility, mimicking the look of natural materials such as wood or stone.

See product for LVT flooring: Luvanto Click Plus Weathered Concrete
Why Remove Vinyl Flooring?
The decision to remove vinyl flooring may stem from the desire to reveal and restore a wooden subfloor, concerns about potential asbestos contamination in older flooring materials, or to prepare the space for a new flooring installation.
Many homeowners choose to remove vinyl flooring because they appreciate the natural beauty and warmth that can be brought out by restoring a hidden wooden subfloor. Exposing the original wooden subfloor can add charm and character to a room, creating a rustic or traditional aesthetic that is highly appealing. The removal process allows for the inspection and restoration of the subfloor, which can strengthen the foundation of the house and enhance its overall durability.
The health risks associated with asbestos are a major concern for those with older vinyl flooring. Asbestos was commonly used in flooring materials in the past, and when disturbed during removal, it can release harmful fibres into the air. Choosing to remove vinyl flooring, especially if it contains asbestos, is a proactive step towards creating a healthier indoor environment for the occupants.
Preparing the space for new flooring installation is another key reason why homeowners opt to remove vinyl flooring. Whether they want to upgrade the aesthetics of the room, improve functionality, or increase the value of their property, removing the old vinyl flooring is often the first step in the renovation process. Properly removing the existing flooring ensures a smooth and stable surface for the new flooring to be installed, leading to a long-lasting and visually appealing result.
Tools and Materials Needed for Removing Vinyl Flooring
To successfully remove vinyl flooring, you will need a set of essential tools and materials, including a floor scraper, utility knife, and solvent thinners, to ensure a thorough and efficient removal process.
a. Essential Tools for Removing Vinyl Flooring
Key tools to remove vinyl flooring include a pry bar for leverage, a putty knife for precise cutting and scraping, and a floor scraper for efficient removal of large sections of flooring.
When using a pry bar, ensure it has a flat end to slide under the vinyl easily, and use even pressure to avoid damaging the subfloor. The putty knife is perfect for delicate tasks like removing adhesive residue or cutting through stubborn spots. Keeping the blades sharp will make your job smoother. As for the floor scraper, opt for one with a long handle for better leverage and consider wearing knee pads for comfort during extended use.
It is crucial to wear proper safety gear like gloves and goggles to protect your hands and eyes. Work systematically in small sections, starting from a corner, to avoid damaging the surrounding area. Always double-check for any electrical wires or pipes below the vinyl flooring to prevent accidents. Clean your tools after each use and store them in a dry place to prevent rusting and maintain their effectiveness for future projects.
b. Materials Needed for Removing Vinyl Flooring
Apart from tools, materials like elbow grease for manual labour and safety precautions for protection against dust, debris, or chemical exposure are vital for a successful vinyl flooring removal project.
When undertaking a project of this nature, you’ll need specific materials to facilitate the removal process efficiently. Some essentials include a utility knife for careful cutting, a heat gun or hairdryer for softening adhesive, a floor scraper for tackling stubborn sections, and a dust mask to shield against inhaling harmful particles.
Proper safety gear is non-negotiable for this job. Goggles, gloves, and a respirator should always be worn to safeguard against potential hazards during the removal process. Ensuring adequate ventilation in the work area is essential to minimise exposure to any fumes or dust generated.
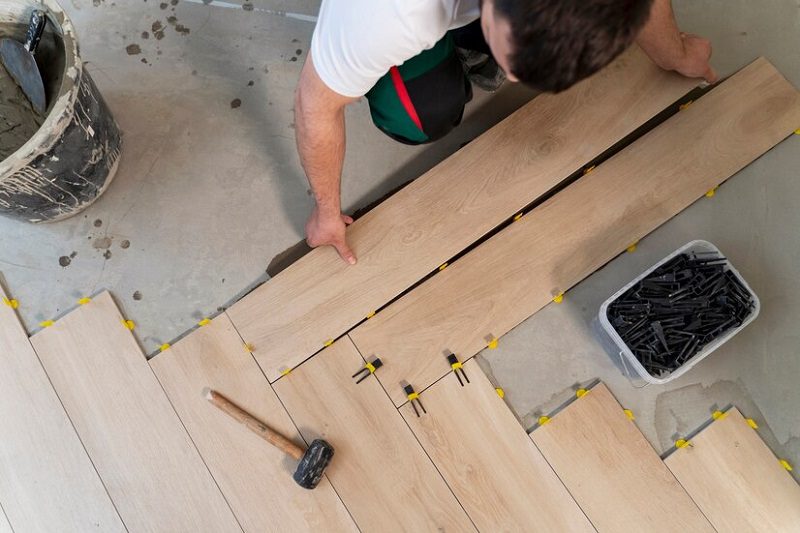
How to Remove Vinyl Flooring Guide
Following a systematic approach is crucial when removing vinyl flooring. The step-by-step guide on how to remove vinyl flooring glue from concrete, plywood, or hardwood includes processes like:
a. Step 1: Prepare the Area
Before starting the removal process, prepare the area by clearing out furniture, rugs, and other obstacles, and have a skip or disposal plan ready for efficient waste management during and after the project.
Ensuring a clean and clutter-free workspace is crucial when tackling a vinyl flooring removal project. By removing all items that could impede your progress, you create a safer environment for yourself and ensure a smoother process.
Safety measures should also be a top priority, including wearing protective equipment such as gloves and goggles to prevent any injuries from sharp edges or dust particles. Proper ventilation is essential to avoid inhaling harmful fumes, especially when using adhesives or solvents.
b. Step 2: Remove the Baseboards
To facilitate vinyl flooring removal, start by removing the skirting boards or plinths along the edges of the room using a crowbar and putty knife, ensuring a clean separation between the flooring and walls.
Removing skirting boards carefully is vital to preventing damage, as they can be reused after the flooring removal process. Once the skirting boards are off, label them for easy reinstallation later. In case of any damage during removal, consider using wood filler or caulk to repair any nicks or holes. Sanding and repainting the skirting boards can also help restore their appearance. Take time to clean the wall surfaces and the back of the skirting boards thoroughly before reattachment for a seamless finish.
c. Step 3: Cut the Vinyl Flooring
For an easy way to remove vinyl flooring, cut the vinyl flooring into manageable sections using a utility knife.
By cutting the vinyl flooring into smaller sections, you not only make the removal process more manageable but also prevent any potential damage that may occur during extraction. Ensure that the utility knife has a sharp blade to make clean and precise cuts without causing splintering or tearing. To maintain safety, wear gloves and protective eyewear when handling the knife to prevent any accidents. Remember to work systematically and slowly, following the lines of the flooring pattern to maintain uniformity in cuts. Different types of vinyl flooring, including sheet, plank, or tile, require specific cutting techniques such as scoring and snapping for sheet vinyl, using a straightedge for planks, or employing a sharp cutter for tiles to achieve clean separations.
d. Step 4: Remove the Adhesive
Removing the adhesive residue left behind after vinyl flooring removal requires patience and the use of solvent thinners or scraping tools to ensure a clean and smooth subfloor surface for the next flooring installation.
When dealing with adhesive removal, it’s essential to approach the task systematically. Begin by testing a small area with your chosen solvent to ensure it doesn’t damage the subfloor.
Typically, solvents like acetone, isopropyl alcohol, or citrus-based cleaners are effective in breaking down the adhesive. You can apply the solvent using a cloth or sponge and let it sit for a few minutes to soften the residue. For stubborn spots, a plastic scraper or putty knife can help gently lift the adhesive without causing any surface damage.
e. Step 5: Remove the Underlayment
After vinyl flooring removal, the underlayment must be carefully detached using a putty knife or similar tool to reveal the subfloor and assess its condition for any necessary repairs or preparations.
Once the underlayment is exposed, it’s essential to inspect it thoroughly for any signs of damage, moisture, mould, or uneven surfaces. This inspection will help determine if the subfloor needs any levelling or repairs before installing new flooring. To ensure a smooth transition, tools required for underlayment removal and inspection may include a utility knife, pry bar, hammer, and a vacuum for clean-up.
Handling the underlayment carefully during removal is crucial to avoid causing further damage to the subfloor. It’s recommended to work methodically in small sections, gently lifting and prising the underlayment away from the subfloor. By taking your time and being meticulous, you can minimise the risk of splintering or gouging the subfloor.
f. Step 6: Clean the Subfloor
To prepare the subfloor for new flooring, thoroughly clean the surface, remove any debris, and consider options like artificial grass mats for additional cushioning or moisture protection before the installation process begins.
Once the surface is cleaned, inspect it for any imperfections or irregularities that may affect the final flooring finish. Address any uneven areas by applying a suitable levelling compound to ensure a smooth and flat subfloor. Additionally, moisture barriers or vapour retarders can be installed to protect the new flooring from potential moisture issues that could arise from a damp subfloor. For areas prone to high moisture levels, such as basements, it is crucial to take extra precautions to prevent future damage.
How to Remove Vinyl Flooring Tricks and Trick
When dealing with challenging aspects of vinyl flooring removal, tips and tricks such as using heat to soften the adhesive, applying vinegar solutions for stubborn stains, or laying rugs over difficult areas can simplify the process and enhance efficiency.
1. How to Remove Difficult Adhesive
When faced with stubborn adhesive residues during vinyl flooring removal, it is essential to prioritise safety precautions such as using proper ventilation, and protective gear, and choosing the right solvents for effective and safe adhesive removal.
It is advisable to test a small inconspicuous area before full application to ensure compatibility and avoid any potential damage to the flooring.
Explore eco-friendly adhesive removers like citrus-based products or vinegar solutions, which are safer for the environment and health, minimising harmful chemical exposure.
- Consider utilising mechanical methods like scraping or sanding if the adhesive is particularly stubborn, ensuring thorough removal.
- Always read and follow the manufacturer’s instructions on the adhesive remover for optimal effectiveness and safety.
2. How to Repair Damaged Subfloor
In cases where the subfloor has sustained damage during vinyl flooring removal, repairing the affected areas with suitable materials, levelling compounds, or replacing sections may be necessary, followed by reinstalling skirting boards for a finished look.
For subfloor repair projects, it’s essential to assess the extent of the damage before proceeding with any fixes. One effective approach is to carefully inspect the subfloor for signs of water damage, termite infestation, or structural issues. Addressing these underlying issues is crucial to prevent further deterioration of the subfloor and ensure a sturdy foundation for the new flooring installation. Additionally, utilising moisture barriers and quality underlayment during the repair process can help enhance the subfloor’s resilience against future wear and tear.
Conclusion
In conclusion, removing vinyl flooring requires careful planning, the right tools, and adherence to safety precautions, especially when dealing with potential asbestos-containing materials, to ensure a successful and hazard-free renovation or flooring upgrade.
If you’re considering removing your old vinyl flooring and installing a fresh one, why not make use of TEKA Flooring’s fitting service? Our team of experts is here to assist you in finding the perfect flooring solution tailored to your needs.
You can also choose from a variety of vinyl flooring options, particularly LVT with attractive designs. Get the special discount for Karndean, from £62.49 /m² to £56.24 /m². Add to your basket now!
Read also: