Considering installing vinyl flooring on your floorboards but not sure where to start? This step-by-step guide on how to lay vinyl flooring on floorboards will walk you through everything you need to know, from preparation to finishing touches.
Discover the tools and materials you’ll need, how to lay the vinyl planks, and how to properly care for your new flooring. nSay goodbye to outdated floorboards and hello to a fresh, modern look with vinyl flooring!
What Is Vinyl Flooring?
Vinyl flooring, including luxury vinyl tiles (LVT), is a versatile and durable flooring option that is available in various styles, such as click-and-lock planks and sheet vinyl, making it a popular choice for both residential and commercial applications.
- Click-and-lock vinyl planks offer easy installation and a seamless finish, perfect for DIY projects.
- Sheet vinyl, available in large rolls, is ideal for covering large areas quickly and efficiently.
- Luxury vinyl tiles (LVT) provide a premium look and feel, often indistinguishable from natural materials, offering a luxurious touch to any room.

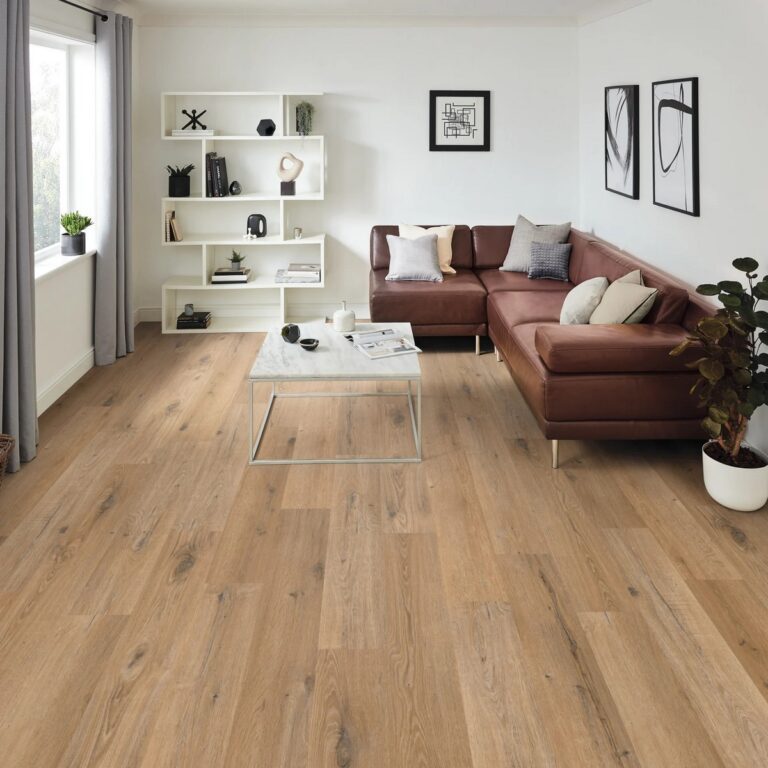
See product: Karndean Art Select Oak Royale Glacier Oak
The Benefit of Installing Vinyl Flooring on Floorboards
Installing vinyl flooring on floorboards can enhance the aesthetic appeal and functionality of your space, providing a cost-effective and moisture-resistant solution that is easy to install and maintain.
One of the key advantages of choosing vinyl flooring over traditional floorboards is its exceptional water resistance. This makes it an ideal option for areas prone to moisture, such as bathrooms and kitchens, where spills and humidity are common. The ease of installation with vinyl flooring saves both time and money compared to the labour-intensive process of laying floorboards.
Unlike floorboards that require regular sanding, staining, and sealing for upkeep, vinyl is incredibly low maintenance. With simple cleaning routines, such as sweeping and occasional mopping, vinyl flooring maintains its appearance for years without the need for refinishing.
Tools and Materials Needed
To install vinyl flooring on floorboards, you’ll need a variety of tools and materials, including a utility knife, straight edge, measuring tape, vinyl adhesive, and underlayment for added cushioning and support.
Having a floor roller can help ensure proper adhesion of the vinyl flooring to the underlayment. A pencil or chalk can be handy for marking and cutting the vinyl, while a trowel may be needed for spreading the adhesive evenly.
Knee pads are essential for comfort and knee protection during the installation process, especially if you’ll be spending a significant amount of time on your knees. A notched trowel might assist in achieving the correct adhesive application thickness for optimal results.
How to Lay Vinyl Flooring on Floorboards: Preparation
Before you begin installing vinyl flooring on floorboards, it’s crucial to properly prepare the subfloor by cleaning and levelling the surface, ensuring that it is free from debris and uneven areas that could affect the installation process.
1. Measure and Prepare the Floorboards
Accurately measuring the dimensions of your floorboards is the first step in preparing for vinyl flooring installation, ensuring that you have the right amount of materials such as underlay and vinyl planks or sheets.
When measuring, start by assessing the width and length of the room to determine the square footage required. Be sure to account for any nooks or irregularities that may affect the measurements. It’s crucial to leave room for expansion gaps, generally around 1/4 inch, along the perimeter of the room. Having the correct underlay is essential as it provides cushioning and noise reduction. When purchasing vinyl, aim for a bit extra to accommodate cuts, mistakes, or future repairs, preventing any disruptions in your flooring project’s flow.
2. Clean and Level the Floorboards
Cleaning and levelling the floorboards is crucial to ensure a smooth and stable surface for the vinyl flooring, which helps to prevent any bumps or irregularities from affecting the final installation.
- One of the essential tools for levelling floorboards is a self-levelling compound, which can help create a flat surface by filling in any gaps or low spots.
- Before applying the compound, make sure to thoroughly clean the subfloor to remove any dirt, debris, or old adhesive that could impact the bonding of the compound.
- Using a floor scraper or sander can help smooth out any rough patches and ensure the subfloor is free of imperfections.
Remember, a clean and level subfloor not only improves the aesthetics of the vinyl flooring but also increases its durability and lifespan.
3. Allow for Expansion Gaps
It’s essential to allow for expansion gaps around the perimeter of the room and any fixed objects when installing vinyl flooring on floorboards to accommodate potential expansion and contraction due to temperature changes.
These expansion gaps are crucial as they provide space for the flooring to expand without buckling or warping when temperatures fluctuate. To properly measure and leave these gaps, use spacers to ensure a consistent width along the edges.
A general rule of thumb is to leave at least 1/4 inch around the perimeter, adding more for larger rooms. Failure to include these gaps can result in the flooring pushing against walls, causing damage over time.
How to Lay Vinyl Flooring on Floorboards: Installation
Laying vinyl flooring on floorboards involves a series of methodical steps to ensure a seamless and durable installation, starting with the preparation of the subfloor and ending with the final touches to secure the flooring in place.
1. Cut and Lay Underlayment
Begin by cutting and laying out the underlay over the floorboards, ensuring that it covers the entire area and provides a smooth base for the vinyl flooring.
To ensure accuracy, measure the underlay carefully to fit the space precisely before cutting. Use a sharp utility knife or scissors for clean cuts. When laying out the underlay, align the edges snugly together without overlapping to maintain a seamless surface. The underlay acts as a protective barrier, providing cushioning to the vinyl flooring, which helps in absorbing impact and reducing noise. Its sound insulation properties also contribute to a quieter and more comfortable living environment.
2. Plan and Cut the Vinyl Planks
Carefully plan the layout of your vinyl planks, taking into account the room’s dimensions and any obstacles, then proceed to cut the planks to fit the space using a utility knife or a vinyl cutter.
Planning the layout is crucial as it not only helps in minimising waste but also ensures a visually appealing finish.
To achieve this, start by measuring the room accurately, accounting for any nooks or irregular shapes. Use these measurements to create a detailed layout plan, considering pattern orientation and visual aesthetic.
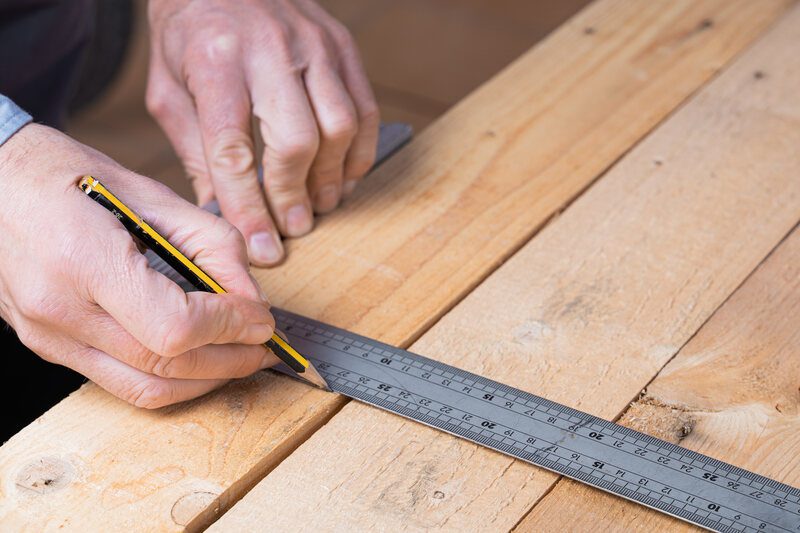
When cutting the vinyl planks, aim for precision by marking the cuts with a pencil and using a straight edge as a guide. Take your time to ensure each cut is accurate to avoid gaps or misaligned edges.
3. Lay the First Row of Vinyl Planks
Start by laying the first row of vinyl planks along the longest wall, using either the click-and-lock method or adhesive, depending on the type of vinyl flooring you are installing.
Before you begin, ensure that the subfloor is clean, dry, and smooth to provide a sturdy foundation for the planks. When using the click-and-lock method, simply interlock the planks at an angle and press them down to secure. This method works well for floating floors. On the other hand, adhesive application is ideal for more permanent installations or in areas prone to moisture.
4. Continue laying the vinyl planks
Continue laying the vinyl planks across the floor, ensuring that each plank clicks into place or is properly adhered to, and staggering the joints for a more natural appearance.
As you continue with the installation, remember to maintain a consistent pattern to enhance the overall aesthetic appeal. This involves double-checking the alignment of each plank to create a uniform look.
An essential tip is to offset the joints by at least 6 inches for a professional finish. Staggering the joints not only adds visual interest but also increases the structural integrity of the flooring.
5. Cut and Fit Around Obstacles
When you encounter obstacles such as door frames or vents, carefully measure and cut the vinyl flooring to fit snugly around these areas, ensuring a clean and professional finish.
One essential technique is to create a template using a piece of paper or cardboard that matches the shape of the obstacle. Transfer this template onto the vinyl flooring and use a sharp utility knife or vinyl cutter to make precise cuts along the lines.
It’s crucial to work slowly and steadily, ensuring accuracy in each cut to avoid gaps or overlaps. Smoothly applying pressure while cutting will result in clean edges and seamless integration with the rest of the flooring.
Consider using a heat gun to soften the vinyl around complex shapes or corners, allowing for easier manipulation and a better fit. Always double-check measurements before making any cuts to avoid costly mistakes.
How to Lay Vinyl Flooring on Floorboards: Finishing
After laying all the vinyl flooring, the final step involves adding the finishing touches such as installing skirting boards and trims, as well as applying any necessary adhesive to secure the edges and prevent lifting.
1. Install Skirting Boards and Trims
Install skirting boards and trims around the perimeter of the room to cover the expansion gaps and provide a polished look to your vinyl flooring installation.
Before starting the installation process, ensure that the vinyl flooring has acclimatised to the room’s temperature and that the subfloor is clean and level. Begin by measuring the length needed for each section of the skirting board, ensuring to leave a small gap at each end to allow for expansion. Cut the boards accurately using a mitre saw for precise angles. Secure the boards to the wall using nails or adhesive, ensuring they are level and snug against the flooring. Finish by attaching the trims to the top of the skirting for a professional touch.
2. Apply Sealant and Adhesive
Apply sealant and adhesive to the edges of the vinyl flooring to secure it in place and create a waterproof seal, ensuring adequate curing time for the best results.
When applying the sealant and adhesive, make sure to use a caulking gun for precision and control. Begin by thoroughly cleaning the edges of the vinyl flooring to remove any dust or debris that could affect adhesion. Next, cut the tip of the tube at a 45-degree angle to achieve a smooth flow of the product.
As you apply the sealant, move the caulking gun steadily along the edges in a continuous motion. Avoid leaving gaps or breaks in the sealant to maintain the waterproof barrier effectively. After application, allow the curing time specified by the manufacturer before allowing foot traffic or heavy use of the flooring to ensure maximum durability.
Maintenance and Care for Vinyl Flooring on Floorboards
Proper maintenance and care are essential to keep your vinyl flooring on floorboards looking new and extending its lifespan, which includes regular cleaning and addressing spills promptly to prevent damage.
Regarding cleaning vinyl flooring, it’s best to start with gentle techniques. Begin by sweeping or vacuuming regularly to remove dust and debris that can scratch the surface. For deeper cleaning, damp mop with a mixture of warm water and a mild cleaner specifically designed for vinyl floors. Avoid using harsh chemicals, as they can strip away the protective layers of the flooring.
It’s also important to tackle spills right away to prevent staining. Blot spills with a soft cloth or towel, and clean the area with a gentle cleaning solution. Consider using mats at entryways to minimise dirt and moisture being tracked onto the vinyl floors.
That’s all about how to lay vinyl flooring on floorboards. Are you ready to transform your living space with stylish, durable, and affordable flooring? Look no further than TEKA Flooring, your premier destination for high-quality vinyl flooring in Peterborough.
We invite you to flooring store in Peterborough to explore our stunning range of vinyl flooring options in person. Our friendly team is ready to assist you, answer any questions, and help you make the best choice for your home.
Read also: