Are you considering vinyl flooring for your home but not sure where to start? In this comprehensive guide, we will cover everything you need to know about the steps of preparing for vinyl flooring installation and provide tips on how to maintain and care for it.
We will also walk you through the different types of vinyl flooring available such as Luxury Vinyl Tile (LVT), Sheet Vinyl, and Vinyl Plank Flooring, to the reasons why vinyl flooring is a popular choice among homeowners.
Whether you are a DIY enthusiast or looking to hire a professional, this article is your go-to resource for all things vinyl flooring.
What Is Vinyl Flooring?
Vinyl flooring is a versatile and resilient flooring option that mimics the look of other materials like wood or tile but offers added benefits such as durability and water resistance.
One of the standout characteristics of vinyl flooring is its versatility, as it can be installed in various rooms of a house, including kitchens, bathrooms, and even basements.
Is vinyl flooring easy to install? Yes, easy installation is another advantage, with options for glue-down, click-and-lock, or peel-and-stick applications. Vinyl flooring is known for its low maintenance requirements, requiring only regular sweeping and occasional mopping to keep it looking fresh. Unlike hardwood floors, vinyl is resistant to scratches and stains, making it ideal for homes with pets or children.
Types of Vinyl Flooring
Vinyl flooring comes in various types, including Luxury Vinyl Tile (LVT), Sheet Vinyl, and Vinyl Plank Flooring, each offering unique designs, textures, and installation methods.
Luxury Vinyl Tile (LVT) stands out for its high-end appearance resembling natural materials like stone or wood, making it a popular choice for upscale spaces.
Sheet Vinyl, on the other hand, is known for its seamless installation due to broad rolls that cover large areas efficiently.
Vinyl Plank Flooring replicates the look of hardwood with individual planks that snap or glue together, perfect for achieving a realistic wood finish without the maintenance requirements of real wood.
While Luxury Vinyl Tile (LVT) and Vinyl Plank Flooring often feature a simple click-lock or glue-down installation system, Sheet Vinyl is typically rolled out and trimmed to fit the room’s dimensions accurately.
Each type of vinyl flooring presents varying levels of durability, moisture resistance, and ease of care, catering to different needs and preferences.
a. Luxury Vinyl Tile (LVT)
Luxury Vinyl Tile (LVT) is a premium vinyl flooring option known for its high-end appearance and durability, often used in residential and commercial settings.
One of the standout features of Luxury Vinyl Tile is its versatility in design, offering a wide range of patterns, colours, and textures that can mimic natural materials like wood and stone with remarkable realism. The installation process is relatively simple due to its click-and-lock or glue-down options, making it a popular choice for DIY enthusiasts or professionals. LVT is highly resistant to scratches, stains, and water damage, requiring minimal maintenance to keep its pristine look intact.
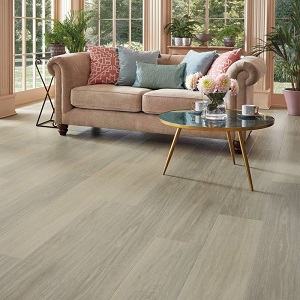
See product: Karndean Art Select Oak Royale Glacier Oak
b. Sheet Vinyl
Sheet Vinyl is a cost-effective vinyl flooring choice that comes in large, continuous rolls, making it suitable for covering large areas quickly and easily.
One of the key advantages of Sheet Vinyl is its versatile range of styles and designs, including wood, tile, and stone patterns, providing aesthetic options for various spaces. This type of flooring is known for its durability and water resistance, making it an ideal choice for high-traffic areas and moisture-prone environments such as kitchens and bathrooms.
c. Vinyl Plank Flooring
Vinyl Plank Flooring replicates the look of hardwood flooring but with added benefits such as water resistance and easy maintenance, making it a popular choice for modern interiors.
One of the key features of Vinyl Plank Flooring is its durability – it can withstand heavy foot traffic and is resistant to scratches and stains, perfect for busy households. Installation of vinyl plank flooring is relatively easy, with options for adhesive, click-lock, or loose lay methods.
Compared to traditional hardwood floors, vinyl plank flooring is typically more affordable and requires less upkeep. It can be used in areas prone to moisture, like kitchens and bathrooms, without the risk of warping or rotting.
The Benefits of Vinyl Flooring
Vinyl flooring is a popular choice for many homeowners due to its durability, water and stain resistance, easy maintenance, and cost-effectiveness compared to other flooring options.
Its high durability makes it ideal for high-traffic areas in the home, such as the kitchen or hallway, where wear and tear are common. The water and stain resistance of vinyl flooring makes it perfect for areas prone to spills, like bathrooms or laundry rooms, as it can be easily wiped clean without damage.
Regarding maintenance, vinyl flooring requires minimal effort to keep looking great – regular sweeping and occasional mopping are typically all that’s needed to maintain its appearance. This low maintenance requirement is a big draw for busy households that want a beautiful floor without the hassle.
In terms of cost, vinyl flooring is often more budget-friendly than hardwood or tile options, making it an attractive choice for those looking to save money without compromising on style or quality. With the wide range of designs and styles available, homeowners can achieve the look they want at a fraction of the cost of other flooring materials.
a. Durable and Long-lasting
Vinyl flooring is known for its durability and longevity, with high-quality vinyl floors lasting for many years even in high-traffic areas.
One of the key features that contribute to the resilience of vinyl flooring is its ability to withstand wear and tear effortlessly. The construction of vinyl flooring, with its multiple layers including a protective top layer, ensures that it can resist scratches, stains, and fading, making it ideal for spaces that experience heavy foot traffic.
Vinyl flooring is renowned for its impact resistance, capable of handling the daily rigours of a busy household or commercial setting. This durability makes vinyl a practical choice for areas prone to drops or heavy objects, as it can endure such impact without significant damage.
Along with its durability, vinyl flooring is relatively low-maintenance, requiring only periodic sweeping and occasional mopping to keep it looking pristine. This ease of care contributes to its long lifespan, allowing it to maintain its aesthetic appeal for years to come.
b. Water and Stain Resistant
One of the key benefits of vinyl flooring is its water and stain resistance, making it ideal for areas prone to spills or moisture like kitchens and bathrooms.
With its impermeable surface, vinyl flooring creates a protective barrier that repels liquid spills effortlessly, preventing them from seeping into the material and causing stains. This waterproof feature not only enhances the durability of the flooring but also simplifies the cleaning process. By quickly wiping away spills and stains, you can maintain the pristine look of vinyl flooring for longer periods.
c. Easy to Maintain
Vinyl floor covering is easy to maintain and clean, requiring simple regular care such as sweeping, vacuuming, and occasional mopping to keep it looking fresh and attractive.
For routine maintenance, it is recommended to sweep or vacuum the floor regularly to remove dirt, dust, and debris. Damp mopping with a gentle cleaner is suitable for deeper cleaning when needed.
Stain removal on vinyl floor covering can be tackled promptly by using a mild detergent or specialised vinyl floor cleaner, avoiding harsh chemicals that may damage the surface. When selecting cleaning products, opt for those specifically designed for vinyl floors to ensure the longevity of your flooring. With proper care and timely attention to spills and stains, your vinyl floor covering can retain its beauty for years to come.
d. Cost-effective
Vinyl flooring is a cost-effective flooring option, offering a balance between affordability and quality, making it a budget-friendly choice for many homeowners.
One of the primary factors that make vinyl flooring a cost-effective choice is its upfront pricing. Vinyl flooring installation cost is often more affordable than other flooring options like hardwood or ceramic tiles, allowing homeowners to achieve the desired look without breaking the bank.
The long-term value of vinyl flooring should not be overlooked. While it may have a lower initial cost, vinyl flooring is known for its durability and low maintenance requirements, which can result in cost savings over time.
Installation costs for vinyl flooring are typically lower than those of other types of flooring, further contributing to its cost-effectiveness.
Preparing for Vinyl Flooring Installation
Proper preparation is key when installing vinyl flooring, including measuring and ordering the correct amount of flooring, prepping the subfloor, and having all the necessary materials and tools for vinyl flooring.
Regarding measuring for vinyl flooring, it’s crucial to account for any irregularities in the room shape or layout, allowing for some extra material for cuts and adjustments.
For the subfloor, it should be clean, flat, and dry before installation to ensure a smooth and stable foundation for the vinyl.
The essential vinyl flooring installation tools you’ll need for the job include a tape measure, utility knife, straight edge, adhesive, a trowel for spreading adhesive, and a roller for ensuring proper adhesion.
1. Measuring and Ordering the Right Amount of Flooring
Accurate measurement and ordering of the correct amount of vinyl flooring are crucial to ensure a seamless installation process and avoid material wastage or shortages.
Regarding estimating the required amount of vinyl flooring, precision is key. It’s essential to calculate the square footage of the area accurately to avoid unnecessary expenses or running out of material mid-project. Taking into consideration the unique layout of each room, including angles, nooks, and crannies, will help in determining the exact measurements needed. In addition, paying attention to pattern matching is vital for achieving a professional and cohesive look. By carefully planning and ordering the right quantity of flooring, you can save both time and money, ensuring a successful installation from start to finish.
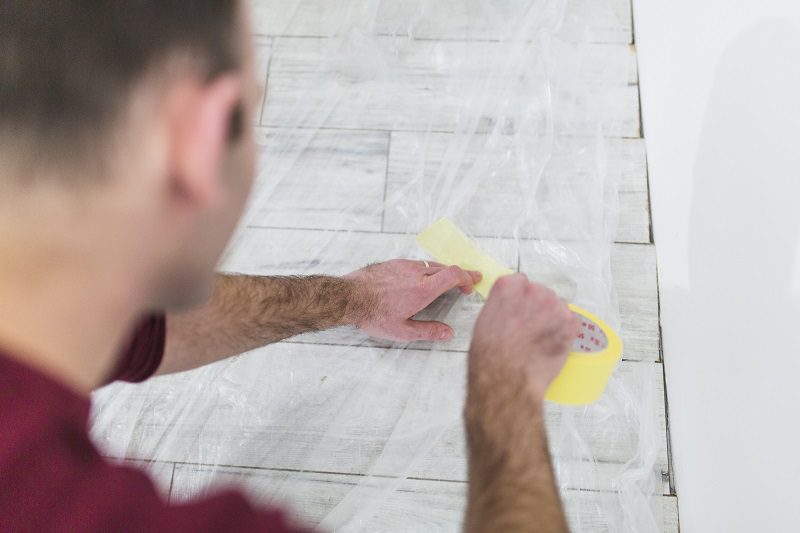
2. Preparing the Subfloor
Preparing the subfloor is essential before installing vinyl flooring, ensuring a smooth and stable surface for the new flooring to adhere to and preventing issues like unevenness or squeaking.
- To begin the process, start by thoroughly cleaning the subfloor to remove any dirt, debris, or existing adhesive residues.
- Next, check the levelness of the subfloor and address any low spots by applying a self-leveling compound.
- Once the floor is level, apply a primer to help the vinyl flooring adhere properly. This step is crucial in ensuring a strong bond between the subfloor and the new vinyl flooring.
Proper subfloor preparation is key to the longevity and performance of your vinyl flooring installation process.
3. Gathering Necessary Tools and Materials
Having the right tools and materials at hand is essential for a successful vinyl flooring installation process, including items like adhesive, underlay, cutting tools, and a tape measure.
Additional tools crucial for a seamless installation process include a utility knife for precise cuts, a hand roller for securely pressing down the flooring, and a trowel for spreading adhesive evenly.
Proper preparation is key – ensure you have a chalk line for accurate layout marking and a primer for sealing the subfloor before installation.
- Don’t forget a floor cleaner to keep the surface tidy and a knee kicker for positioning the flooring during fitting.
- Have a rubber mallet to gently tap the planks into place and ensure a snug fit.
Vinyl Flooring Installation Tips
Steps to install vinyl flooring include preparing the subfloor, laying out the flooring, cutting and trimming pieces, applying adhesive, securing the flooring, and finishing the edges and seams for a polished look.
One of the first steps in the installation process is preparing the subfloor; this ensures a smooth and even surface for the vinyl to adhere to. Once the subfloor is ready, carefully lay out the vinyl flooring making sure to leave space for expansion around the edges. Next, precise cutting and trimming of pieces may be required to fit the flooring snugly into the space. Applying the adhesive evenly and allowing it to set per the manufacturer’s instructions is crucial.
Securing the flooring in place involves pressing down firmly to ensure proper adhesion. Finishing the edges and seams with matching trim pieces or sealer adds a professional touch to the installation.
Step 1: Prepare the Subfloor
- The first step in a vinyl flooring installation process is to prepare the subfloor by cleaning, levelling, and ensuring it is free of debris and imperfections to create a suitable base for the new flooring.
Inspect the subfloor carefully for any signs of water damage or mould, as these issues must be addressed before proceeding.
Repairs should be done using a suitable filler to correct any uneven areas. After repairs, it is crucial to prime the subfloor to enhance adhesion and prevent moisture-related problems in the future. This step is essential for ensuring the longevity and durability of your new vinyl flooring.
Step 2: Lay Out the Vinyl Flooring
After the subfloor is ready, the next step is to lay out the vinyl flooring according to the room dimensions and layout, ensuring proper alignment and pattern placement before installation.
When positioning the vinyl flooring, start by finding the centre of the room and placing the first plank in a straight line along that point. This initial placement is crucial as it sets the tone for the entire installation process. Ensure that the planks are parallel to the longest wall in the room to create a visually appealing result.
Step 3: Cut and Trim the Vinyl Flooring
Trimming and cutting the vinyl flooring to fit the room dimensions and edges is a vital stage that requires accuracy and the appropriate tools to achieve flawless installations.
To accurately trim vinyl flooring, measure the space meticulously and use a ruler to mark where to trim. When trimming, use a sharp craft knife or specialised vinyl shears for neat edges. Score the vinyl gently before cutting through to prevent damaging the subfloor. Always wear protective goggles and gloves to shield yourself from any potential mishaps. Trim the edges meticulously to ensure a tight fit and prevent any gaps. Remember to double-check the measurements before making final trims for a polished finish.
Step 4: Apply Adhesive and Lay the Flooring
Applying adhesive and laying the vinyl flooring systematically ensures proper adhesion and alignment, creating a secure bond between the flooring and the subfloor.
Before starting the application process, ensure you have the correct type of adhesive for your vinyl flooring. There are various options available, such as pressure-sensitive adhesive, water-based adhesive, and solvent-based adhesive.
- First, prepare the subfloor by ensuring it is clean, dry, and level.
- Use a trowel to spread the adhesive evenly onto the subfloor, taking care to follow the manufacturer’s instructions regarding coverage rates and drying times.
When laying the vinyl flooring, start in one corner of the room and work your way across. Ensure each piece is properly aligned before pressing it down firmly to secure it in place.
Step 5: Roll Out and Secure the Flooring
Rolling out the flooring and securing it in place helps eliminate air bubbles and ensures a flat surface, enhancing the overall appearance and longevity of the vinyl flooring.
When rolling out vinyl flooring, it is crucial to apply even pressure across the surface to prevent bumps and creases that can impact the final look. Proper seam alignment is essential for a seamless finish, ensuring that the individual pieces fit snugly together. Taking the time to make final adjustments by trimming excess edges and ensuring all seams are tightly secured not only enhances the aesthetics but also contributes to the durability of the flooring.
Step 6: Finish the Edges and Seams
Finishing the edges and seams of the vinyl flooring gives the installation a polished look and ensures a seamless transition between flooring sections, enhancing the aesthetic appeal of the room.
Regarding finishing edges and seams of vinyl flooring, attention to detail is key. One popular method for creating strong, durable seams is heat welding. This technique involves using a heat gun and a special welding rod to melt the edges of the vinyl together, resulting in a bond that is both visually seamless and incredibly strong. Alternatively, seam sealers can also be used to seal the edges, providing a clean finish and preventing moisture infiltration. To achieve professional results, ensure the seams are aligned perfectly before applying the chosen finishing method.
Maintenance and Care for Vinyl Flooring
Regular maintenance and proper care are essential for preserving the appearance and longevity of vinyl flooring, including routine cleaning, stain removal, and preventive measures to avoid damage.
One of the best practices for vinyl flooring maintenance is to establish a regular cleaning routine. This includes sweeping or vacuuming to remove debris and dust, followed by mopping with a manufacturer-recommended cleaner.
Preventive measures such as using furniture pads to prevent scratches and placing mats at entrances to trap dirt can significantly extend the life of your vinyl floors. Promptly addressing spills and stains with gentle cleaning solutions can prevent permanent damage and maintain the floor’s pristine look.
For professional installation, you can use the fitting service from TEKA Flooring. Our experts are here to provide all your flooring needs. Take it to TEKA and we will ensure a seamless hassle-free experience.
Also, At TEKA Flooring, you’ll find a wide selection of top-quality Luxury Vinyl Tile products from well-known brands like Karndean, Floorify, and Luvanto. Checkout your Favorite LVT options now!
Read also: