Scratches on laminate floors can appear quickly from everyday wear, yet they need not ruin the sleek look of your home. Discovering how to remove scratches from laminate flooring is a practical skill that saves time and money while preserving the beauty of your investment. With the right approach, most marks can be repaired at home using straightforward techniques that restore the surface without replacing entire planks.
This guide explains the process clearly so you can tackle the problem confidently and enjoy flawless floors once more.
How to Remove Scratches from Laminate Flooring
Laminate flooring is durable and stylish, but it can still pick up scratches from everyday use, furniture movement, or accidents. The good news is that many scratches can be repaired quickly and affordably without replacing the planks. This guide walks you through the proper steps, starting with correctly assessing the damage.
1. Assessing the Damage
Before any repair work begins, it is essential to evaluate the scratch properly. This initial check determines whether a simple fix will suffice or if a more involved solution is required, preventing further damage to the flooring.
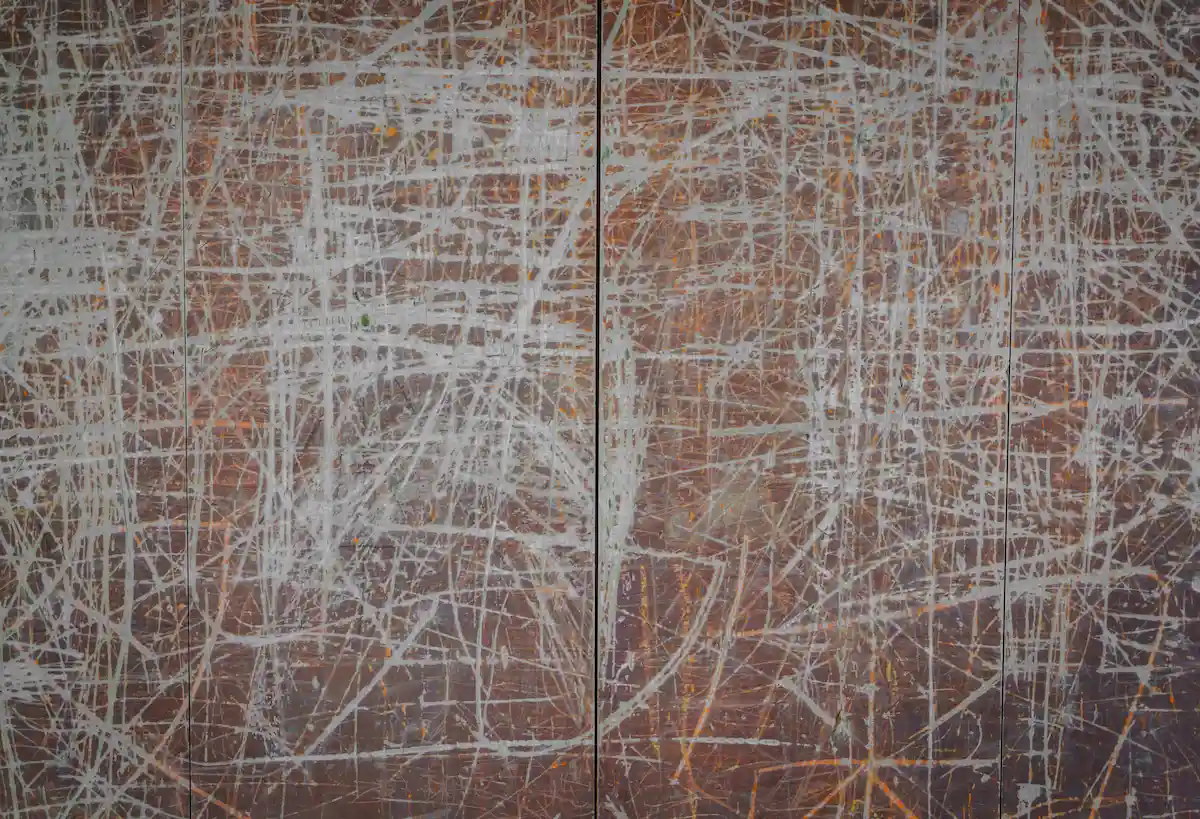
A. Identifying superficial marks
Superficial scratches affect only the thin protective wear layer. These appear as fine white or light lines that do not reach the printed design beneath. Run your finger gently over the area; if it feels almost smooth, the damage is surface-level and responds well to polishing or touch-up products.
B. Recognising moderate scratches
Moderate scratches penetrate slightly deeper, revealing the pattern layer or causing a visible groove. These often catch the light and feel rough to the touch. They usually require a specialised filler or repair kit that matches the floor’s colour and texture.
C. Knowing when professional help is needed
If the scratch has gouged into the core board or the plank is lifting, replacement is the only lasting solution. In such cases, attempting a DIY repair may worsen the problem, so consult a flooring specialist promptly.
Read also: What Is Laminate Flooring Made Of? Understanding the Top Choice
2. Gathering the Right Tools and Materials
Having everything prepared in advance makes the repair process smoother and ensures a professional-looking finish. A few basic items and optional specialist products are all that most homeowners need.
A. Everyday household solutions
Collect a soft microfibre cloth, mild laminate cleaner, a vacuum with a soft brush attachment, and a pencil eraser or white toothpaste for very light marks. These items are usually already in the home and work effectively on minor scratches.
B. Specialised repair products
Purchase a laminate repair kit containing colour-matched wax sticks, touch-up markers, or a scratch repair pen designed specifically for laminate flooring. These products blend seamlessly with the original finish and provide longer-lasting results.
C. Safety and protective items
Wear soft-soled shoes during repair to avoid new marks, and keep a dustpan and brush handy. Good ventilation is advisable when using any filler or polish.
Read also: How To Install Laminate Flooring on Stair for Beginner
3. Step-by-Step Repair Process
Following a methodical approach guarantees the best outcome and minimises the risk of accidental damage to surrounding areas. The technique varies slightly depending on scratch depth, yet the core stages remain the same.
A. Cleaning the scratched area
Begin by vacuuming thoroughly to remove all dust and grit. Wipe the floor with a barely damp microfibre cloth and a pH-neutral laminate cleaner, then allow the surface to dry completely. Any remaining dirt will interfere with the repair and may cause the scratch to appear more prominent.
B. Applying the appropriate repair technique
For superficial marks, rub a colour-matched touch-up marker or crayon gently along the scratch, working in the direction of the plank grain. For deeper grooves, warm a wax filler stick with a hairdryer and press it into the scratch, smoothing the excess with a plastic scraper. Allow it to harden for the recommended time.
C. Buffing and sealing the surface
Once the filler has set, buff the area lightly with a soft cloth or the polishing pad supplied in the kit until it blends with the surrounding floor. Apply a thin layer of laminate floor polish if desired to restore the original sheen and add an extra protective barrier.
4. Preventing Future Scratches
Maintaining your laminate flooring properly extends its life and reduces the frequency of repairs. Simple habits make a significant difference.
Place felt pads under furniture legs, use doormats at entrances, and avoid dragging heavy objects across the floor. Regular sweeping and occasional polishing keep the surface resilient and easier to clean.
In conclusion, mastering how to remove scratches from laminate flooring empowers you to keep your home looking its best without expensive professional call-outs. By assessing the damage, using the correct tools, and following the steps outlined, most imperfections can be erased quickly and effectively.
If you are considering new or replacement laminate flooring after your repairs, explore the premium collection at TEKA Flooring Peterborough. Their durable, stylish laminate floor products are designed to resist everyday wear while offering beautiful finishes that complement any interior. Visit our showroom or contact the team today to find the perfect solution for your home and enjoy floors that stay pristine for years to come.
Read also: Is Laminate Flooring Toxic? What You Need to Know