Looking to upgrade your home with a beautiful and durable flooring option? Engineered wood floors might be the perfect choice for you. However, what do you already know about how to install engineered wood floors?
In this article, we will explore the benefits of choosing engineered wood floors, the tools and materials you will need for the installation process, and a step-by-step guide for engineered wood flooring installation
From durability to cost-effectiveness, we will cover everything you need to know about how to install engineered wood floors to transform your space with engineered wood floors. Let’s get started!
Tools and Materials Needed for Fitting Engineered Wood Flooring
What do you need to install engineered hardwood floors? Before installing engineered wood floors, gather essential tools and materials such as underlay, adhesive, flooring planks, a rubber mallet, tape measure, and a saw.
a. Underlayment
Underlay acts as a crucial foundation for engineered wood flooring, providing insulation, soundproofing, and moisture protection.
When installing engineered wood flooring, the choice of underlay can significantly impact the overall performance and longevity of the floor. The underlay helps to create a smooth and even surface for the flooring to be installed upon, ensuring that the floor remains stable and secure over time.
Underlay plays a key role in reducing noise transmission, making your living space quieter and more comfortable. By absorbing impact sound and minimising vibrations, underlay enhances the acoustics of the room, creating a peaceful environment.
Underlay acts as a barrier against moisture, preventing water damage and mould growth. This moisture protection is essential, especially in areas prone to high humidity or potential water exposure.
b. Engineered Wood Flooring
Engineered wood flooring is the primary material used for the floor surface, offering a versatile and durable option for various interior designs.
One of the key benefits of engineered wood flooring is its resistance to moisture and temperature changes, making it ideal for areas prone to high humidity levels. The top layer of real wood provides an authentic look and feel, enhancing the overall aesthetics of a space.
The structural integrity of engineered wood flooring is also commendable, as it is less prone to expansion and contraction compared to solid wood floors, resulting in a more stable surface over time.
Its design versatility allows for a wide range of finishes and styles, catering to diverse design preferences.
c. Moisture Barrier
A moisture barrier is essential to prevent moisture-related issues such as warping or cupping in engineered wood flooring, ensuring long-term performance and durability.
By acting as a shield against water vapour and moisture seepage, the moisture barrier acts as a protective layer between the subfloor and the engineered wood planks. This crucial element helps to maintain the stability and structural integrity of the flooring over time. Additionally, moisture barriers play a vital role in preserving the aesthetic appeal of the floor, preventing unsightly damage like swelling or cracking.
d. Adhesive or Nails
Adhesive or nails are used to secure the engineered wood flooring in place, providing a stable and permanent bond between the flooring and the subfloor.
In terms of the application methods, if using an adhesive, it’s crucial to ensure that the subfloor is clean and free of any debris.
Applying the adhesive evenly and allowing it to cure properly plays a significant role in the bonding process.
Benefits of using adhesive include enhanced sound insulation and preventing moisture from seeping through the gaps.
On the other hand, nails are often preferred for their quick installation and ease of replacement if required.
Considering the type of subfloor and the climate conditions is essential when deciding between adhesive or nails.
e. Saw
A saw is necessary for cutting engineered wood flooring to fit around corners, edges, or obstacles, ensuring a precise and seamless installation.
In terms of selecting the right type of saw for this task, the key consideration is the type of cut you need. For straight cuts along the length of the flooring planks, a table saw or mitre saw could be ideal, providing clean and accurate results.
For intricate cuts around irregular shapes or corners, a jigsaw or circular saw with a fine-toothed blade can offer better manoeuvrability and precision. These tools allow you to navigate tight spaces and craft detailed cuts with ease.
Correct technique is also crucial when using a saw for flooring installation. It’s essential to measure and mark the cutting lines accurately before making any cuts to avoid mistakes that can spoil the appearance of your floor.
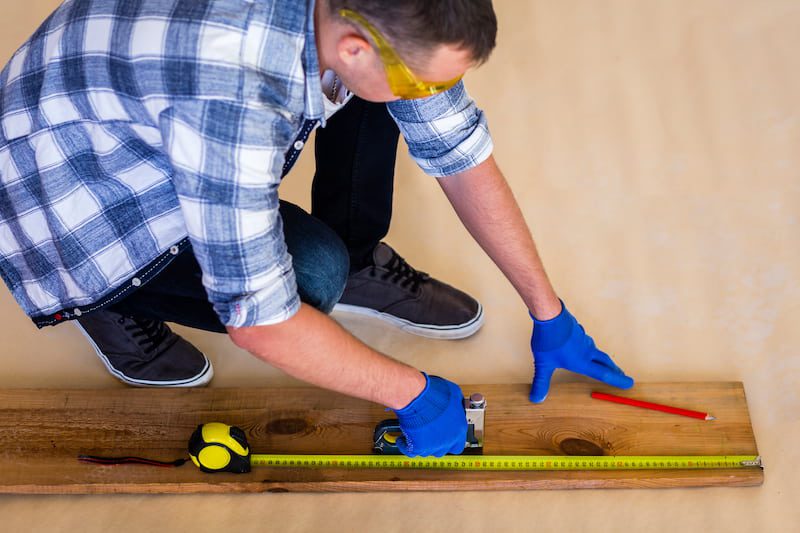
f. Measuring Tape
A measuring tape is critical for accurately measuring and laying out the installation area, ensuring precise cuts and alignment of engineered wood flooring.
When embarking on the installation process, having a reliable measuring tape at hand is crucial for obtaining precise measurements of the room dimensions. This tool helps in mapping out the layout design, ensuring that the engineered wood planks are aligned correctly and fit seamlessly together. Without proper measurements from the tape, you run the risk of inaccurate cuts, misaligned flooring, and potential wastage of materials. It serves as a guide to achieving a professional finish and a polished look for your flooring project.
g. Hammer
A rubber mallet or hammer is essential for gently tapping and securing the flooring planks together without causing damage during installation.
When using a rubber mallet for assembling flooring planks, it’s crucial to implement the proper tapping technique. This involves applying controlled force to ensure each plank fits snugly without any gaps. Safety precautions should always be a top priority, such as wearing protective gear like goggles and gloves to prevent any accidents. It’s also vital to choose a non-damaging tool like a rubber mallet to avoid leaving marks or dents on the surface of the planks.
Choosing the right tool can make a significant difference in the overall quality of the installation process.
h. Tapping Block
A knocking block, often used with a rubber mallet, assists in ensuring uniformity and tight seams between engineered wood flooring planks, enhancing the overall appearance and stability of the floor.
By providing a surface to evenly distribute the force of the mallet, the knocking block helps prevent damage to the flooring material while securely locking the planks in place. This essential tool plays a crucial role in minimising the risk of uneven gaps and misalignments, facilitating a professional finish and ensuring that the floor remains structurally sound over time. It also simplifies the installation process by allowing installers to work more efficiently and precisely, ultimately saving time and effort.
How to Install Engineered Wood Floors
How is engineered wood flooring installed? A guide to laying engineered wood flooring starts by assessing the subfloor condition to ensure it is clean, level, and free of any moisture issues. Repair any imperfections or uneven areas to provide a smooth surface for the engineered wood flooring.
Next, install the appropriate underlayment material, such as foam or cork, to provide cushioning and sound absorption. Follow the manufacturer’s guidelines for proper underlayment installation.
When laying the engineered wood flooring, begin in one corner of the room and work your way across, staggering the planks for a more natural look. Use a tapping block and rubber mallet to ensure the planks fit together snugly. Below is a more detailed explanation of how to install engineered wood floors.
1. Prepare the Subfloor
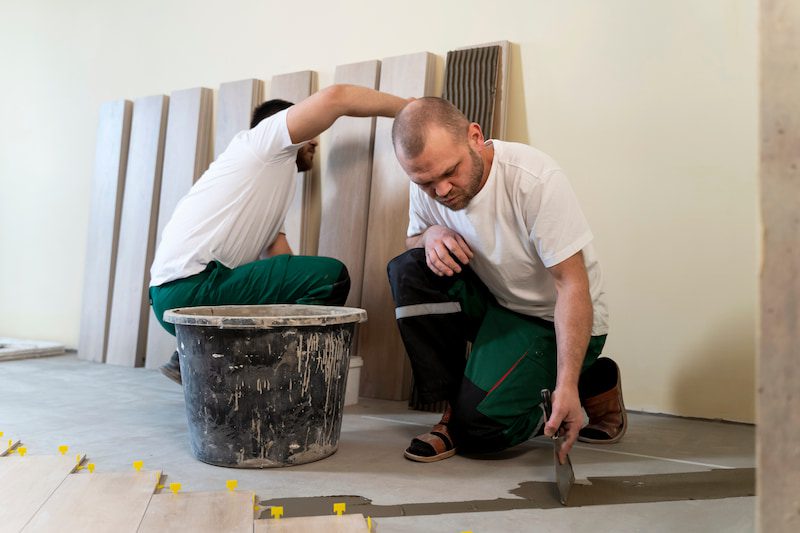
Proper subfloor preparation is essential for a successful engineered wood flooring installation, ensuring a level, clean, and stable foundation for the new floor.
Before installing engineered wood flooring, it is crucial to assess the moisture levels of the subfloor to prevent future issues. Excessive moisture can lead to warping and damage.
Next, addressing any irregularities in the subfloor, such as bumps or dips, is crucial for achieving a smooth and level surface. Existing floor conditions must be evaluated to ensure compatibility with the new flooring.
By taking these steps, you can safeguard the longevity and stability of your engineered wood flooring.
2. Lay the Underlayment
Installing underlay provides a protective barrier and cushioning layer for engineered wood floors, enhancing comfort, durability, and acoustics.
When laying underlay for floors, the process typically involves cleaning and levelling the subfloor to ensure a smooth surface. The underlay is then rolled out, with seams overlapped and taped to create a continuous barrier against moisture. This layer not only helps in reducing noise transmission within the room but also acts as a thermal insulator, keeping the floor warm during colder months. Underlay can prevent moisture from seeping into the wood, prolonging the lifespan of the flooring.
3. Install the Moisture Barrier

The installation of a moisture barrier is crucial in preventing moisture-related issues and preserving the integrity of engineered wood flooring over time.
One of the primary steps in installing a moisture barrier involves prepping the subfloor to ensure a smooth and clean surface for optimal adhesion. This process may include removing any debris, levelling uneven areas, and repairing any cracks or imperfections.
Next, carefully lay out the moisture barrier material, ensuring that it covers the entire floor area with no gaps or overlaps. Use proper adhesives or tapes to secure the barrier in place, paying attention to corners and edges.
Additionally, proper sealing of seams and edges is essential to create a continuous barrier that effectively blocks moisture infiltration. This meticulous approach significantly enhances the barrier’s performance and longevity in safeguarding the engineered wood flooring against potential damage.
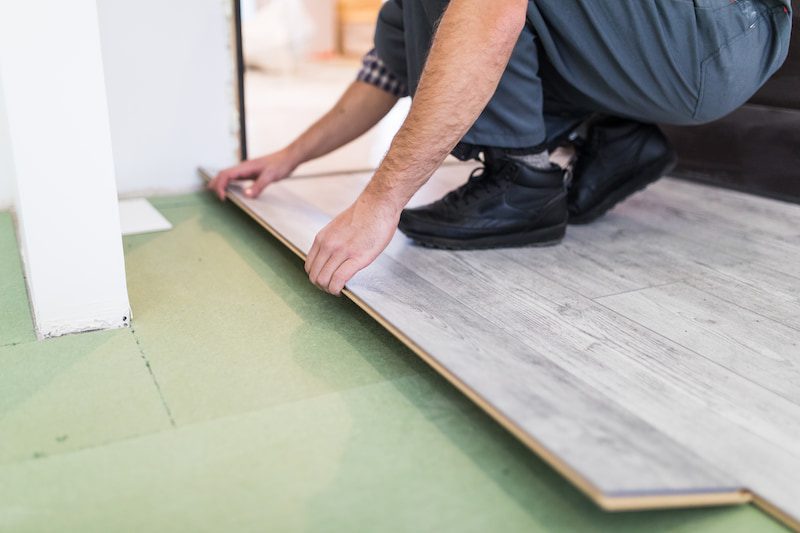
4. Begin Laying the Flooring
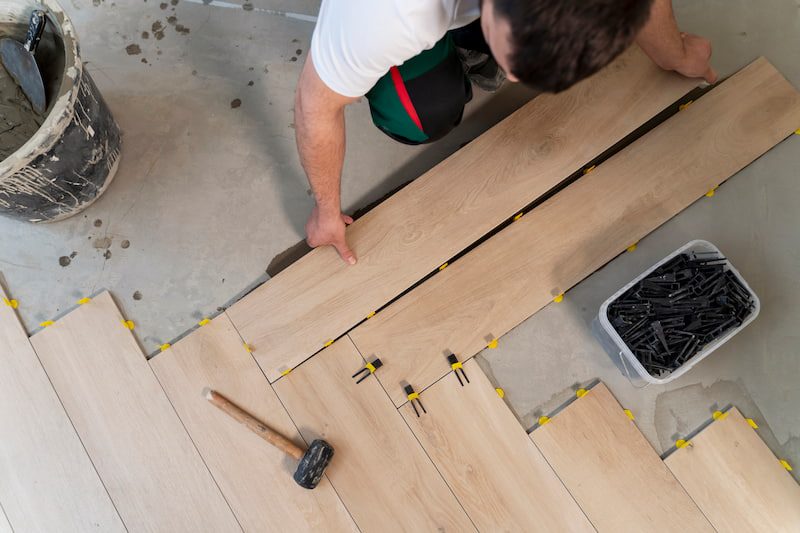
Start laying engineered wood flooring by interlocking the tongue and groove joints, ensuring proper alignment, spacing for expansion gaps, and a seamless fit.
Once you have secured the first row of planks, continue by adding subsequent rows in a staggered pattern to create a more stable and visually appealing floor. Remember to maintain the recommended expansion gap of at least 1/4 inch along the perimeter of the room to allow the wood to naturally expand and contract with changes in humidity and temperature.
Use a tapping block and a rubber mallet to gently tap each plank into place, ensuring tight joints without causing any damage to the material. Check periodically with a straight edge to verify that the planks are level and aligned correctly, making any necessary adjustments as you progress.
5. Cut and Fit the Flooring
Use a saw to cut and fit the engineered wood flooring around corners, edges, or obstacles, ensuring a tailored and professional finish with the assistance of cork strips for expansion gaps.
When cutting the planks, make sure to measure precisely before making any incisions to avoid unnecessary gaps or irregularities in the alignment. Seam alignment is crucial for maintaining a seamless appearance; take time to fit each plank snugly together for a cohesive look.
Integrating cork strips within expansion joints helps manage the natural movement of the wood due to temperature and humidity changes, preventing buckling or warping over time. These strips act as a buffer, allowing the flooring to expand and contract without causing damage.
6. Secure the Flooring

The next step in how to install engineered wood floors is to secure the engineered wood flooring in place using adhesive, nails, or a floating installation method, ensuring a stable, level, and visually appealing floor surface.
When opting for the adhesive method, make sure the subfloor is clean and dry before applying the adhesive evenly across the surface to create a strong bond. For nail installation, utilise a nail gun designed for wood flooring to securely fasten the planks to the subfloor. If choosing a floating installation, interlock the planks without attaching them to the subfloor, allowing for natural expansion and contraction.
Whichever method you choose, it is essential to follow the manufacturer’s recommendations to ensure the longevity and durability of your engineered wood flooring.
7. Finish the Installation

Complete the installation process by applying finishing touches, ensuring all flooring planks are securely in place, and making necessary adjustments for a polished and professional outcome.
One essential tip to perfect the final steps of your flooring installation is to carefully address trim installation details. Skirting boards and transition moulding should be securely put in place to enhance the visual appeal and protect the edges of your new flooring. Pay close attention to gap-filling to ensure a seamless finish. Consider using a high-quality filler that matches your flooring colour and texture to fill in any remaining gaps for a cohesive look.
Key Tips on How to Install Engineered Wood Floors
- Acclimatise the Flooring – Leave the planks in the room for at least 48 hours to adjust to temperature and humidity.
- Prepare the Subfloor – Ensure it’s clean, dry, and level. Use a moisture barrier if installing over concrete.
- Plan the Layout – Arrange the planks to minimise waste and avoid small cuts at the edges.
- Choose the Right Underlay – Use an appropriate underlay to reduce noise and moisture issues.
- Leave Expansion Gaps – Maintain a 10-15mm gap around the perimeter to allow for natural movement.
- Use the Correct Installation Method – Depending on your flooring type, use click-lock, glue-down, or floating methods.
- Stagger Joints – Ensure the planks’ end joints are offset by at least 30cm for a natural look and stability.
- Cut Carefully – Use a fine-tooth saw for precise cuts without splintering.
- Secure the Flooring – Ensure planks are properly clicked together or glued down to prevent gaps.
- Finishing Touches – Install skirting boards or beading to cover expansion gaps and clean with a damp mop.
Installing engineered wood floors offers the benefit of increased stability compared to solid wood floors, making them less susceptible to changes in humidity and temperature. This structural advantage makes engineered wooden floors an ideal choice for areas with varying climates, such as basements or kitchens
It would be highly beneficial for you to choose high-quality engineered wood floors like those from Lionvaest’s collection offered at TEKA Flooring. Lionvest provides a range of engineered wood types that you can customise to complement your home’s design, spanning from brown tones and grey tones to natural-tone engineered wood flooring.
Read Also: