Are you considering updating your flooring but don’t want to deal with the hassle of removing your existing tile? Do you think vinyl flooring might be the perfect solution for you? We will explore the different types of vinyl flooring, discuss the pros and cons of laying vinyl over tile floors, and provide step-by-step instructions on how to successfully complete the installation.
Whether you’re looking for a cost-effective and easy-to-maintain option or are concerned about potential challenges, we’ve got you covered with tips for a successful installation. Let’s dive in and learn more about the benefits and drawbacks of putting vinyl over tile.
What Is Vinyl Flooring?
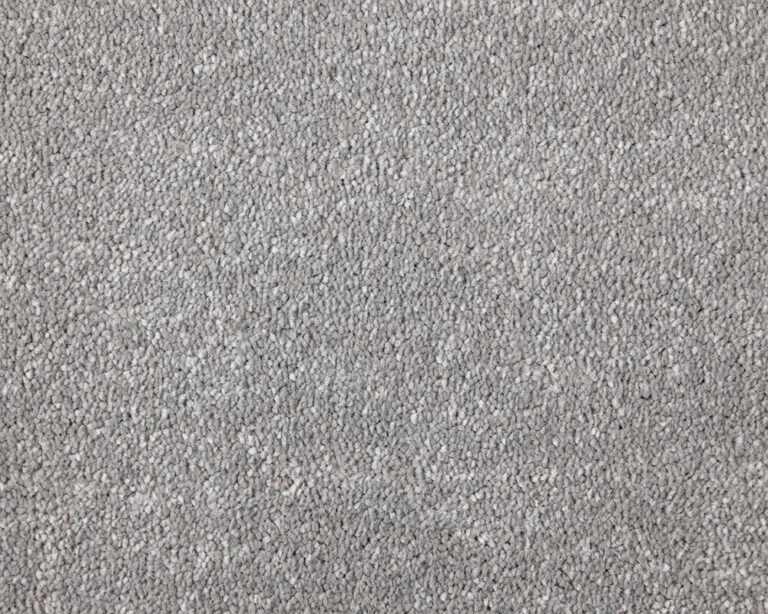
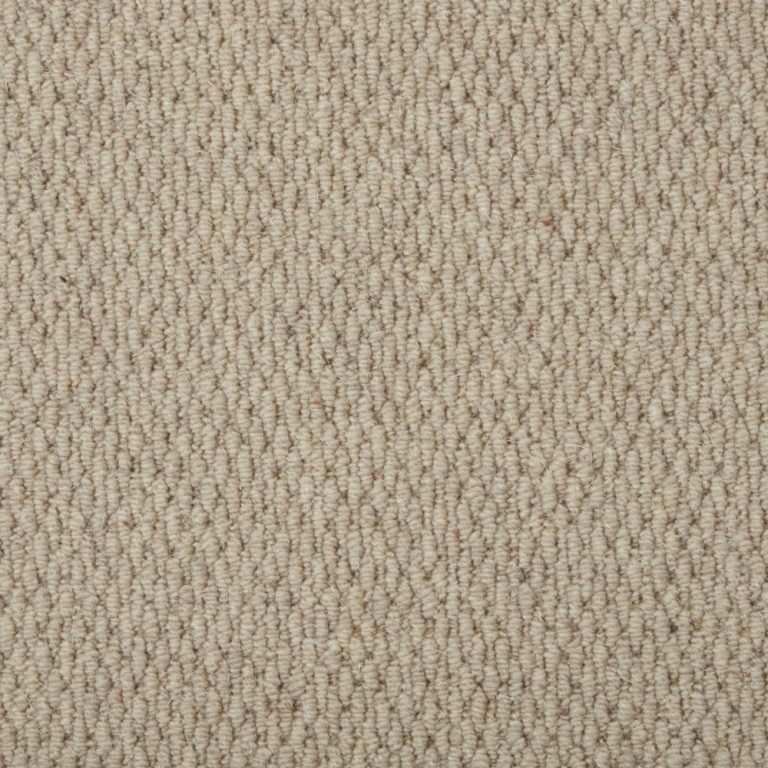
Vinyl flooring is a versatile and cost-effective flooring option that mimics the look of tiles while offering durability and easy maintenance. It is a synthetic material that comes in various styles, including luxury vinyl plank and tile designs.
This type of flooring provides the aesthetic appeal of tile floors without the added cost and maintenance requirements. Its composition often includes layers such as a wear layer, a decorative layer, a core layer, and a backing layer, making it resistant to scratches, stains, and water damage. In comparison to traditional tile flooring, vinyl is softer underfoot, warmer in colder climates, and more forgiving for dropped items. Installation methods vary from peel-and-stick tiles to click-lock planks, offering versatility and ease of fitting.
The Different Types of Vinyl Flooring
Vinyl flooring comes in various types, including peel-and-stick vinyl planks, glue-down vinyl planks, and floating vinyl planks. Each type offers unique installation methods and benefits.
a. Peel-and-Stick Vinyl Planks
Peel-and-stick vinyl planks are a convenient option for DIY enthusiasts as they require no additional adhesive. These planks can be directly applied to the subfloor or existing tile with the need for underlay.
One of the key advantages of peel-and-stick vinyl planks is their simple installation process. The first step involves preparing the subfloor by ensuring it is clean, smooth, and free of any debris. Next, simply peel off the protective backing and stick the planks onto the surface, pressing firmly to ensure a secure bond.
Although the lack of need for additional adhesives speeds up the installation, a potential challenge of these planks is ensuring the subfloor is perfectly level to avoid any bumps or imperfections showing through the vinyl over time.

See product: Luvanto Pace Washed Grey Oak
b. Glue-Down Vinyl Planks
Glue-down vinyl planks offer a secure and long-lasting flooring solution. They are ideal for installations over existing tiles, concrete, or other hard surfaces, providing a seamless and durable finish.
Before beginning the installation process, it is essential to prepare the existing tiles or concrete surface thoroughly. Ensure that the surface is clean, flat, and dry to promote proper adhesion. Once the surface is ready, apply a high-quality adhesive evenly to secure the vinyl planks in place. The adhesive creates a strong bond between the planks and the substrate, preventing any shifting or movement over time.
This method of installing vinyl planks offers numerous benefits, including increased stability and durability. It also minimises the risk of damage or wear and tear, ensuring a long-lasting and visually appealing flooring solution.

See product: Karndean Van Gogh Gluedown Warm Brushed Oak (Small)
c. Floating Vinyl Planks
Floating vinyl planks are designed to lock together without the need for adhesive, creating a ‘floating’ floor. They are suitable for areas with temperature fluctuations and can be installed over existing flooring with the use of a proper underlay.
One key feature of floating vinyl planks is their versatility when it comes to installation. They can easily handle minor imperfections in the subfloor, making them a practical choice for renovations. The use of transition strips is crucial when moving from one room to another or between different flooring types, ensuring a seamless and professional finish.

See product: Floorify Herringbone Unagi
Pros and Cons of Laying Vinyl Over Tile
Laying vinyl over existing tile can be a practical solution for updating your flooring without the hassle and expense of removing the old tiles. Here are some pros and cons of laying vinyl over tile to consider.
The Pros of Laying Vinyl Over Tile
Putting vinyl over tile presents several advantages, including cost-effectiveness, an easy installation process, a wide variety of styles and designs to choose from, and the durability and low maintenance of vinyl flooring compared to traditional tiles.
When opting for vinyl over tile, one significant benefit is the cost-effectiveness of this flooring solution. Vinyl is often more affordable than replacing or repairing tile, making it an attractive option for budget-conscious homeowners.
The process of installing vinyl over tile is relatively straightforward, especially if the existing tile subfloor is in good condition. This can save both time and money compared to the labour-intensive process of removing the old tiles.
1. Cost-Effective
One of the main advantages of installing vinyl over tile is its cost-effectiveness. It allows homeowners to achieve a new look for their floors without the high expense of tile removal and replacement.
The cost-saving benefits of choosing vinyl over tile extend beyond just the initial installation process. Since vinyl is a durable material, it requires minimal upkeep and maintenance, reducing long-term costs. Opting for vinyl can also help save on labour expenses, as the installation is typically quicker and easier compared to intricate tile work. This means less time spent on labour costs and potentially lower overall project costs.
2. Easy Installation
The installation process of laying vinyl over a tile floor is relatively straightforward and can be a DIY project for many homeowners. It eliminates the need for extensive demolition and reduces labour costs.
Ensure that the existing tile surface is clean, dry, and in good condition before starting the installation.
Next, measure the room carefully and purchase enough vinyl flooring to cover the area, allowing for some extra in case of mistakes.
Then, begin by applying a thin layer of adhesive onto the tile surface and carefully lay down the vinyl planks or tiles, making sure they fit snugly together.
Use a roller to ensure proper adhesion and prevent air pockets. Trim any excess material and enjoy your newly transformed space!
3. Variety of Styles and Designs
Vinyl flooring offers a wide range of styles and designs, allowing homeowners to customise their floors to match their preferences and interior décor. From wood-like planks to stone-inspired tiles, the options are diverse.
One of the most significant advantages of vinyl flooring is its aesthetic flexibility. With advancements in technology, vinyl can now mimic the look of various materials like hardwood, ceramic, and even marble. This provides homeowners with the opportunity to achieve their desired aesthetics without compromising on durability and maintenance.
Whether you prefer a rustic farmhouse style or a sleek modern design, there is a vinyl flooring option to suit every taste and interior theme.
Product link: https://tekaflooring.co.uk/product/floorify-big-tiles-terrazzo/
4. Durable and Low-maintenance
Vinyl flooring is known for its durability and low maintenance requirements. It resists scratches, stains, and water damage, making it a practical choice for high-traffic areas like kitchens and bathrooms.
The longevity of vinyl flooring is worth noting. With proper care and maintenance, vinyl floors can last for many years without showing significant wear and tear. This resilience to daily wear and tear is especially beneficial for households with pets or young children.
Another advantage of vinyl flooring is its ease of cleaning. Regular sweeping and occasional mopping with a mild detergent is usually sufficient to keep vinyl floors looking fresh and vibrant. Unlike some other flooring options, vinyl does not require special treatments or refinishing to maintain its appearance.
The Cons of Laying Vinyl Over Tile
Despite its advantages, laying vinyl over tile has some drawbacks. These include the challenge of dealing with an uneven surface, the potential for moisture trapping between the layers, and the difficulty in removing the vinyl later if needed.
When laying vinyl over tile, the irregularities in the tile surface can telegraph through the vinyl, leading to an unappealing aesthetic and potential premature wear and tear.
Moisture can become trapped between the tile and vinyl layers, creating a breeding ground for mould and mildew, posing health risks and potentially damaging the subfloor.
In the long run, if you ever need to remove the vinyl, it can be a labour-intensive process, especially if adhesive was used, leaving behind a sticky residue that may require chemical solvents to fully clean.
1. Uneven Surface
One of the problems with laying vinyl over tile is dealing with an uneven surface. This can lead to issues with the installation process and affect the final appearance and performance of the flooring.
When the underlying tile surface isn’t smooth, it can cause the vinyl to not lie flat, resulting in bumps or lumps. This not only compromises the aesthetics but also the longevity of the flooring.
To address this, it’s crucial to prepare the surface properly. One solution is to use a self-levelling compound to even out any irregularities, creating a smooth base for the vinyl.
Alternatively, adding an additional underlay can help mitigate the impact of an uneven surface, providing a stable foundation for the vinyl to adhere to.
2. Potential for Moisture Trapping
Another downside of laying vinyl over tiles is the risk of moisture being trapped between the layers, which can lead to mould growth, odours, and damage to the subfloor if not properly addressed during installation.
Moisture trapping occurs when water or humidity becomes trapped between the tile and vinyl layers, creating a breeding ground for mould and mildew. The presence of excess moisture can not only result in unsightly mould growth but also release musty odours that can permeate throughout the room. Prolonged exposure to moisture can weaken the subfloor, causing it to warp or rot over time.
To prevent issues with moisture trapping, it is essential to conduct a thorough moisture test on the subfloor before installation. Installing a vapour barrier or moisture-resistant underlayment can help create a protective barrier against moisture infiltration. Ensuring proper ventilation in the room can help reduce humidity levels and prevent condensation from forming beneath the flooring.
3. Difficulty in Removing Later
One significant problem with laying vinyl over tile is the difficulty in removing the vinyl later if needed. It can be a time-consuming and labour-intensive process, especially if the vinyl is adhered firmly to the existing tile.
Due to the strong adhesion of the vinyl to the underlying tile, attempting to peel it off can result in damage to the existing flooring.
This can be particularly problematic if the tile is delicate or prone to chipping, as the removal process may cause irreparable harm.
The adhesive used to bond the vinyl to the tile can leave behind stubborn residue that is not only challenging to remove but also requires specialised tools and expertise.
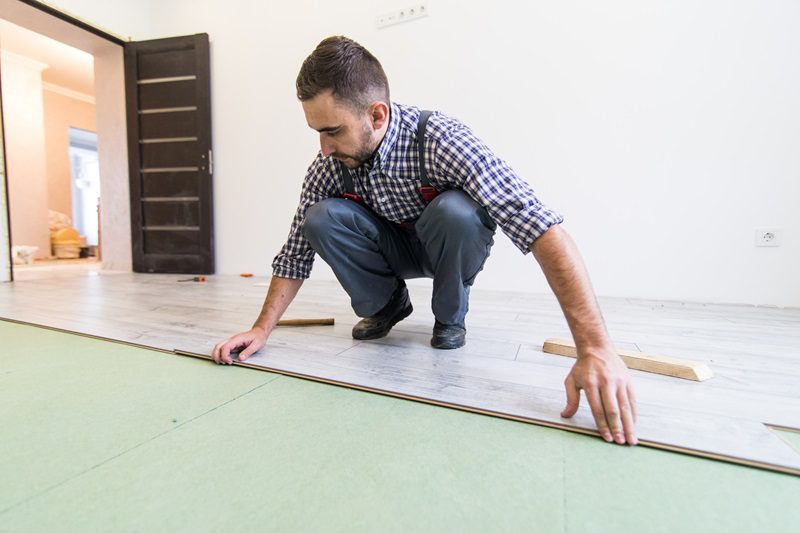
The Steps to Lay Vinyl Over Tile
Vinyl flooring installation involves several key steps to ensure a successful installation. These steps include cleaning and preparing the tile surface, measuring and cutting the vinyl planks, applying adhesive or peel-and-stick planks, securing the edges and seams, and trimming and finishing the edges for a polished look.
1. Clean and Prepare the Tile Surface
Before laying vinyl over the tile, it is crucial to clean and prepare the tile surface adequately. This includes removing any dirt, debris, or grout residues that could impact the adhesion of the vinyl planks.
Proper cleaning and preparation of the tile surface not only ensure the longevity and durability of the vinyl flooring but also contribute to a flawless installation.
To begin, gather essential tools such as a broom, vacuum, mop, and appropriate cleaning agents suitable for your specific tile material.
Sweep or vacuum the surface to eliminate loose particles and dust. Next, use a suitable cleaning solution diluted in water to mop the tiles thoroughly, focusing on stains and grime buildup.
2. Measure and Cut the Vinyl Planks
Accurate measurement and cutting of the vinyl planks are essential for a precise and seamless installation. Properly sizing the planks helps achieve a professional finish and minimises waste during the process.
One key step in the process is to measure the area where the planks will be installed accurately. This involves carefully determining the dimensions and accounting for any obstacles or irregularities in the space.
Once the measurements are taken, the next crucial step is to cut the planks to fit precisely, ensuring seamless joints and a polished look. Tools like a quality utility knife, straight edge, and square are critical for achieving clean cuts. By following these steps diligently, you can ensure a successful vinyl plank flooring installation.
3. Apply Adhesive or Peel-and-Stick Planks
The next step in laying vinyl over tile is to apply adhesive or use peel-and-stick planks, depending on the type of vinyl flooring chosen. Adhesive ensures a secure bond, while peel-and-stick planks offer a convenient installation option.
When opting for adhesive application, it’s crucial to ensure an even and consistent spread of the adhesive on the subfloor to avoid lumps or gaps beneath the vinyl. This method typically requires more time for the adhesive to set, providing a strong, lasting hold once fully cured.
On the other hand, peel-and-stick planks offer a quick and mess-free solution, eliminating the need for additional adhesives. Simply peel off the backing and press the planks onto the clean, dry surface for effortless installation.
4. Secure the Edges and Seams
Securing the edges and seams of the vinyl planks is essential for a tidy and durable finish. Properly sealing these areas prevents moisture ingress and enhances the overall appearance of the flooring.
One effective way to secure the edges of vinyl over tile is by using an adhesive specifically designed for this purpose. Adhesives create a strong bond between the vinyl planks and the underlying tile, ensuring a seamless look and preventing any gaps or movement over time. Ensuring that the planks are tightly abutted against each other also plays a crucial role in maintaining a professional finish. Another method to secure the corners and seams is by using a heat gun to soften the vinyl, allowing for a snug fit and a smart appearance.
5. Trim and Finish the Edges
The final step in laying vinyl over tile is to trim and finish the edges for a polished look. Utilise a sharp utility knife or specialised vinyl cutter to ensure clean cuts without causing any damage to the flooring. Measuring accurately before cutting is crucial to avoid mistakes. Remember to work slowly and steadily, applying consistent pressure to maintain a straight cut.
After trimming, use fine-grit sandpaper to smooth out any rough edges or imperfections. This step helps in achieving a professional finish by eliminating any unwanted bumps or jagged edges. Taking the time to sand the trimmed edges will result in a sleek and seamless appearance.
Some Tips for a Successful Installation
To ensure a successful installation of vinyl over tile, it is important to choose the right type of vinyl flooring that suits your needs, properly prepare the tile surface, use high-quality adhesive, and follow the manufacturer’s instructions for a seamless and long-lasting finish.
Choose the Right Type of Vinyl Flooring
Selecting the appropriate type of vinyl flooring is crucial for a successful installation. Consider factors such as room usage, moisture levels, and design preferences when choosing between vinyl planks, tiles, or sheets.
When opting for vinyl planks, take into account the durability and thickness of the product. Thicker planks tend to be more resilient and provide enhanced sound insulation. The installation method plays a significant role in the overall look and feel of the flooring.
You’ll want to assess the subfloor condition and ensure it is suitable for the type of vinyl flooring you select. Poor subfloor preparation can lead to issues such as bumps, cracks, or uneven surfaces that may affect the longevity and performance of the flooring.
Properly Prepare the Tile Surface
Thoroughly cleaning and priming the tile surface before installation is essential to ensure proper adhesion and long-term durability of the vinyl flooring. Remove any residues, grease, or imperfections that could affect the bonding process.
After clearing the surface of any debris, fill in any cracks or holes with a suitable filler compound, allowing it to dry completely before moving forward. Once the surface is smooth and level, sand it lightly to create a better bonding surface for the primer.
- Applying a high-quality primer specifically designed for tile surfaces is crucial, as it enhances adhesion and creates a strong bond between the old tile and the new vinyl flooring.
- Allow the primer to cure as per the manufacturer’s recommendations before proceeding to the actual installation, ensuring a solid foundation for your new floor.
Use High-Quality Adhesive
Investing in high-quality adhesive is essential for a secure and long-lasting installation of vinyl flooring over tile. Choose an adhesive recommended by the manufacturer and follow the application instructions diligently.
Quality adhesive ensures a strong bond between the vinyl flooring and the underlying surface, preventing any issues like peeling or lifting over time. The flexibility and waterproof characteristics of premium adhesives are crucial for vinyl installations, especially in high-traffic areas or moist environments.
By opting for the right adhesive, you guarantee a professional finish that withstands everyday wear and tear. Properly applying the adhesive, spreading it evenly, and allowing sufficient drying time are fundamental steps in achieving a seamless vinyl flooring installation.
Follow The Manufacturer’s Instructions
Adhering to the manufacturer’s instructions is crucial for a successful vinyl flooring installation. Follow the recommended guidelines for acclimatising the flooring, temperature conditions, and post-installation care to ensure optimal performance.
Proper acclimatisation is essential, so allow the flooring to adjust to the room’s temperature and humidity levels as per the manufacturer’s instructions. This step helps prevent issues like warping or buckling. Ensure the installation conditions meet the specified requirements to guarantee a durable and long-lasting result.
Regular maintenance, including using the recommended cleaning products and techniques, is vital to prolong the flooring’s lifespan and preserve its appearance. By following the manufacturer’s instructions diligently throughout the process, you can enjoy a beautiful and functional vinyl floor for years to come.
In conclusion, when it comes to laying vinyl flooring, entrusting the task to professional flooring installation services like TEKA Flooring is a decision you won’t regret. We commit to ensuring that your flooring project is completed seamlessly, leaving you with a space that exudes beauty, comfort, and durability.
Take the first step towards enhancing your home or commercial space with stunning vinyl flooring—consult with TEKA Flooring today!
Read also: