Regular mopping keeps vinyl floors looking good day to day, but ground-in dirt is a different challenge. This is the grime that builds up over time in the textured surface of vinyl, becoming embedded in grooves and grain patterns until the floor looks permanently dull or discoloured.
The good news: ground-in dirt on vinyl flooring can almost always be removed with the right approach. This guide walks you through the most effective cleaning methods, from simple DIY solutions to deep-cleaning techniques that restore your vinyl to its original appearance.
What Causes Ground-in Dirt on Vinyl Floors?
Understanding what causes the problem helps you fix it and prevent it from coming back. Ground-in dirt develops when particles get pressed into the textured surface of vinyl through repeated foot traffic. Common causes include:
- Fine grit and sand tracked in on shoes, which acts like sandpaper under foot traffic and settles into grooves
- Kitchen grease and cooking oils that create a sticky film, attracting dust and dirt that bonds to the surface
- Muddy footprints that dry and harden into textured areas of the vinyl
- Pet hair and dander combined with oils that compact into floor crevices
- Shoe marks and rubber scuffs from dark-soled footwear
- Soap residue buildup from using too much floor cleaner, which traps dirt in a sticky layer
The textured or embossed surface of most vinyl flooring (designed to mimic wood grain or stone) creates tiny grooves where dirt can accumulate. Once compacted by foot traffic, this dirt will not come up with a standard mop.
How to Clean Vinyl Floors with Ground-in Dirt (Step by Step)
Follow these steps in order. Start with the gentlest method and work up to stronger techniques only if needed. This protects your vinyl’s wear layer from unnecessary abrasion.
Step 1: Sweep or Vacuum Thoroughly
Before any wet cleaning, remove all loose dirt, dust, and debris from the surface. This prevents you from grinding particles further into the floor during the cleaning process.
- Use a soft-bristle broom or a vacuum cleaner with the beater bar switched off
- Pay extra attention to edges, corners, and areas under furniture
- For textured vinyl, a vacuum is more effective than sweeping as it pulls grit out of grooves
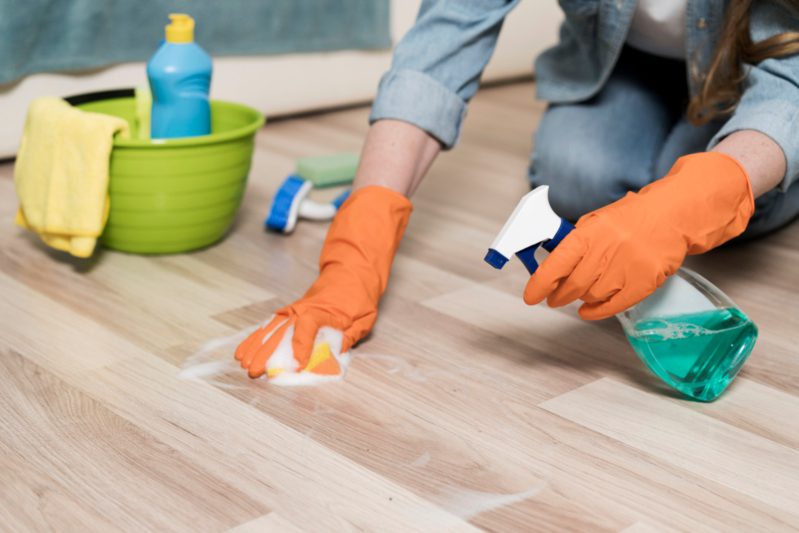
Step 2: Mop with a pH-Neutral Cleaner
Mix a pH-neutral vinyl floor cleaner with warm water according to the product instructions. Alternatively, use a simple solution of warm water with a few drops of washing-up liquid.
- Use a microfibre mop (never a string mop, which pushes dirty water into grooves)
- Wring the mop until it is damp, not dripping. Excess water can seep into seams
- Mop in sections, rinsing the mop head frequently in clean water
- Allow the floor to dry fully before walking on it
Important: Never use bleach, ammonia, or abrasive cleaners on vinyl. These damage the protective wear layer and can cause permanent discolouration.
Step 3: Scrub Stubborn Areas with Baking Soda
For areas where ground-in dirt remains after mopping, baking soda provides gentle abrasion without damaging the vinyl surface.
- Make a paste with 2 tablespoons of baking soda and a small amount of warm water
- Apply the paste directly to the stained or dirty area
- Leave it for 5-10 minutes to loosen the embedded dirt
- Scrub gently with a soft-bristle brush or non-scratch scrubbing pad in small circular motions
- Wipe away the residue with a damp cloth and dry the area
This method is particularly effective for grease stains, yellowed patches near kitchen appliances, and stubborn scuff marks.
Step 4: Use White Vinegar for Buildup and Film
If your vinyl looks hazy or has a sticky film (often caused by product buildup from previous cleaners), white vinegar cuts through it effectively.
- Mix one cup of white vinegar with one gallon (4 litres) of warm water
- Mop the floor with this solution, working in manageable sections
- The mild acidity dissolves soap residue, mineral deposits, and waxy buildup
- Rinse with clean water afterwards and dry with a soft towel
Note: Do not use undiluted vinegar, as the acidity can dull the vinyl over time. Always dilute it as described above.
Step 5: Deep Clean with a Steam Mop (If Suitable)
Steam cleaning is highly effective for ground-in dirt as the heat loosens embedded grime without chemicals. However, not all vinyl flooring is suitable for steam cleaning.
- Safe for: Sheet vinyl that is fully adhered (glued down) with sealed seams
- Not recommended for: Click-lock LVT, loose-lay vinyl, or any vinyl with unsealed joints where steam can penetrate and cause lifting or bubbling
- Always check your manufacturer’s care guide before using steam
- Use the lowest steam setting and keep the mop moving (do not hold it in one spot)
Step 6: Tackle Specific Stains
Different types of ground-in stains require targeted treatment:
Grease and cooking oil: Apply neat washing-up liquid to the stain, leave for 5 minutes, then scrub with a soft brush and rinse. Repeat if needed.
Ink and marker: Dab with rubbing alcohol (isopropyl alcohol) on a cloth. Do not rub aggressively as this can spread the stain.
Rubber scuff marks: Rub gently with a pencil eraser or a cloth dampened with a small amount of WD-40, then clean the area with your standard floor cleaner.
Hair dye and cosmetics: Baking soda paste left for 15 minutes, followed by gentle scrubbing. For persistent stains, try rubbing alcohol.
Dried paint: See our dedicated guide for safe removal methods that protect your vinyl surface.
Yellowing near radiators or windows: This is often oxidation from UV exposure or heat. Baking soda paste can lighten mild yellowing, but severe cases may be permanent damage to the vinyl.
What NOT to Use on Vinyl Floors
Using the wrong products can permanently damage your vinyl. Avoid these:
- Bleach or ammonia (strips the protective wear layer and causes discolouration)
- Abrasive scrubbing pads or steel wool (scratches the surface permanently)
- “Mop and shine” products (build up a sticky residue that attracts more dirt)
- Solvent-based cleaners (can dissolve the vinyl surface)
- Excessive water (seeps into seams and edges, causing lifting and mould)
- Wax or polish (vinyl has a built-in shine layer; wax builds up and yellows)
How to Prevent Ground-in Dirt from Coming Back
Once your vinyl is clean, these habits will keep it looking good and prevent dirt from embedding again:
Use Doormats at Every Entrance
Doormats capture 80% of the grit and dirt that would otherwise end up on your floor. Use a coarse mat outside and a softer mat inside each entrance. Shake or vacuum mats weekly.
Implement a No-Shoes Policy
Outdoor shoes are the single biggest source of ground-in dirt. Providing a shoe rack or basket by the door encourages the habit without making guests uncomfortable.
Sweep or Vacuum Daily in High-Traffic Areas
A 2-minute sweep of hallways, kitchens, and entrances each day removes grit before it gets pressed into the vinyl by foot traffic. This single habit makes the biggest difference to long-term floor condition.
Mop Weekly with the Right Products
A weekly mop with a pH-neutral cleaner prevents buildup. Use less product than you think you need. More is not better with floor cleaners; excess creates the sticky residue that attracts dirt. For detailed routine cleaning guidance, see our complete vinyl cleaning guide.
Attach Furniture Pads
Felt pads on chair legs, table feet, and sofa bases prevent scratching and reduce the amount of dirt that gets trapped under furniture and ground in when items are moved.
Clean Spills Immediately
Liquid spills (especially oil, coffee, and coloured drinks) start bonding with the vinyl surface within minutes. Wiping them up promptly prevents staining and buildup that becomes harder to remove later.
When to Consider Professional Cleaning
If you have tried all the methods above and your vinyl still looks dull or discoloured, professional floor cleaning may be needed. This is common in:
- Rental properties where floors have not been maintained for years
- Commercial spaces with heavy foot traffic
- Kitchens where grease has built up over an extended period
- Homes where previous owners used incorrect cleaning products that left residue
Professional cleaners use commercial-grade rotary scrubbers and specialist vinyl cleaning solutions that can restore severely neglected floors. However, if the vinyl’s wear layer has been damaged (by bleach, abrasives, or heavy scratching), cleaning alone will not fix it and replacement may be the better long-term option.
Frequently Asked Questions
What is the best homemade solution for ground-in dirt on vinyl?
A paste of baking soda and warm water is the most effective homemade solution for ground-in dirt. Apply it to the affected area, leave for 5-10 minutes, then scrub gently with a soft brush. For general film or buildup, diluted white vinegar (1 cup per 4 litres of warm water) works well as a mopping solution.
Can I use a steam mop on vinyl flooring?
Only on fully adhered (glued-down) sheet vinyl with sealed edges. Steam can penetrate the joints of click-lock LVT and loose-lay vinyl, causing the adhesive to fail and the flooring to bubble or lift. Always check your vinyl manufacturer’s care instructions before using steam.
Why does my vinyl floor still look dirty after mopping?
This is usually caused by one of three things: using too much cleaning product (which leaves a sticky residue that attracts dirt), not rinsing the mop often enough (spreading dirty water around), or not removing loose grit before mopping (which smears dirt into the grooves). Try mopping with plain warm water and a clean microfibre mop to see if residue is the issue.
How do I get yellow stains out of vinyl flooring?
Mild yellowing from product buildup responds well to baking soda paste or diluted vinegar. However, yellowing caused by UV exposure, rubber-backed mats (which cause a chemical reaction), or heat damage is often permanent. Prevention (using UV-protective blinds and avoiding rubber-backed mats) is the best approach for these types of discolouration.
How often should I deep clean vinyl flooring?
A deep clean (scrubbing textured areas, treating stains) every 1-2 months is sufficient for most homes. High-traffic areas like kitchens and hallways may benefit from monthly attention. Regular daily sweeping and weekly mopping prevent most ground-in dirt from developing in the first place.
Will ground-in dirt permanently damage my vinyl floor?
In most cases, no. Ground-in dirt sits on or within the surface texture and can be removed with proper cleaning. However, if abrasive grit has been ground into the floor over a long period, it can cause micro-scratches in the wear layer that make the surface appear permanently dull. This is wear damage rather than dirt, and the only fix is replacing the affected areas.
Final Thoughts
Ground-in dirt on vinyl flooring looks bad but is almost always fixable with the right technique. Start gentle (sweep, then mop with pH-neutral cleaner), move to targeted solutions (baking soda paste, diluted vinegar), and use steam only if your vinyl type allows it. Prevention through doormats, daily sweeping, and proper cleaning products will keep the problem from returning.
Looking for premium vinyl flooring that is easier to maintain and built to last? Browse our luxury vinyl tile collection or visit TEKA Flooring in Peterborough to see our full range. We also offer professional installation for a flawless finish.
Read also: